MEI ADVANCE SCN6628R
ACTUALIZACIÓN DE FIRMWARE
FIRMWARE UPDATE
CUSTNO: 1860 - NCR
Seleccione STS Advance para SCN-SCR
Select STS Advance for SCN-SCR
|
|
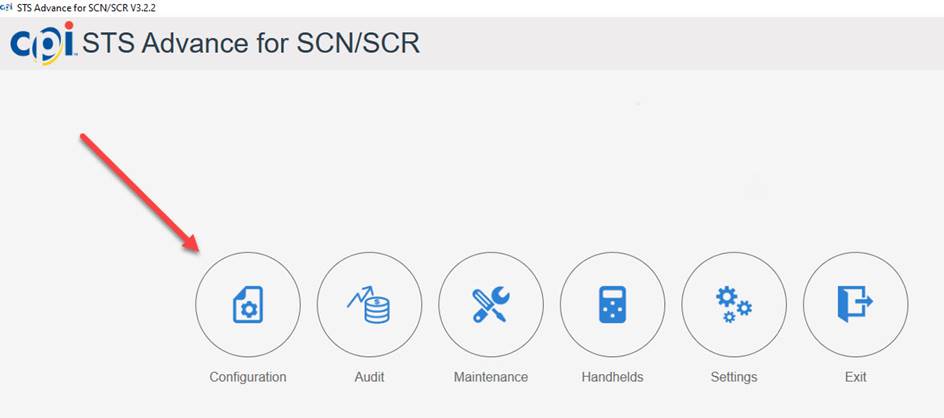
Configuaración
Configuration
|
|
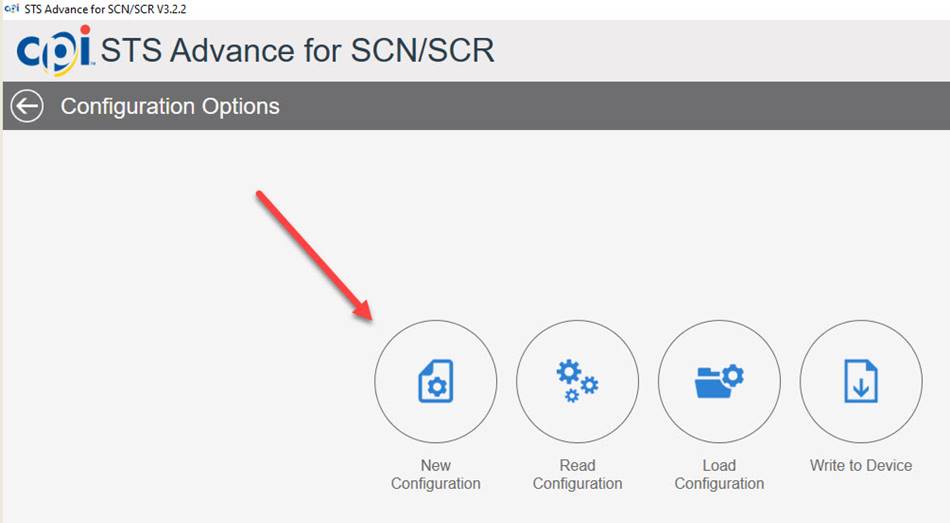
Nueva configuración
New Configuration
|
|
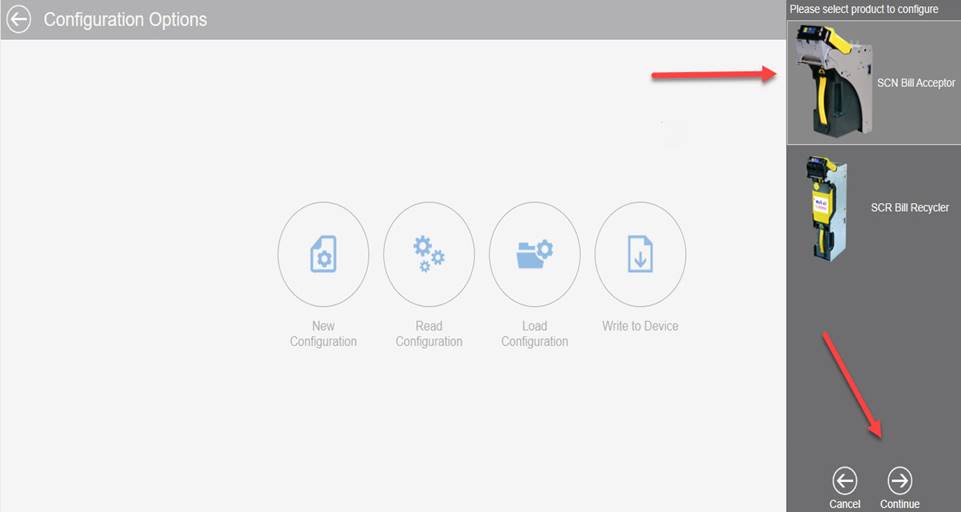
Seleccione SCN Bill Acceptor y continúe
Select SCN Bill Acceptor and continue
|
|
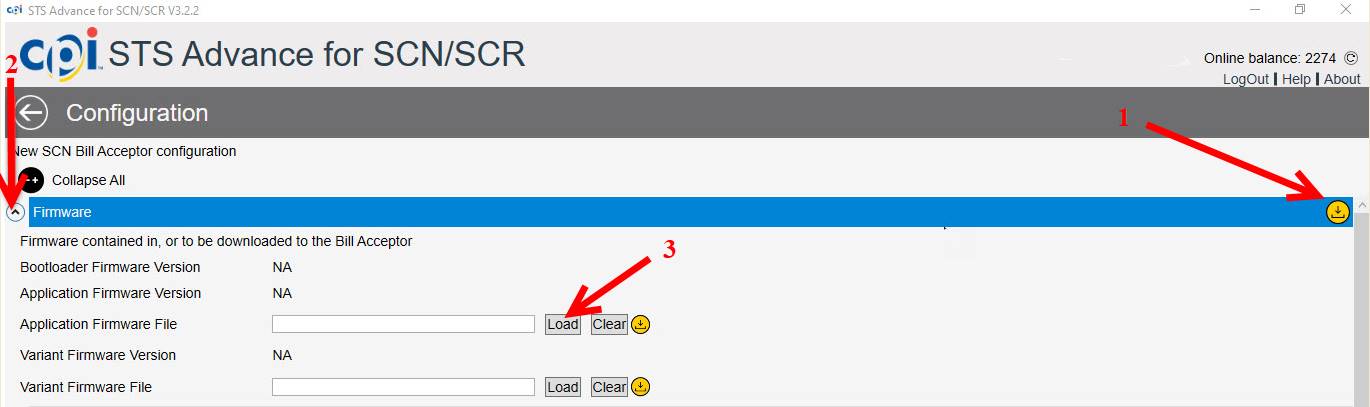
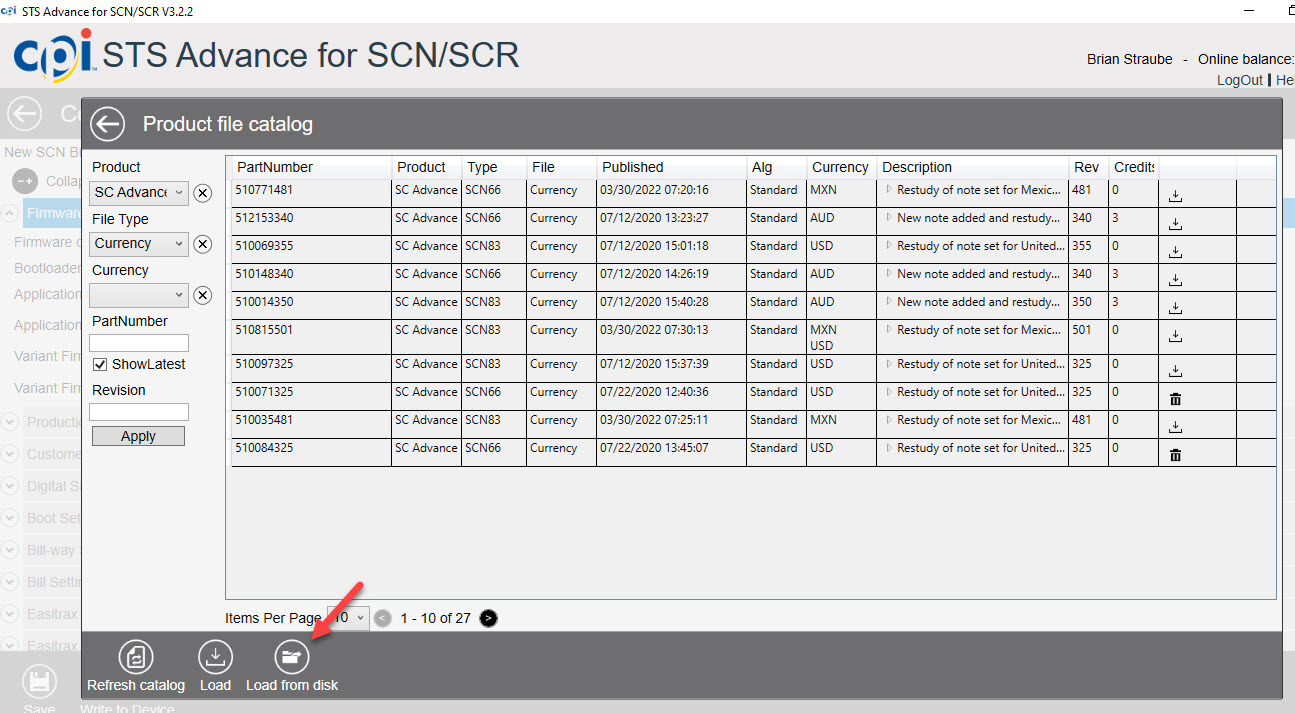
Seleccione Firmware y cargar
Select Firmware and Load
|
|
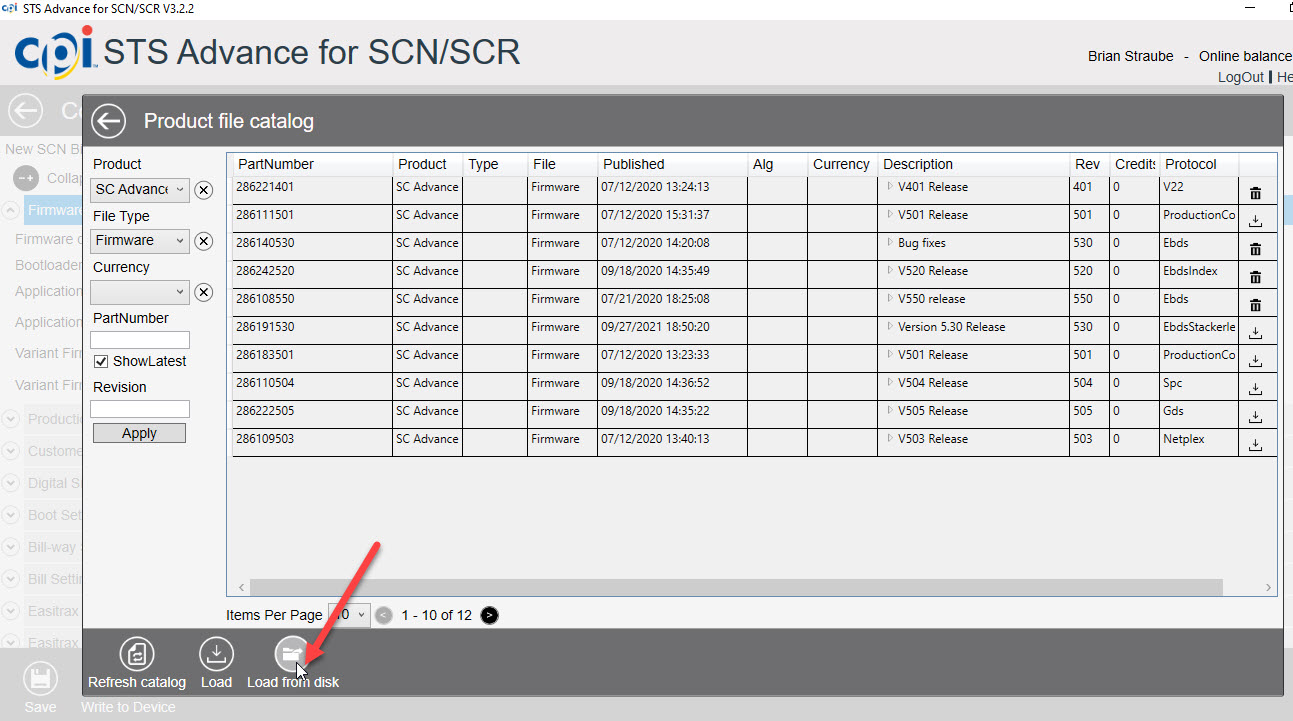
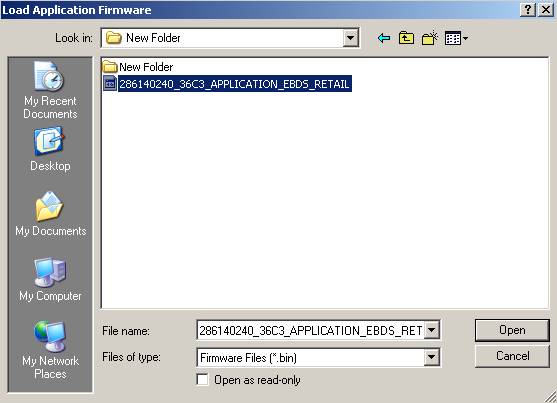
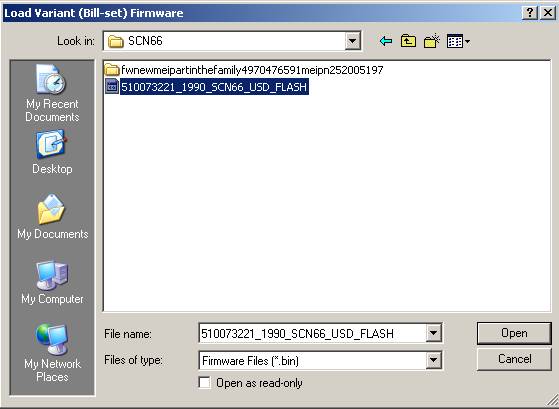
Presione Cargar desde disco
Press Load from disk
|
|
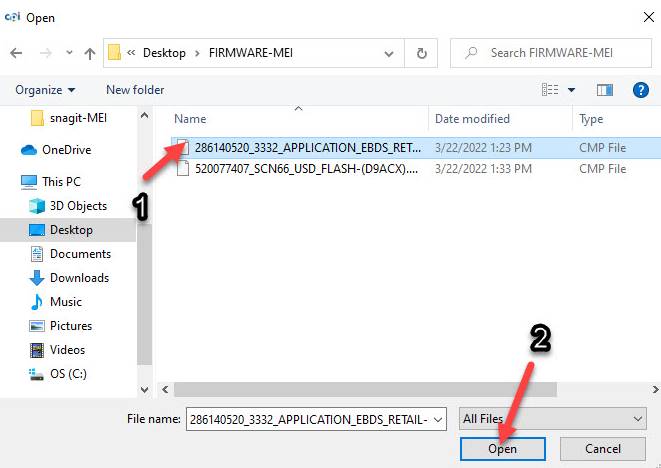
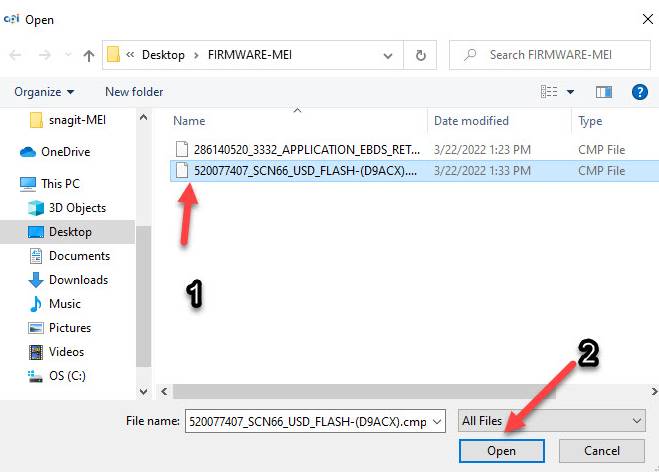
Seleccione el folder FIRMWARE-MEI que se encuentra en el escritorio de su PC
Select the FIRMWARE-MEI folder located on the desktop of your PC
|
|

Seleccione Application Firmware 286140520 y Abrir
Select Application Firmware 286140520 and Open
|
|
Seleccione cargar
Select Load
|
|
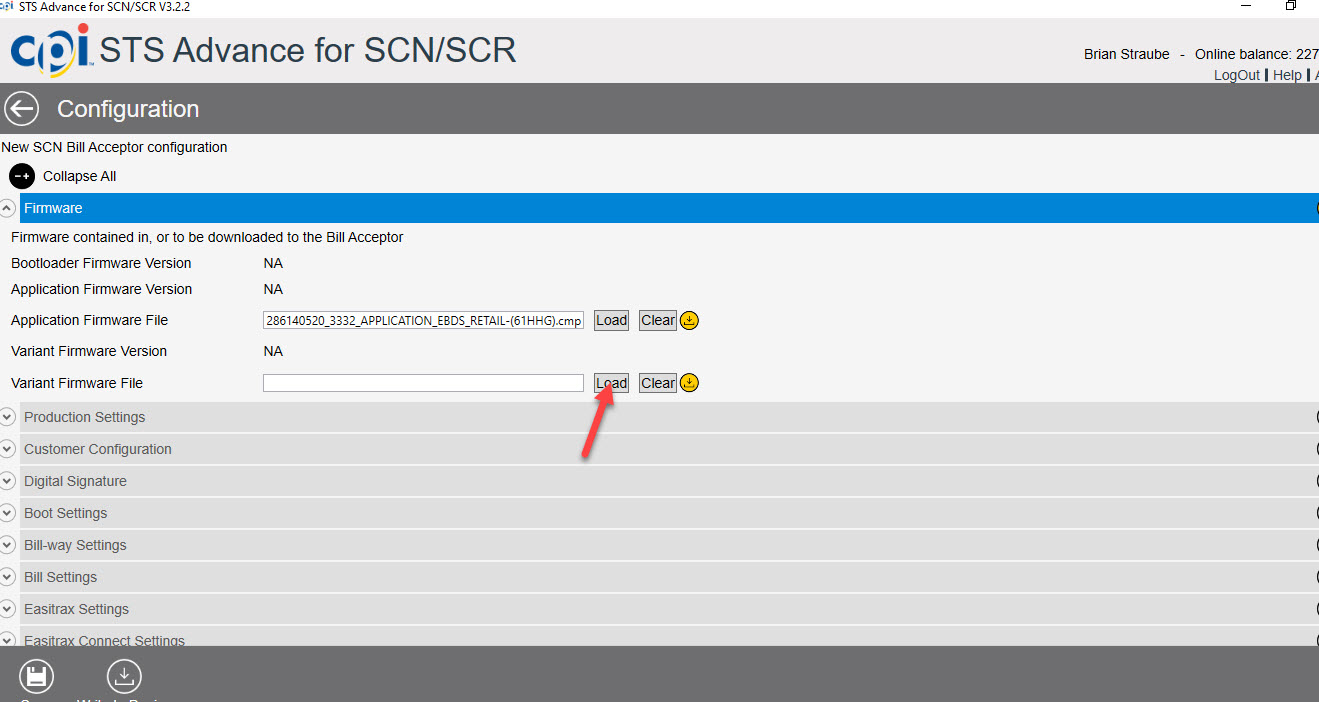
Presione Cargar desde disco
Press Load from disk
|
|
Seleccione Variant Firmware 520077407 y Abrir
Select Variant firmware 520077407 and Open
|
|
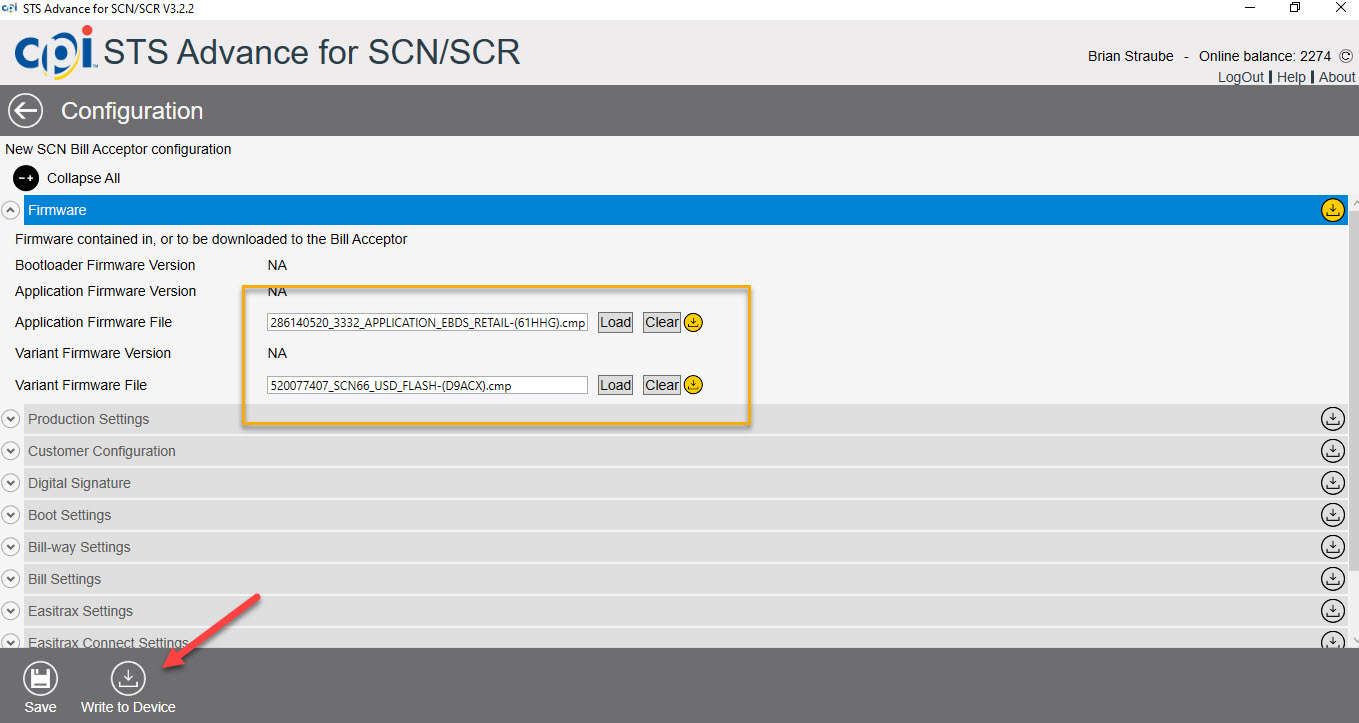
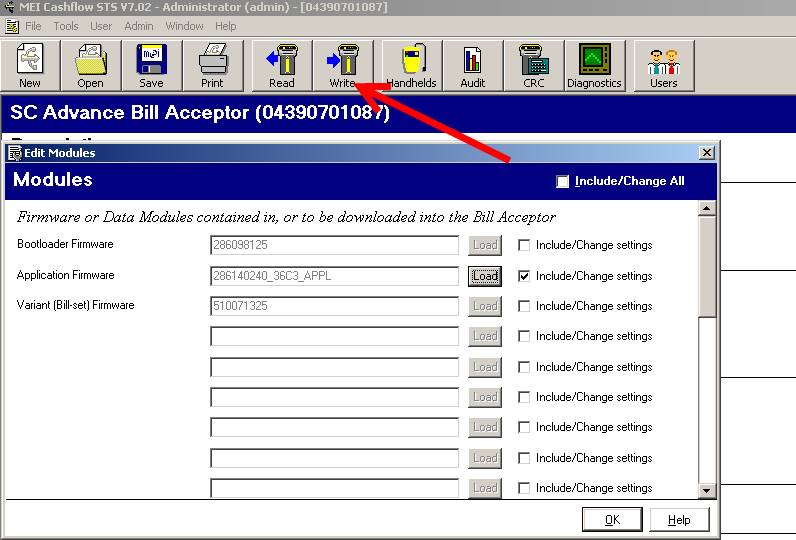
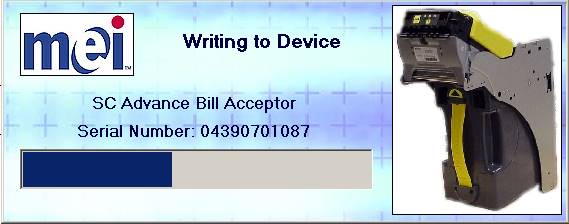
Presione escribir en el dispositivo
Press write to device
|
|
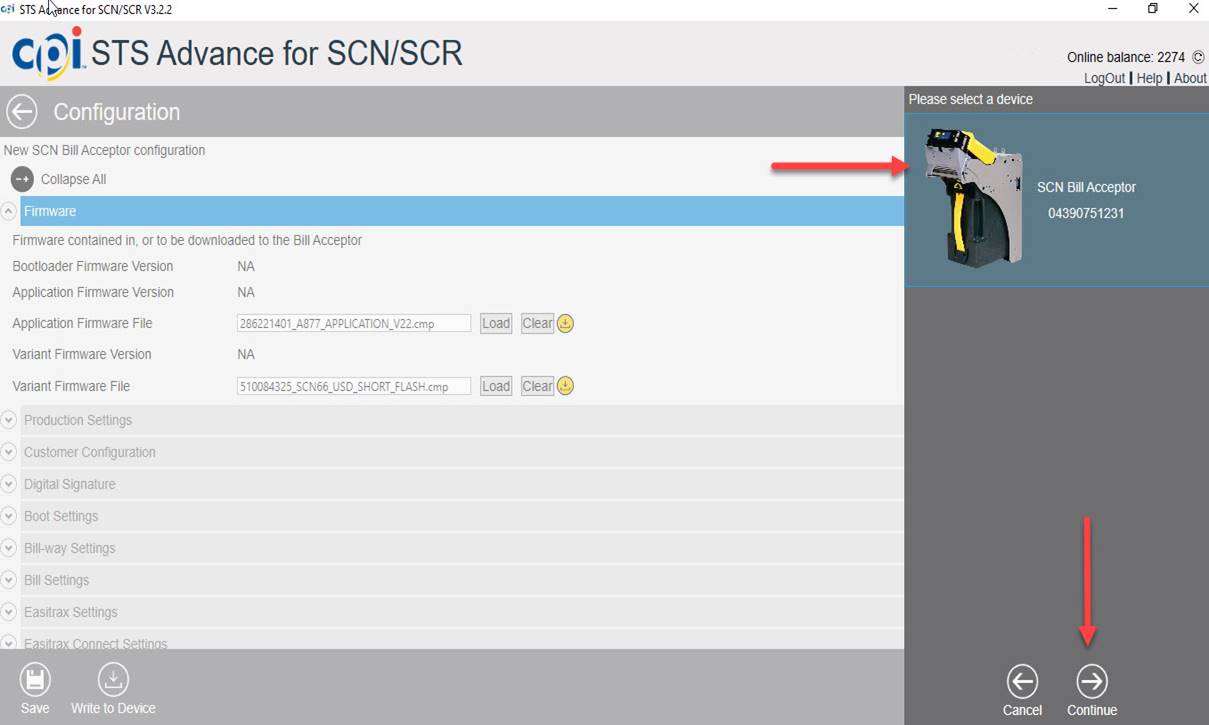
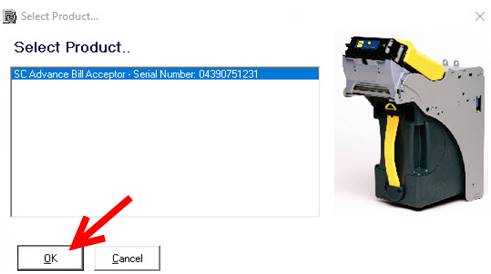
Seleccione un dispositivo Aceptador de billetes SCN y continúe
Select a device SCN Bill Acceptor and Continue
|
|
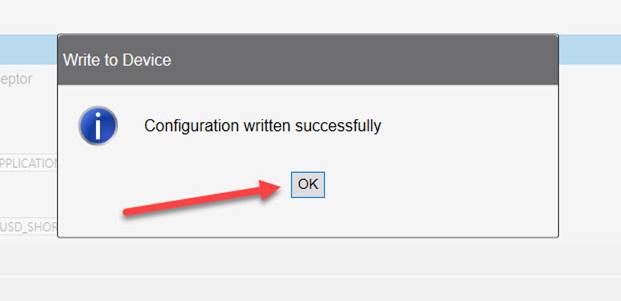
Cuando termine la descarga presione OK
Verify that the firmwares have been downloaded correctly
When the download is finished press OK
|
|
|
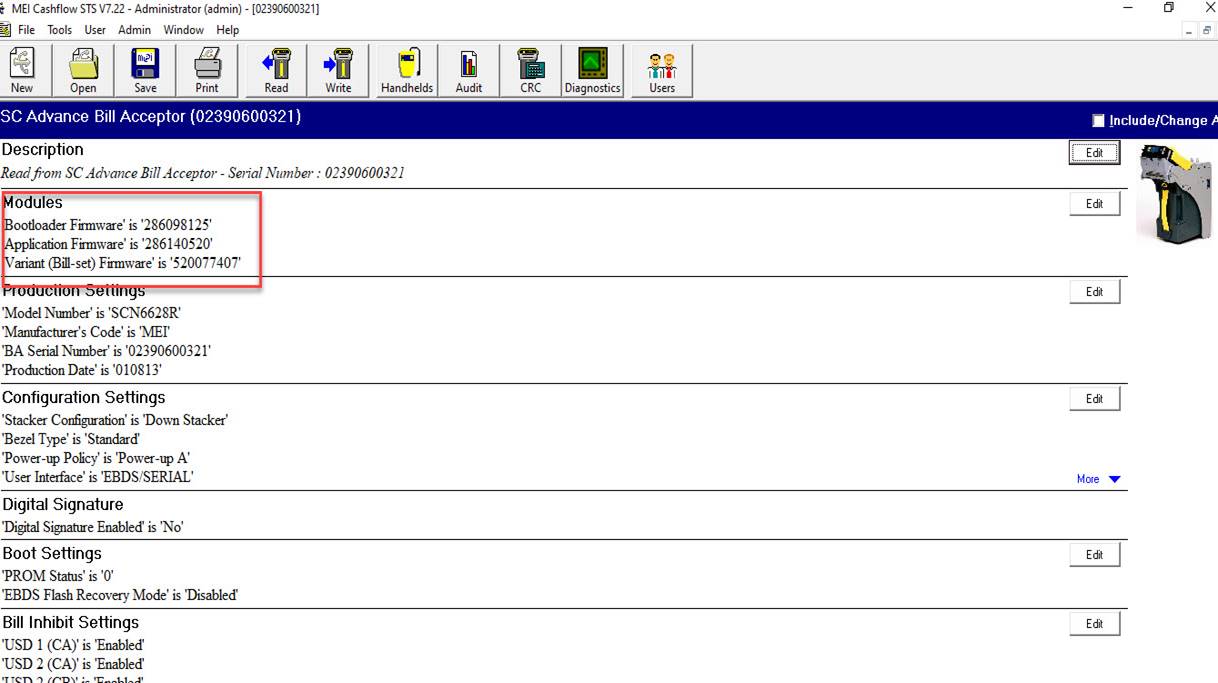
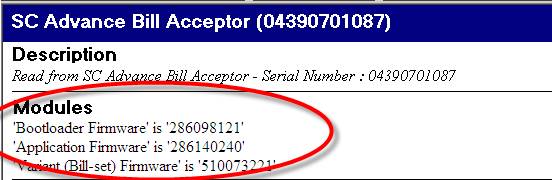
Verifique que los firmware se hayan descargado correctamente
Verify that the firmwares have been downloaded correctly
|
|
ACTUALIZACIÓN DE FIRMWARE
FIRMWARE UPDATE
CUSTNO: 2481 - MICROLOGIC ASSOCIATES
CUSTNO: 8072 - E CASH INCORPORATED
Seleccione Cashflow STS
Select Cashflow STS
|
|

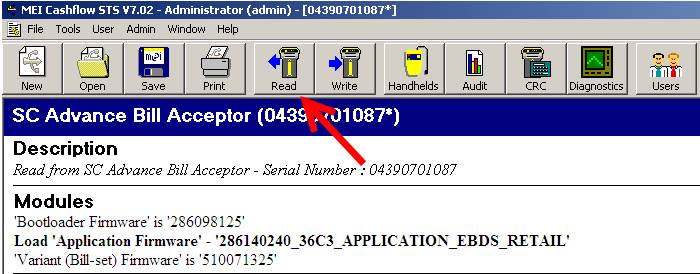
En la parte superior encontrará la barra de herramientas principal Seleccionar (Read/Leer) y OK
At the top you will find the main toolbar Select (Read) and OK
|

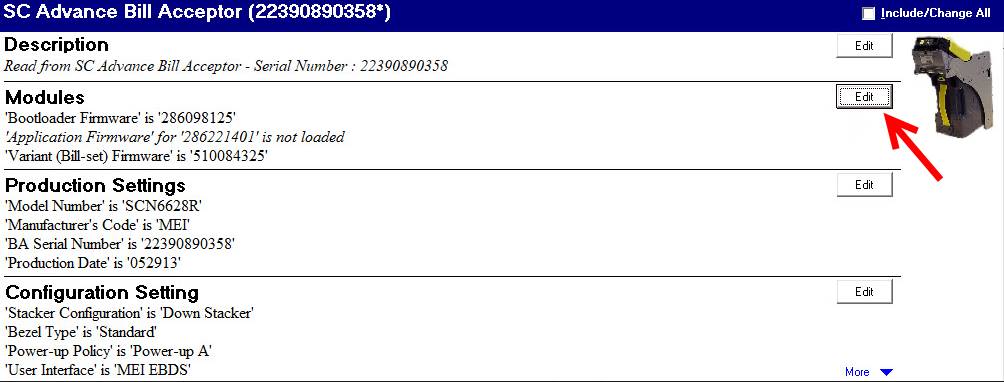
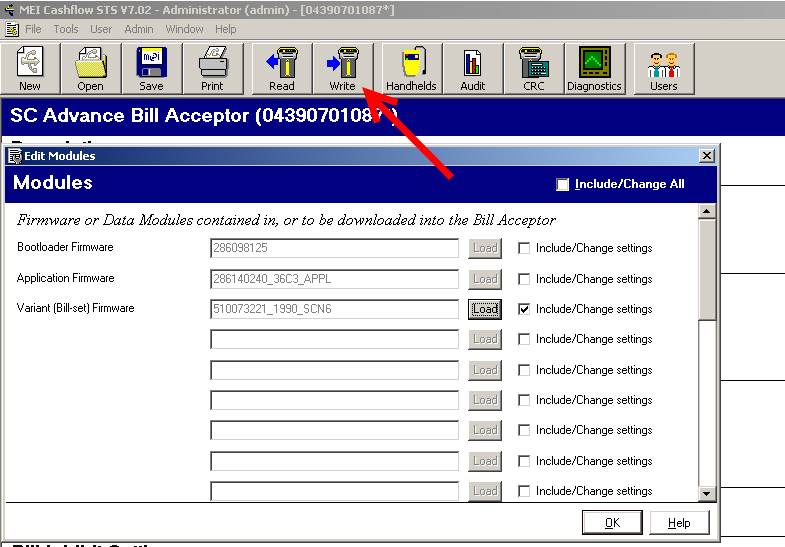
Seleccione Editar en la seccion de Modulos
Select Edit in the Modules section
|
|
Seleccione cambiar ajustes en la seccion de firmware de la aplicación y presione Load
Select change settings in the firmware section of the application and press Load
|
|
|
|
|
|
|
|
|

|
|
|
|
|
|
|
|
|
|
|
PRUEBA FUNCIONAL
FUNCTIONAL TEST
Seleccione Cashflow STS
Select Cashflow STS
|
|
En la parte superior encontrará la barra de herramientas principal Seleccionar (Read/Leer) y OK
At the top you will find the main toolbar Select (Read) and OK
|
|
|
Compruebe que el número de serie, el Firmware (Vea Tabla 1.1 en la seccion de ayudas viuales) y el modelo son correctos
Check that the serial number, the Firmware (See Table 1.1 in the visual aids section) and the model numer are correct.
|
|
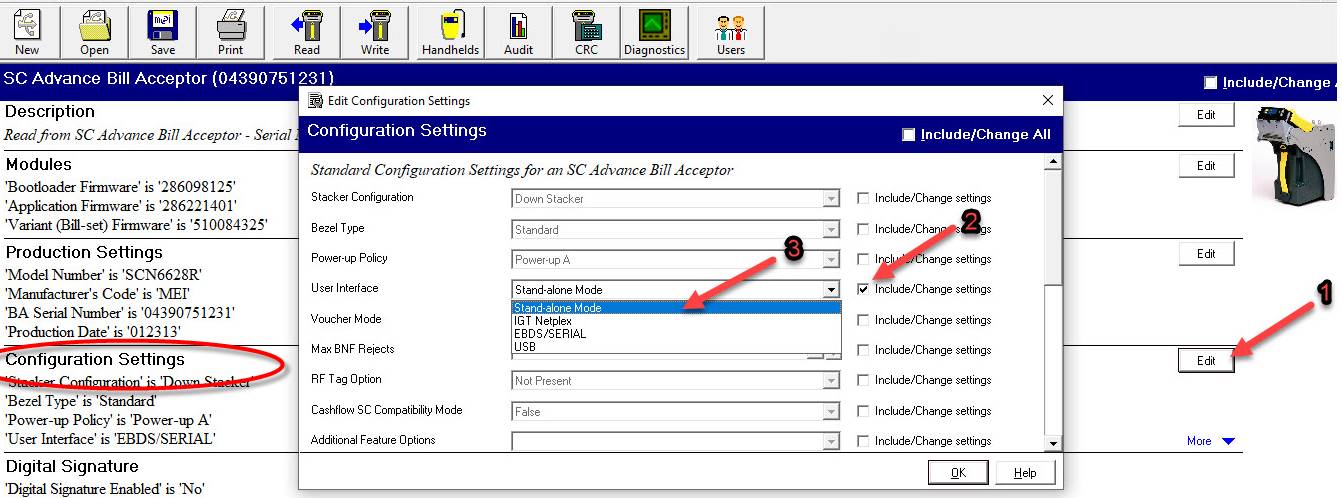
1-Seleccione Edit dentro de Ajustes de configuración (Configuration Settings)
2-Seleccione Cambiar ajuste (Change settings) en Interfaz de usuario (User Interface)
3-Cambie los ajustes a Modo independiente (Stand-alone Mode) y presione OK
1-Select Edit under Configuration Settings
2-Select Change settings in User Interface
3-Change the settings to Stand-alone Mode and press OK
|
Salvar cambios en Escribir
Save changes to Write
|
|

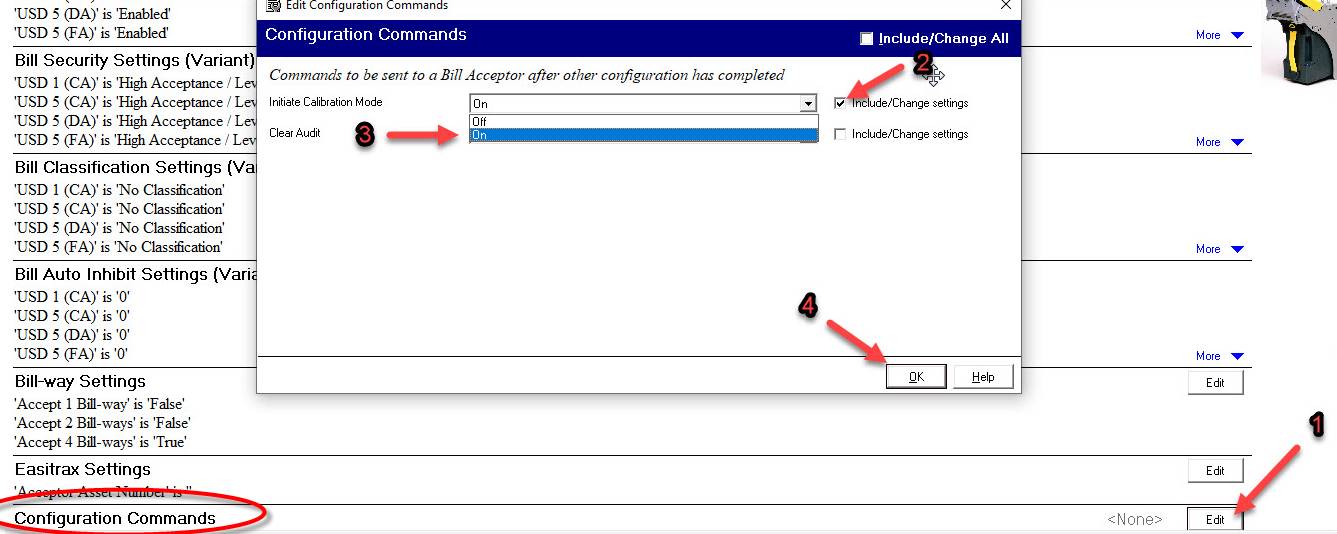
1-Seleccione Edit dentro de configuración de comandos (Configuration commands)
2-Seleccione Cambiar ajuste (Change settings) en Iniciar el modo de calibración (Initiate calibration mode)
3-Cambie los ajustes a Encendido (On)
4-Presione Ok
1-Select Edit under Configuration commands
2-Select Change settings in Initiate calibration mode
3-Change the settings to On
4-Press OK
|
|
Salvar cambios en Escribir
Save changes to Write
|
|
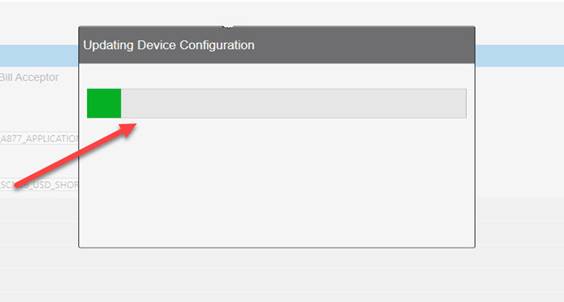
Guardar configuración
Saving configuration
|
|
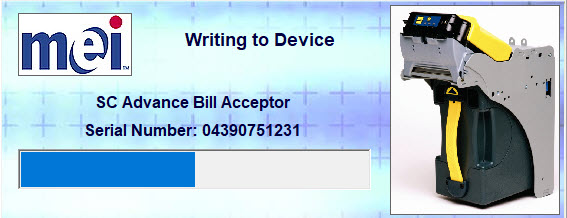
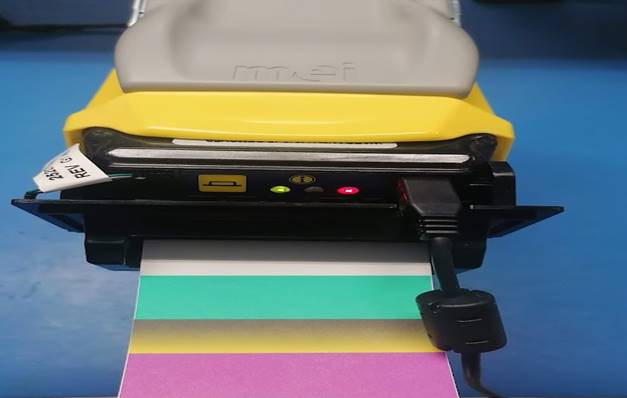
Los LED de la membrana se encienden para indicar que está lista para la calibración del código de colores (Calibrador)
The LEDs on the membrane light up indicating that it is ready to color code calibration (Calibrator)
|
|
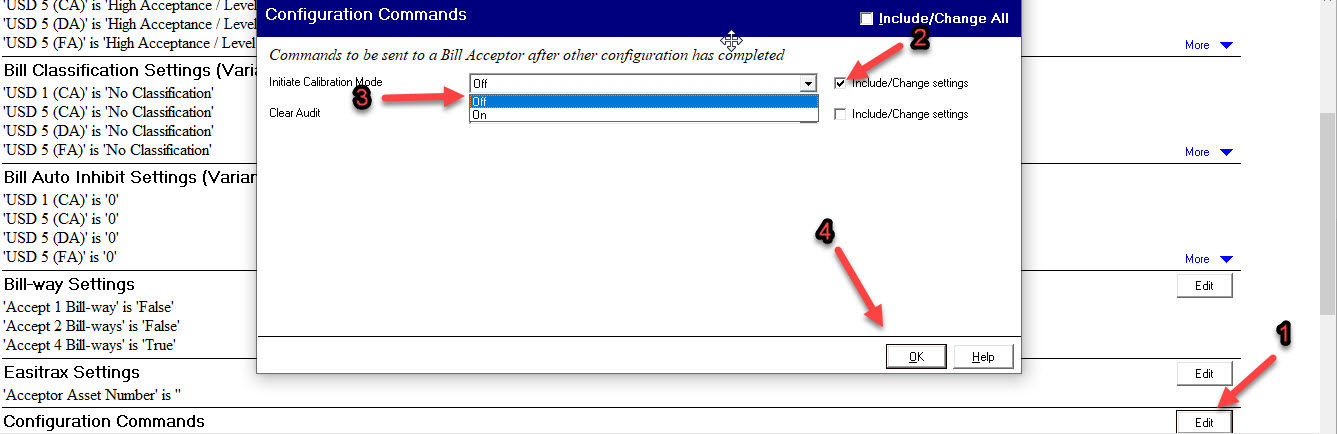
1-Seleccione Edit dentro de configuración de comandos (Configuration commands)
2-Seleccione Cambiar ajuste (Change settings) en Iniciar el modo de calibración (Initiate calibration mode)
3-Cambie los ajustes a Apagado (Off)
4-Presione Ok
1-Select Edit under Configuration commands
2-Select Change settings in Initiate calibration mode
3-Change the settings to Off
4-Press OK
|
|
Salvar cambios en Escribir(Write)
Save changes to Write
|
|
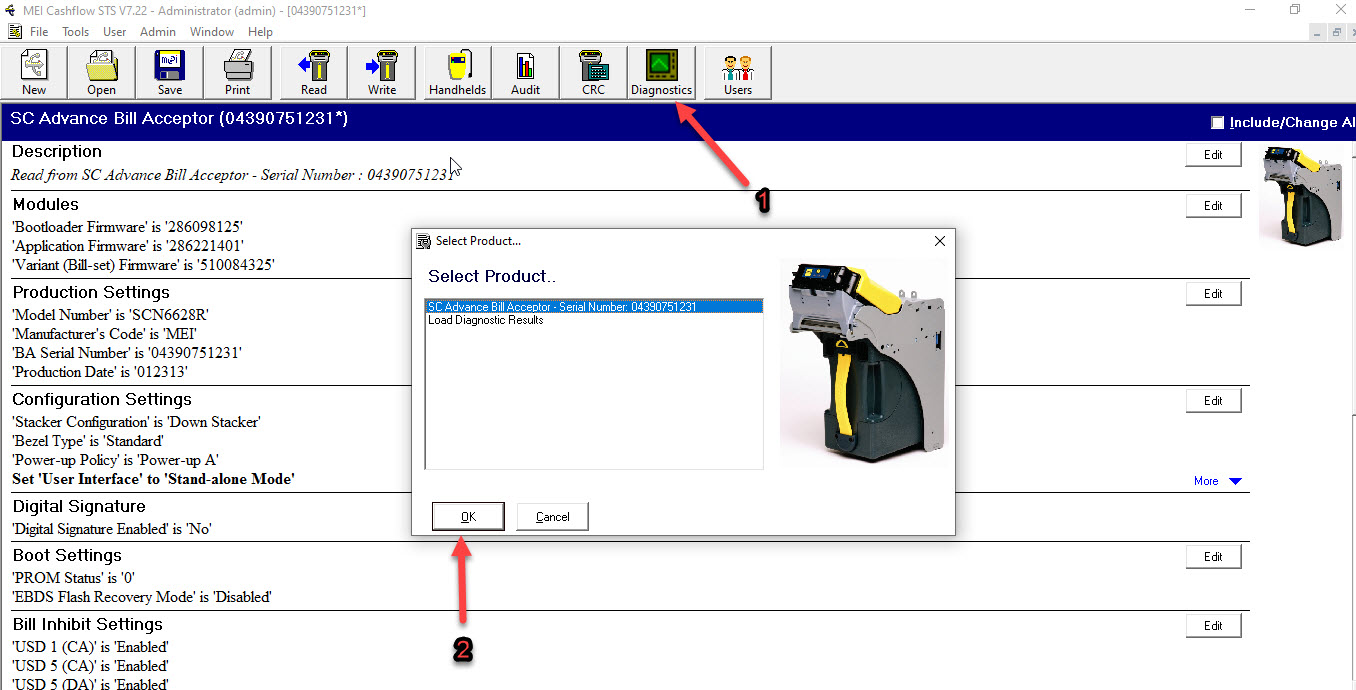
En la barra de herramientas en la parte superior de la pestaña, seleccione Diagnóstico y presione OK
In the toolbar at the top of the tab select Diagnostics and press OK
|
|
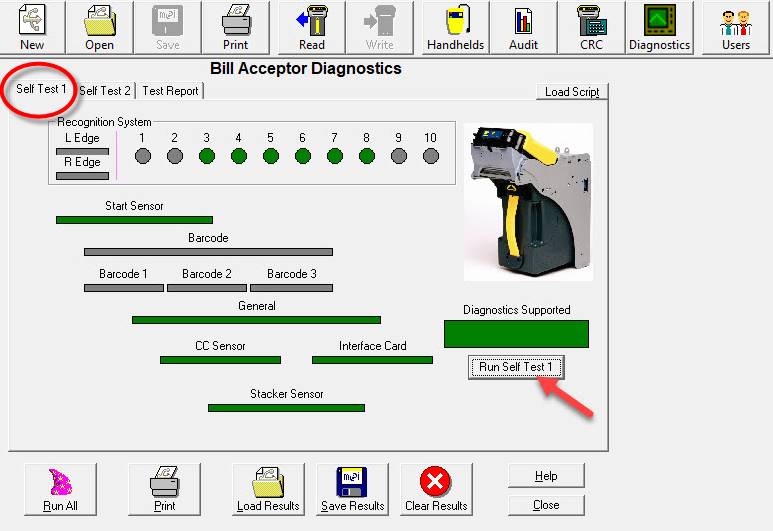
Seleccione Auto prueba 1 (Run self test 1), en ese momento se encenderán todos los diagnósticos en verde, (si no, hay un error) solo en las versiones ADVANCE el código de diagnóstico de barras permanecerá en rojo
Select Self test 1 (Run self test 1), at that
moment will turn on all the diagnostics on green, (if not, there is an error)
only in ADVANCE versions the diagnosis code of bars will remain red
|
|
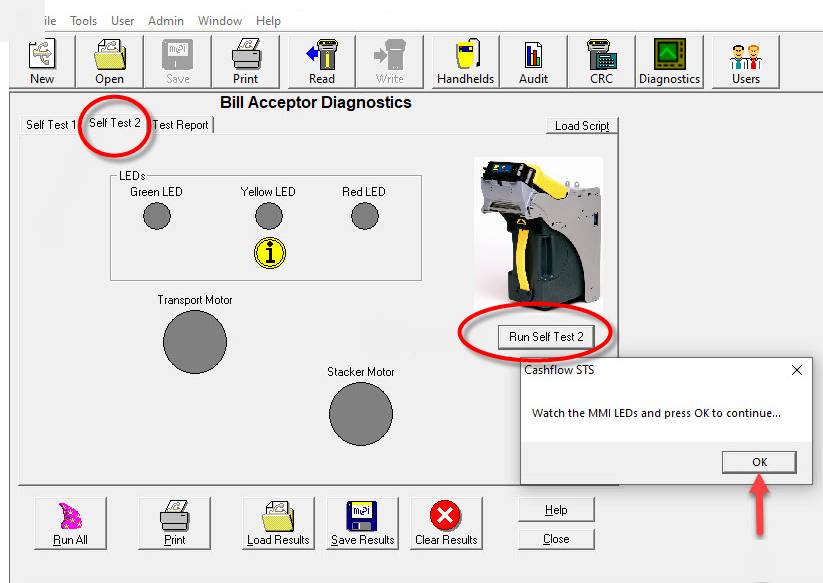
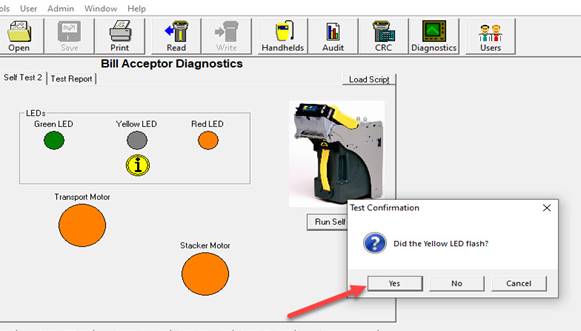
En la parte superior de la misma pestaña, seleccione la pestaña Autoprueba 2 y luego seleccione Ejecutar autoprueba 2 y OK
At the top of the same tab select the Self test 2 tab and then select Run self test 2 and OK
|
|
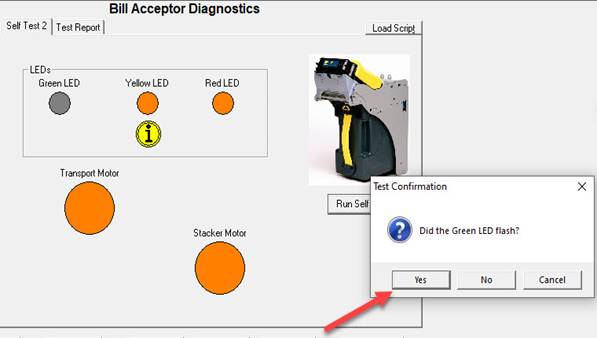
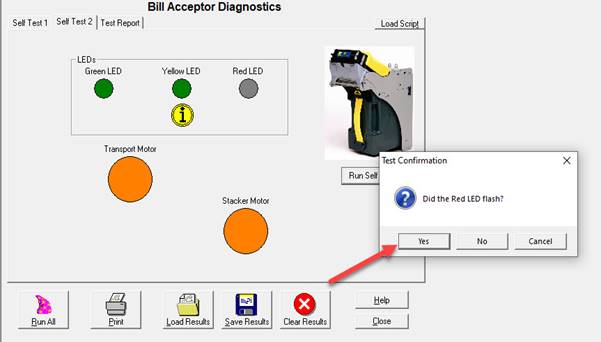
Luego se abrirán tres pestañas pidiéndole que confirme si se encendieron los 3 led's de cada color en la membrana, en caso afirmativo seleccione la opción SI.
Then three tabs will open asking you to confirm if the 3 led's of each color were turned on, if yes select the option OK or YES.
|
|
|
|
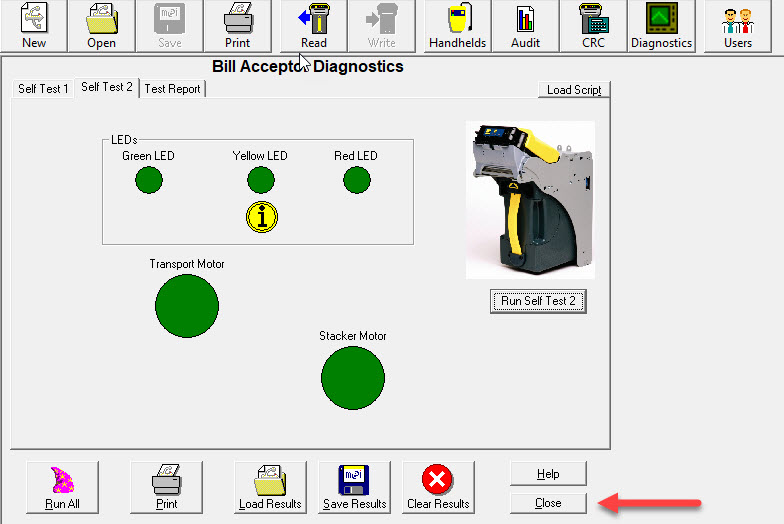
Presione cerrar para salir
Press close to exit
|
|
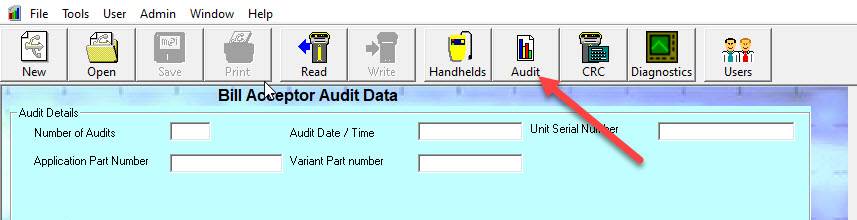
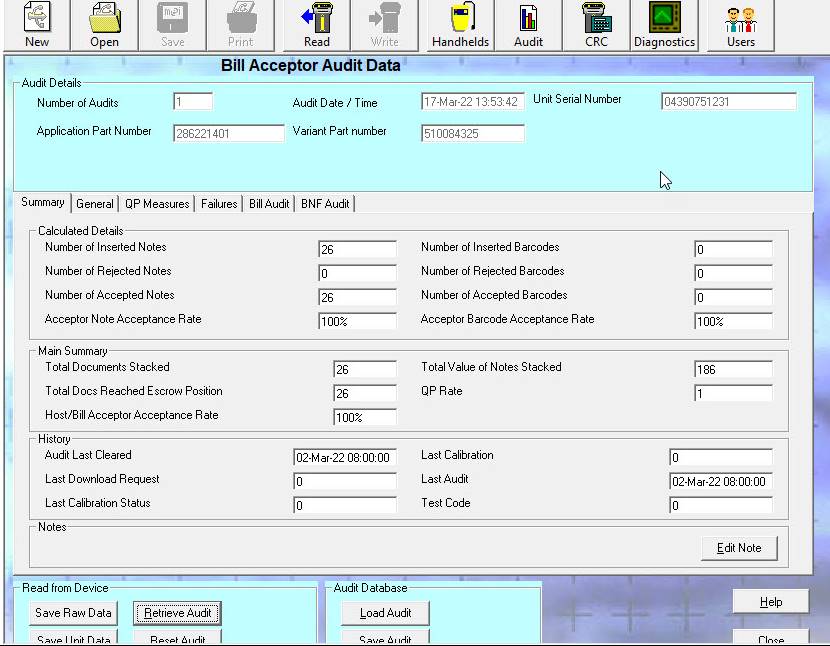
En la barra de herramientas en la parte superior de la pestaña, seleccione Auditoria
In the toolbar at the top of the tab select Audit
|
|
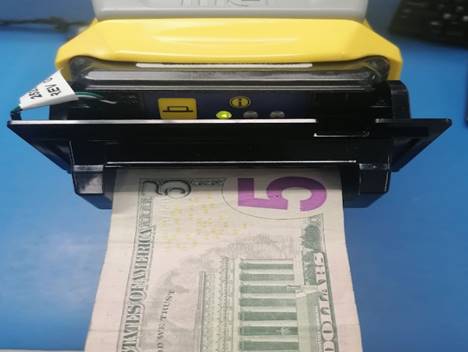
Retire el cable USB, la unidad entrará en el ciclo de inicialización, espere hasta que los LED del bisel se vuelvan verdes fijos, ahora está listo para la prueba de inserción de billetes
Nota: Deberán ser insertados por sus cuatro lados
Remove the USB cable, the unit will enter the initialization cycle, wait until the Bezel leds turn solid green, now is ready to bill inserting test.
Note: They must be inserted on all four sides
|
|
|

Analizce el número de billetes insertados, la cantidad y el porcentaje de aceptación y cierre
Analyze the number of bills inserted, the cuantity and the percentage of acceptance and Close
|
|
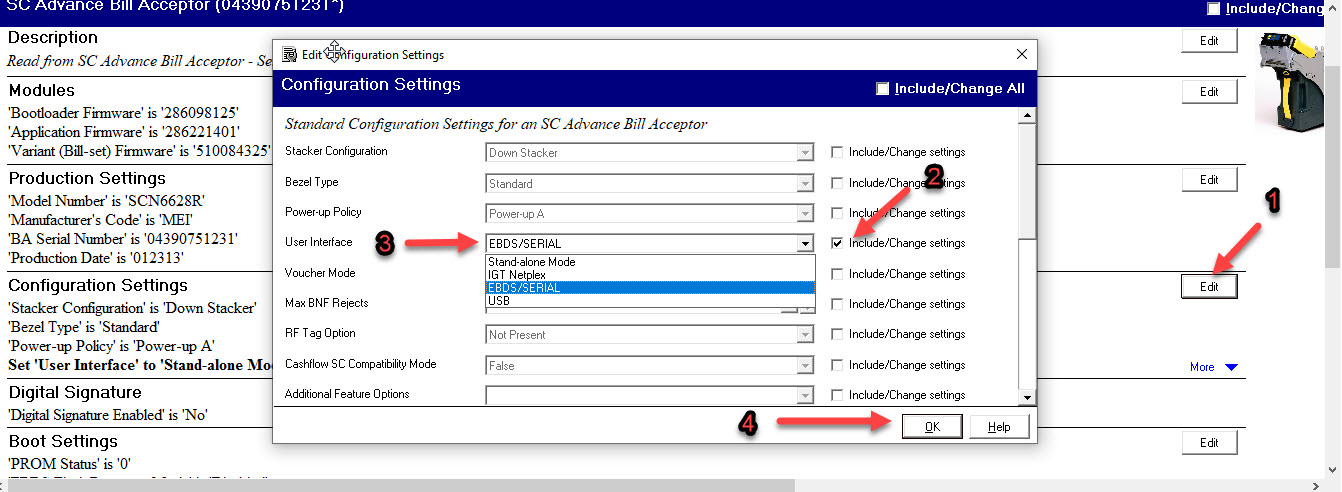
1-Seleccione Edit dentro de Ajustes de configuración (Configuration Settings)
2-Seleccione Cambiar ajuste (Change settings) en Interfaz de usuario (User Interface)
3-Cambie los ajustes a Modo independiente EBDS/SERIAL o MEI (Según el caso)
4-Presione OK
1-Select Edit under Configuration Settings
2-Select Change settings in User Interface
3-Change the settings to EBDS/SERIAL or MEI (depending on the case)
4-Press OK
|
|
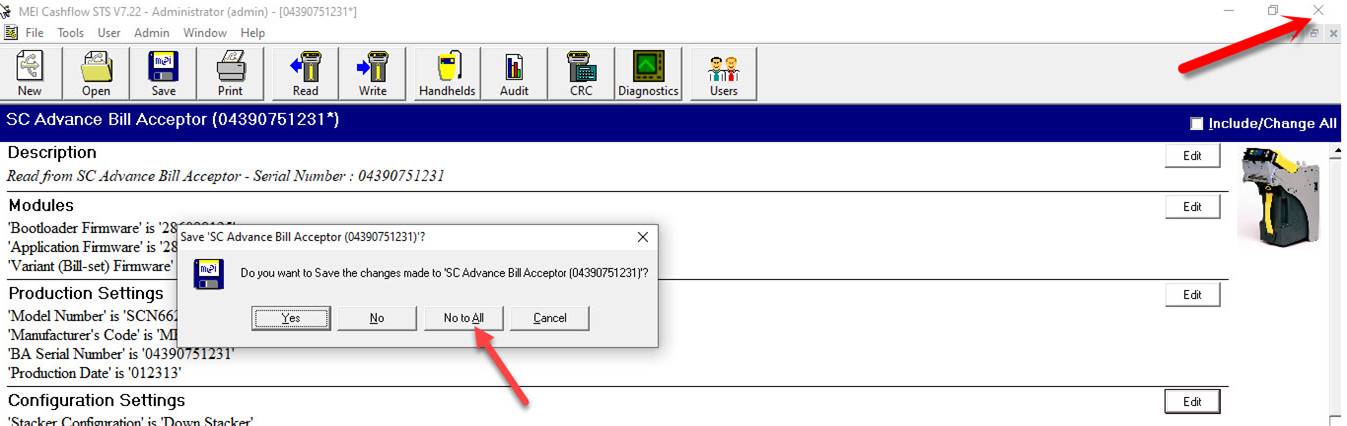
Cierre el programa y seleccione presione No a todo
Close the program and select Press No to All
|
|
Prueba MPOST_.NET_v2.70
NOTA: La siguiente prueba solo se realizará a los modelos que sean completas, es decir Cabezal, Chasis y caja de efectivo
Conecte el puerto serial a la PC y el conector al chasis de la MEI (Sin conectar el Cable USB)
TEST MPOST_.NET_v2.70
NOTE: The following test will only be applied to the models that are complete Head, Chassis and cash box.
Connect the serial port to the PC and the connector to the chassis of the MEI (Without connecting the USB Cable)
En la computadora de prueba seleccione el icono:
On the test computer select the shortcut:
|
|

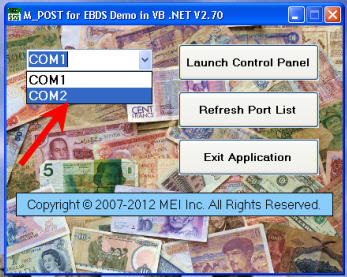
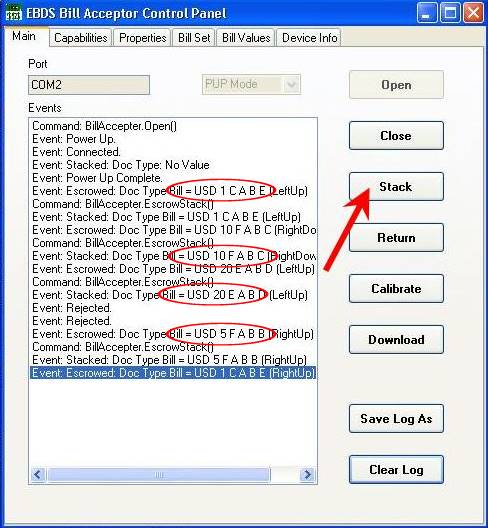
Se abrirá la siguiente ventana de la cual seleccionará: el puerto correspondiente según su computadora de prueba en este caso se utilizará el COM2
The following tab will be open where you will select: the corresponding port according to your test computer in this case will be COM2
|
|
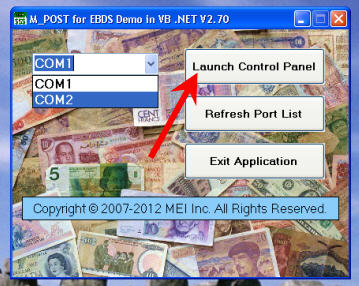
Después seleccione Launch Control Panel
Then select: Launch Control Panel
|
|
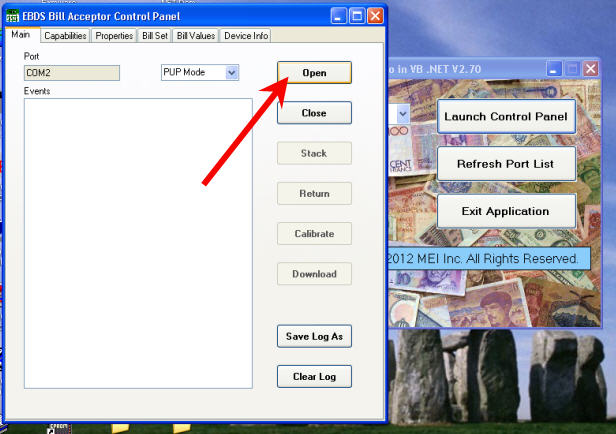
A continuación, se abrirá esta otra ventana de la cual seleccionará Open y espere algunos segundos en lo que la unidad cargue los parámetros y aparezcan en la pantalla.
Next, it will open another tab, select open screen and wait a few seconds while the unit load the parameters and will be displayed on the screen.
|
|
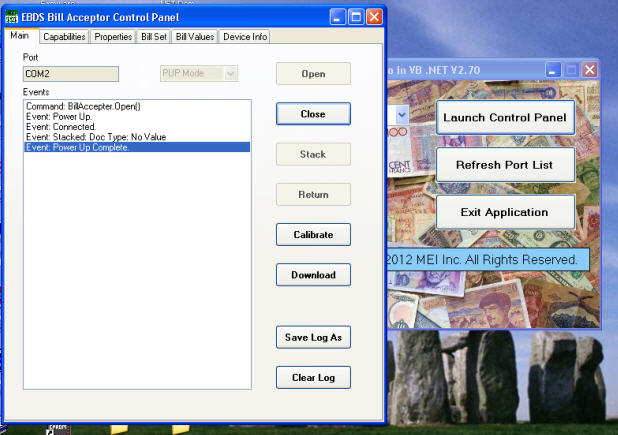
En el aceptador de billetes los leds de color verde deberán estar estáticos preparados para recibir billetes.
In the bill acceptor the green leds must be solid ready to receive bills.
Parámetros cargados:
Loaded Parameters:
|
|
Inserte el billetes:
Insert the bill notes:
|
Por cada billete que inserte deberá seleccionar STACK, en ese momento la unidad guardara el billete en la caja y aparecerá el valor del billete que inserto en la ventana. Deberá insertar las diferentes denominaciones de los billetes que cuente para prueba.
For each bill you insert you must select STACK, at that moment the bill note will be sent to the cash box and the amount of the accepted bill will be displayed. You must insert the different denominations of the bills notes you are testing.
|
|
MANTENIMIENTO
MAINTENANCE
Artículos requeridos para realizar limpieza general.
Items required to perform general cleaning.
Alcohol isopropílico al 5%
5% isopropyl alcohol
Cepillo Antiestático para Limpieza De Partes Electrónicas
Antistatic Brush For Cleaning Electronic Parts
Franela de Microfibra
Microfiber Flannel
|
|
Es importante Limpiar o reemplazar según sea necesario: Rodillos, Engranes, Motores, Cristales, Cubiertas y Balines
It is important to Clean or replace as necessary: Rollers, Gears, Motors, Crystals, Covers and Bearing Pinch
SOLUCION DE ALGUNOS FALLOS
SOLUTION TO SOME FAULTS
|
|
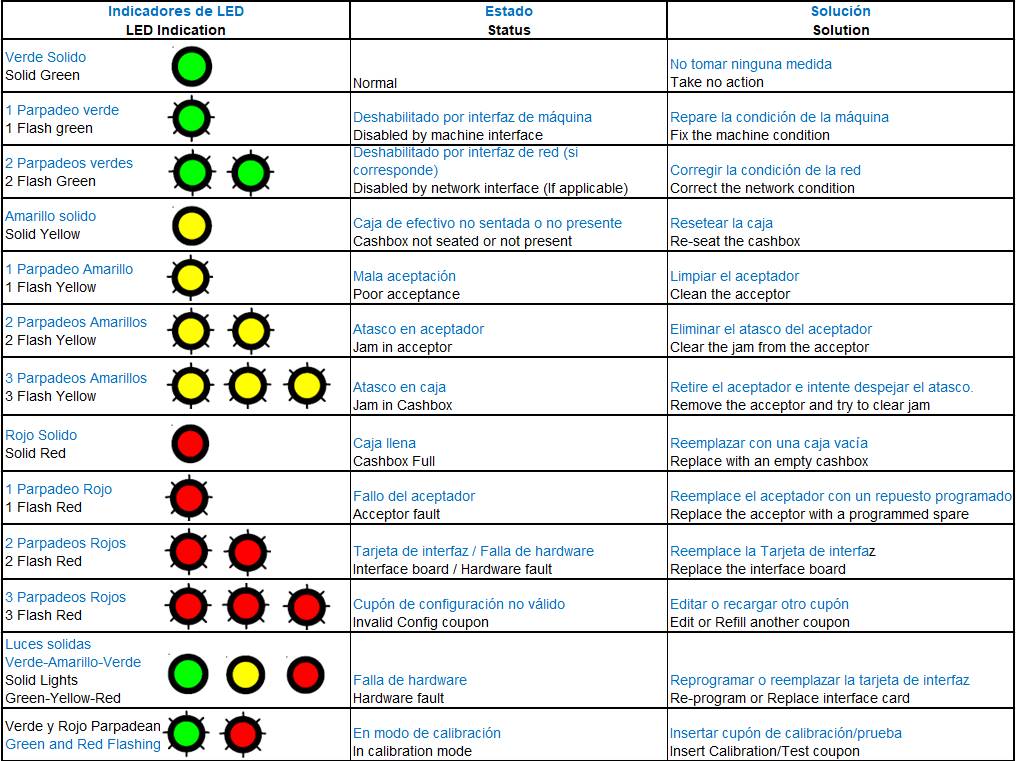
Tabla 1.0 / Table 1.0
AYUDA VISUAL
VISUAL SUPPORT
|
|
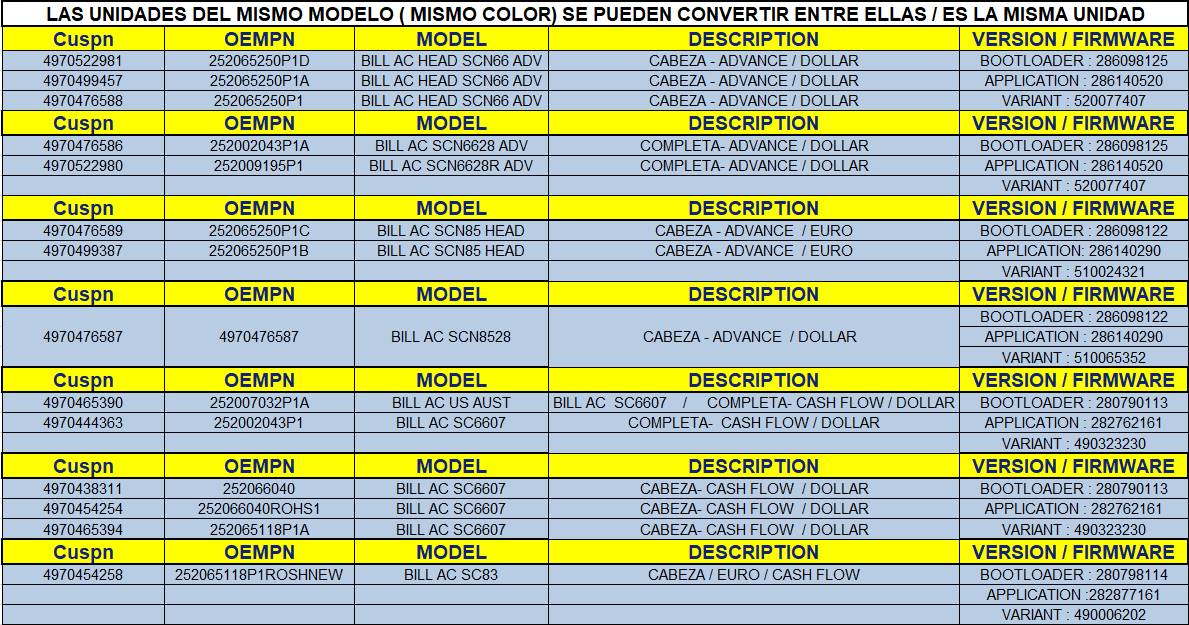
Tabla 1.1 / Table 1.1
|
|
WI#: 522 MEI Cashflow |
Originator: E Parsons 11/5/05 |
||||
|
Rev: 15 |
Rev Date: 4/27/20 |
Name: K Tovar |
Update: New Format
|
Next Review: NA |
Approval: Tom St John |
|
|
Rev: 16 |
Rev Date: 03/22/22 |
Name: H Bailón |
Update: Firmware Updated |
Next Review: NA |
Approval: Tom St John |
|