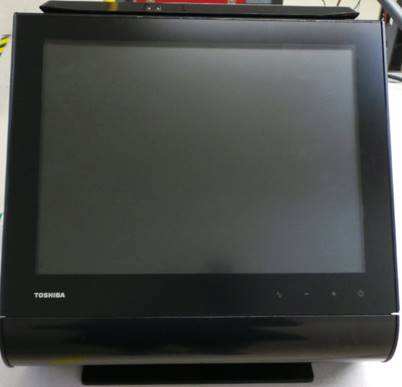
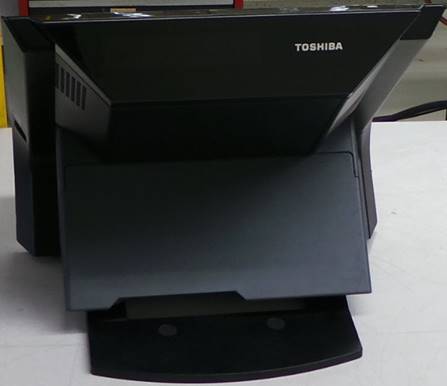
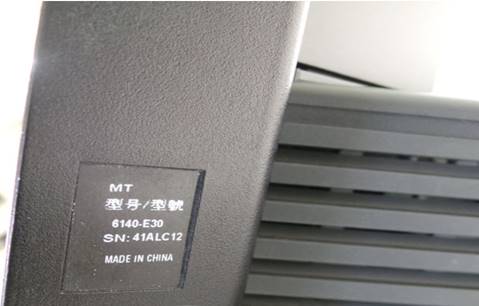
WI # 169 TOSHIBA
6140-E30
|
|
|
|
|
|
INSPECCION INICIAL
INITIAL INSPECTION
Realice una inspección visual en busca de partes dañadas o quebradas.
Perform a visual inspection for damaged or broken parts.
Instale un teclado y un ratón.
Install a keyboard and a mouse.
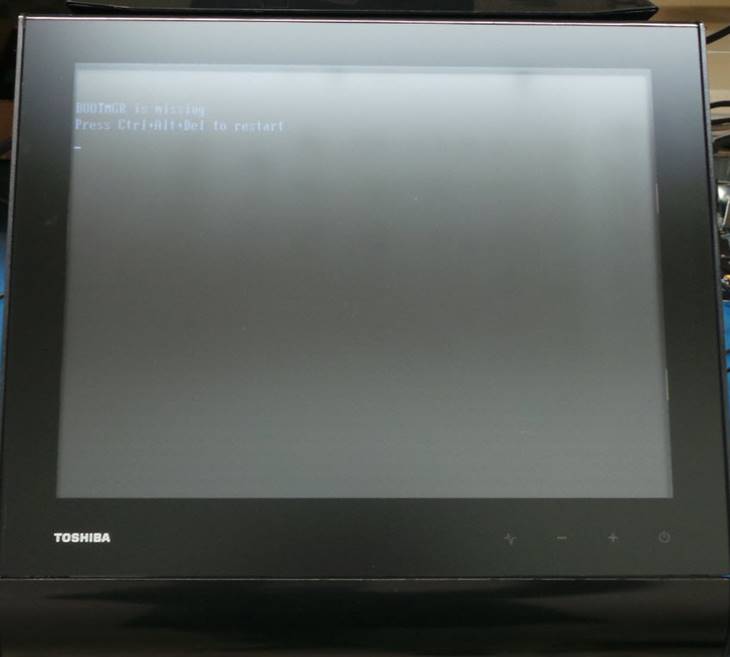
Conecte el cable de la corriente y encienda la unidad.
Plug in the power cord and turn on the unit.
|
|
|


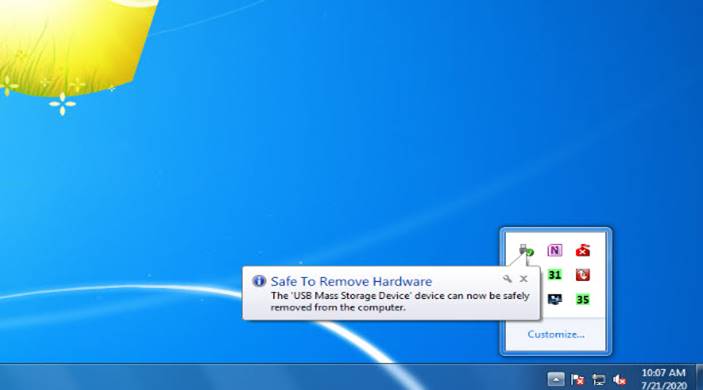
Apague la unidad.
Turn off the unit.
PRUEBAS
TESTS
Coloque la unidad con la pantalla hacia abajo.
Place the unit with the screen facing down.
Abra la cubierta de la interfaz y deslice la manivela hacia arriba hasta el tope.
Open the interface cover and slide the crank up to the stop.

Después de que la manivela llego al tope cierre la cubierta de la interfaz.
After the crank reaches the stop, close the interface cover.

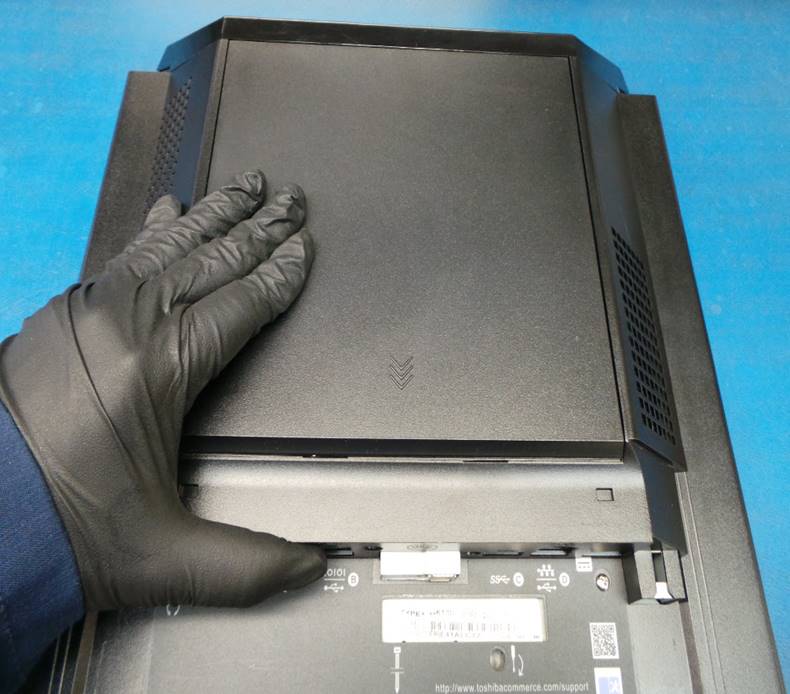
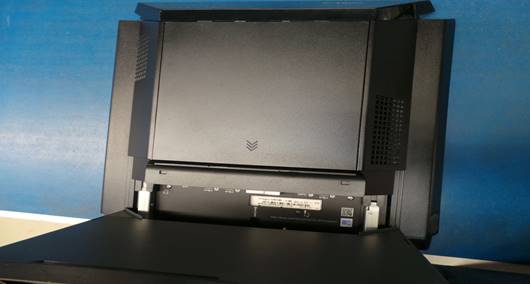
Separe la unidad de la base.
Detach the unit from the base.
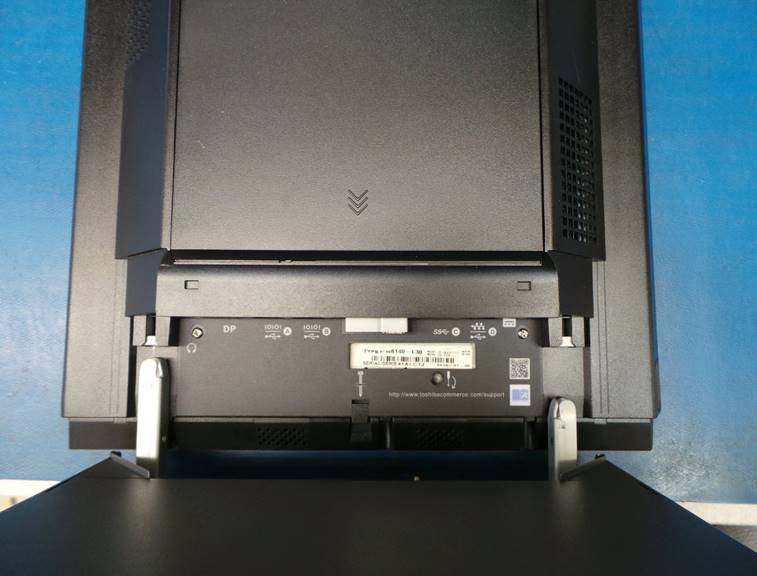
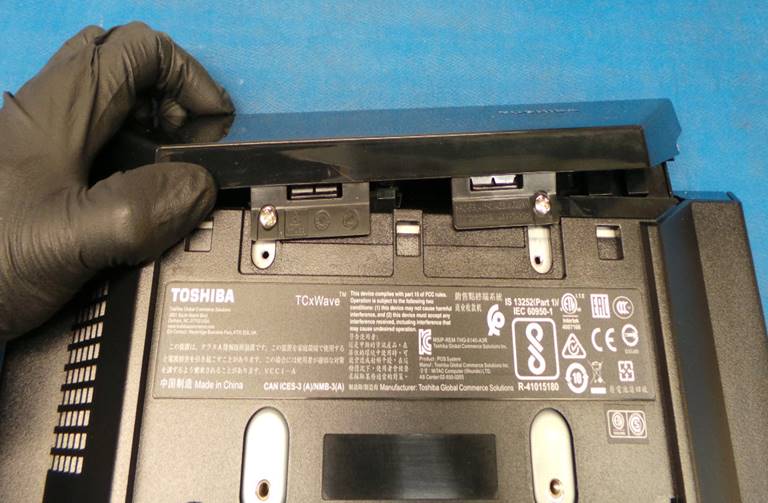
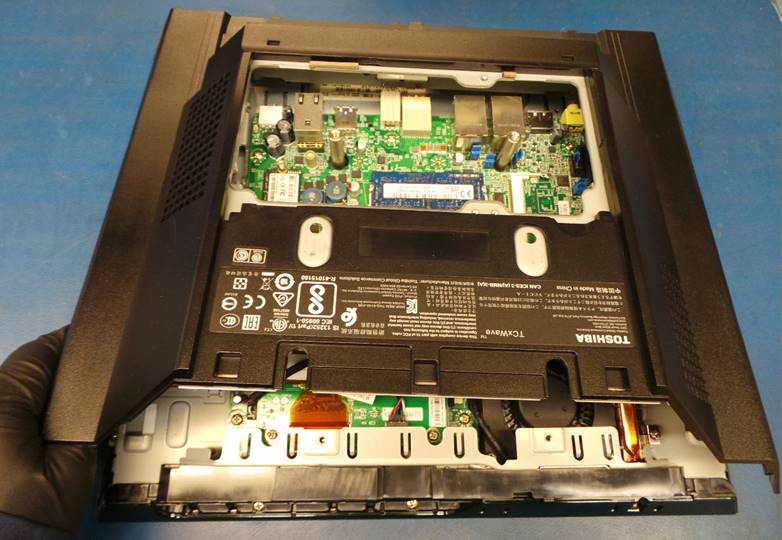
Desinstale la cubierta trasera, para hacerlo deslícela en la misma dirección que la flecha.
Uninstall the back cover, to do so slide it in the same direction as the arrow.
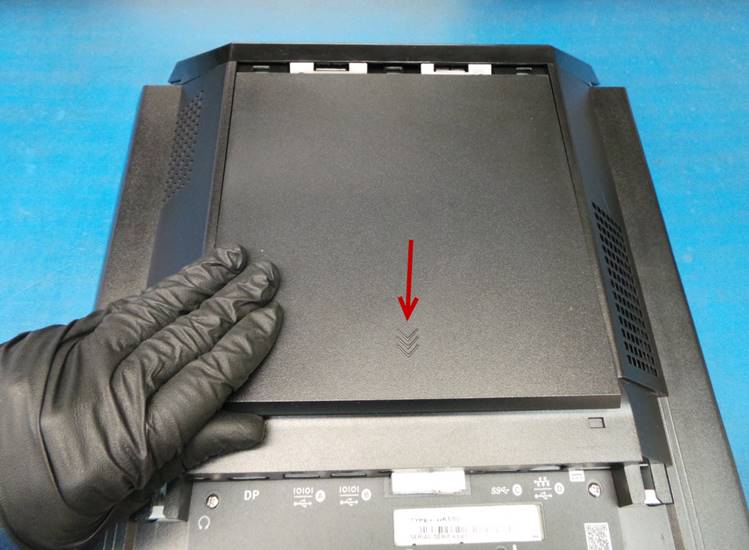
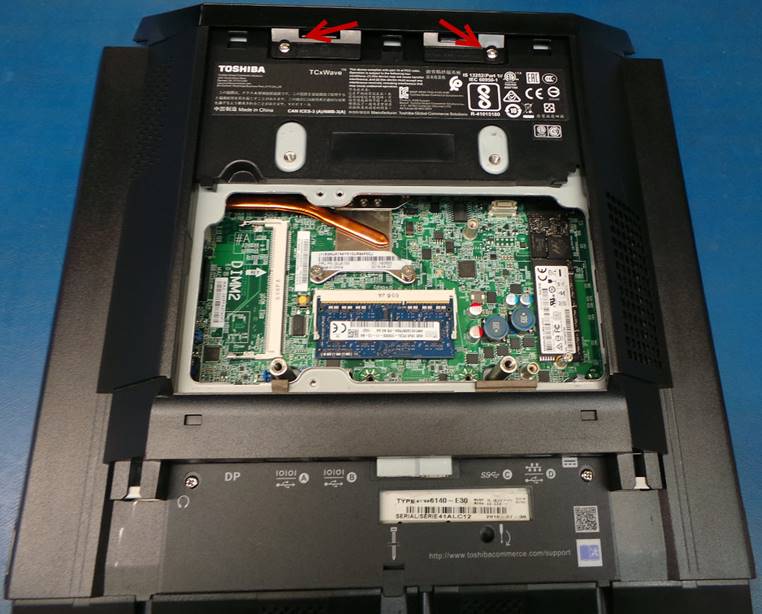
Suelte los 2 tornillos para desinstalar la cubierta del disco duro y memoria RAM.
Loosen the 2 screws to remove the hard drive and RAM cover.

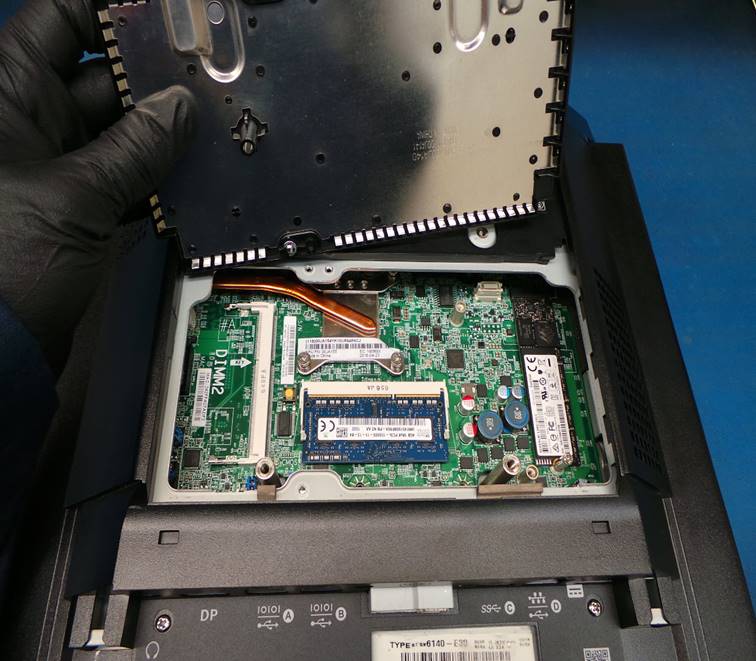
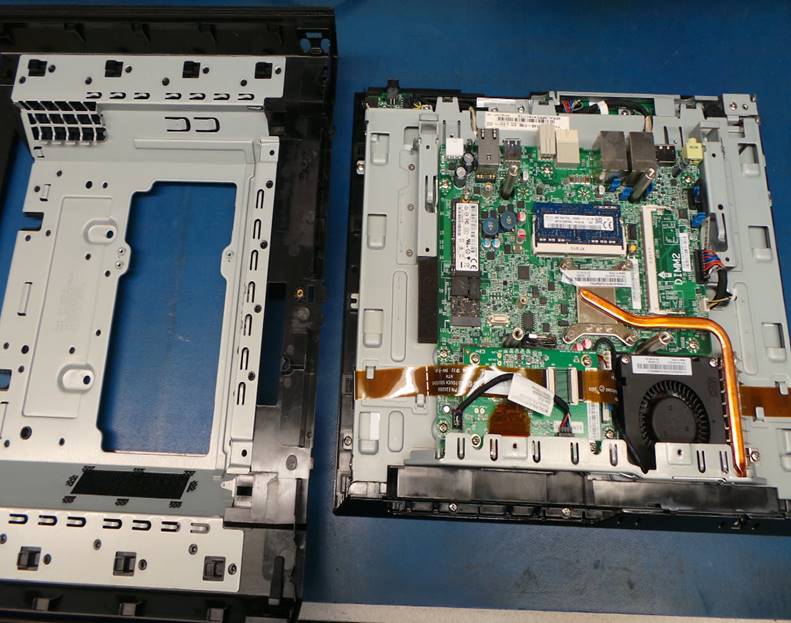
Levante la cubierta para tener acceso a la Tarjeta Madre.
Lift the cover to access the Motherboard.

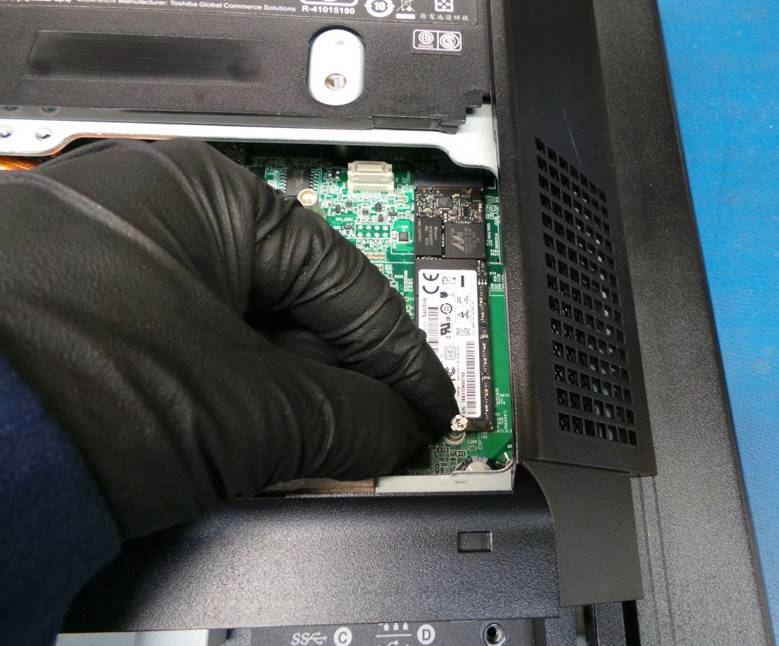
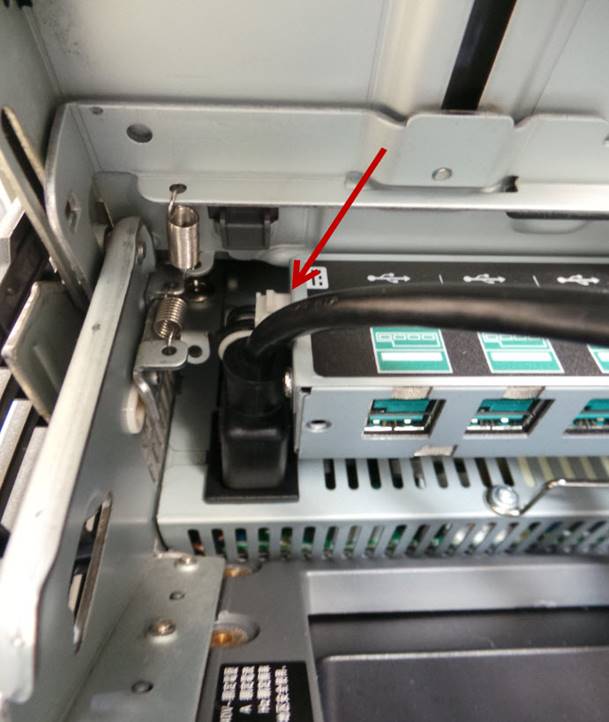
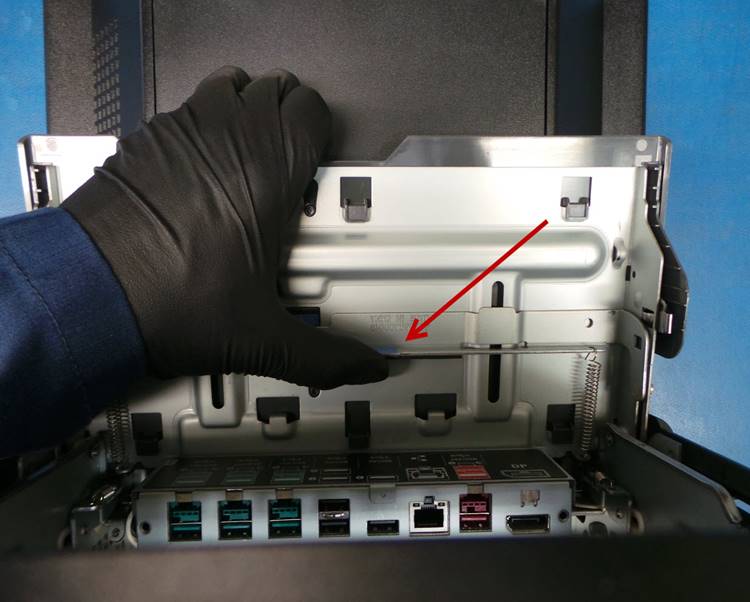
Localice el disco duro, suelte el tornillo señalado en la imagen.
Locate the hard drive, loosen the screw indicated in the image.
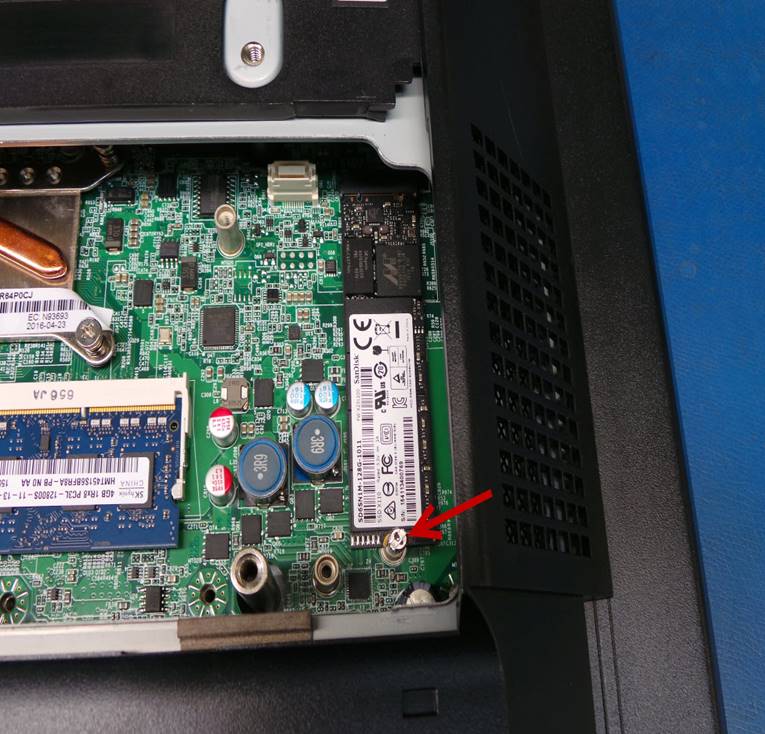
Deslice ligeramente hacia atrás para desinstalarlo de la Tarjeta Madre.
Slide back slightly to uninstall it from the Motherboard.
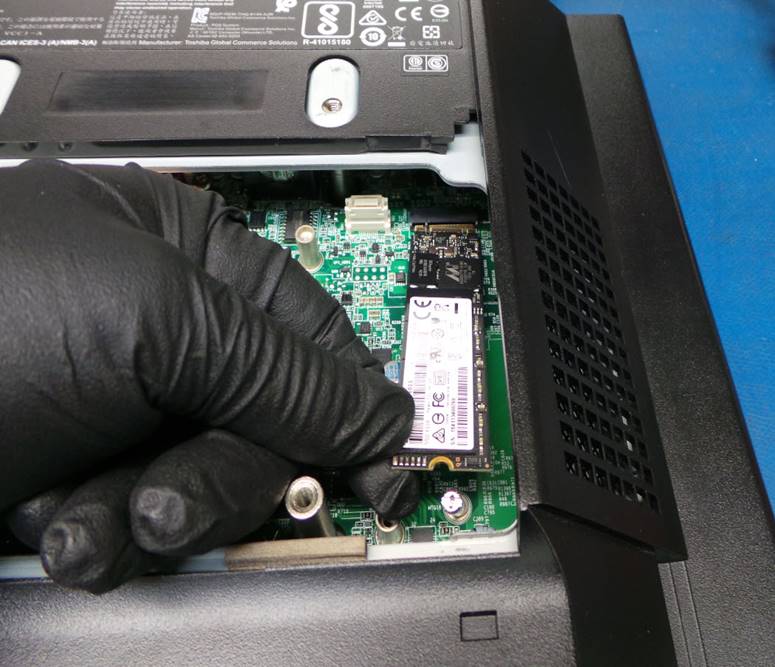
Instale el disco duro de pruebas en la Tarjeta Madre y apriete el tornillo.
Install the test hard drive on the Motherboard and tighten the screw.
Instale la cubierta del disco duro y memoria RAM y apriete los tornillos.
Install the hard drive and RAM cover and tighten the screws.
Instale la cubierta trasera.
Install the back cover.
Instale la unidad en la base.
Install the base.
|
|
|

Conecte el cable de alimentación de corriente.
Connect the power source.
Instale el ratón y el teclado.
Install the mouse and keyboard.
Ubique la impresora IBM SurePOS 700 Powered USB.
Locate the IBM SurePOS 700 Powered USB Printer.

Instale la impresora al puerto de 24 Voltios.
Install the printer to the 24 Volt port.

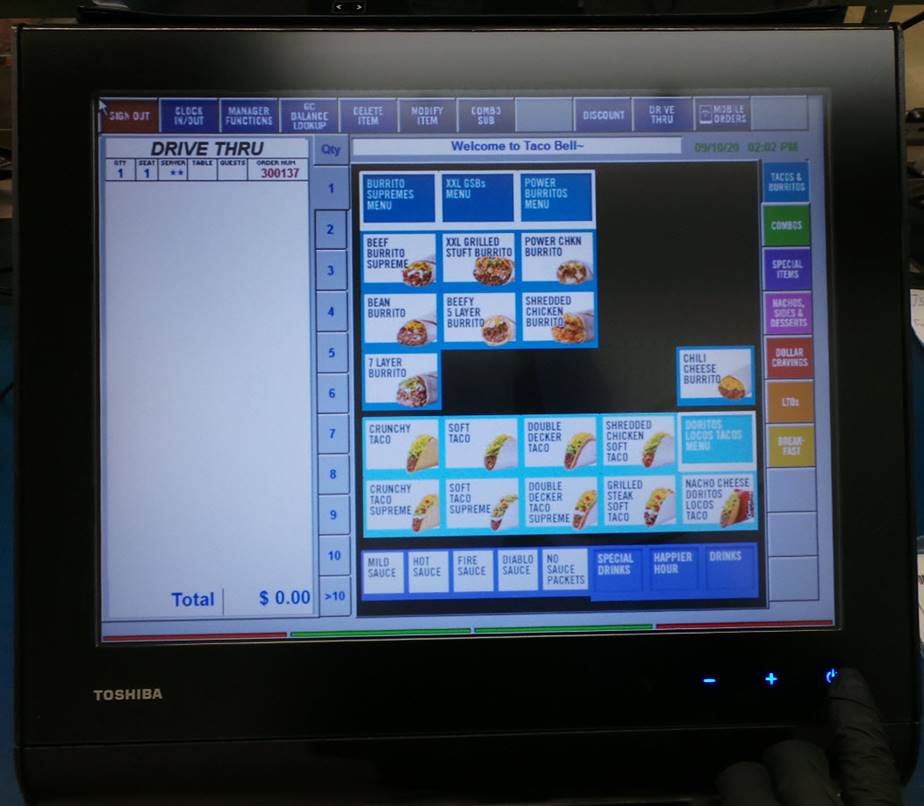
Encienda la unidad.
Turn on the unit.

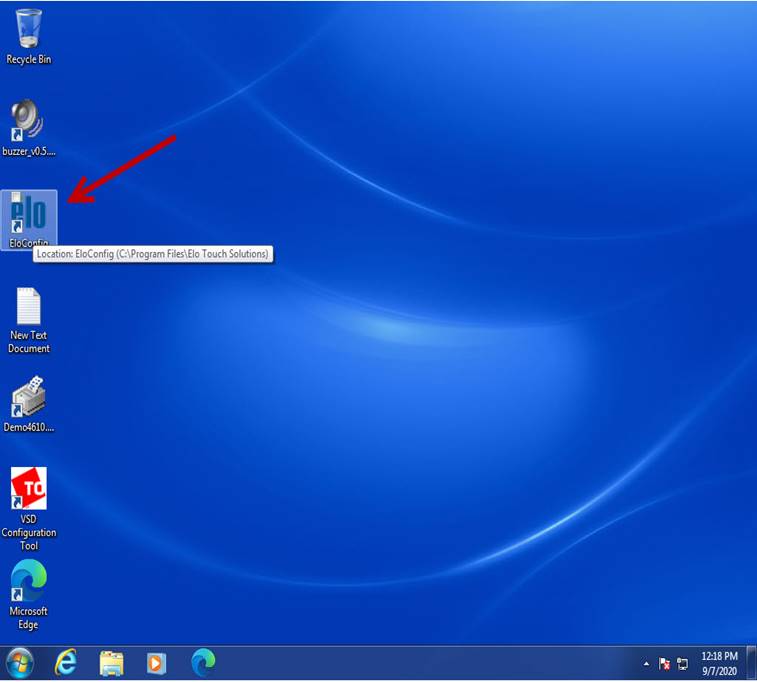
Localice y ejecute el icono EloConfig.
Locate and run the EloConfig icon.
Seleccione – Select Calibrate Touch Screens

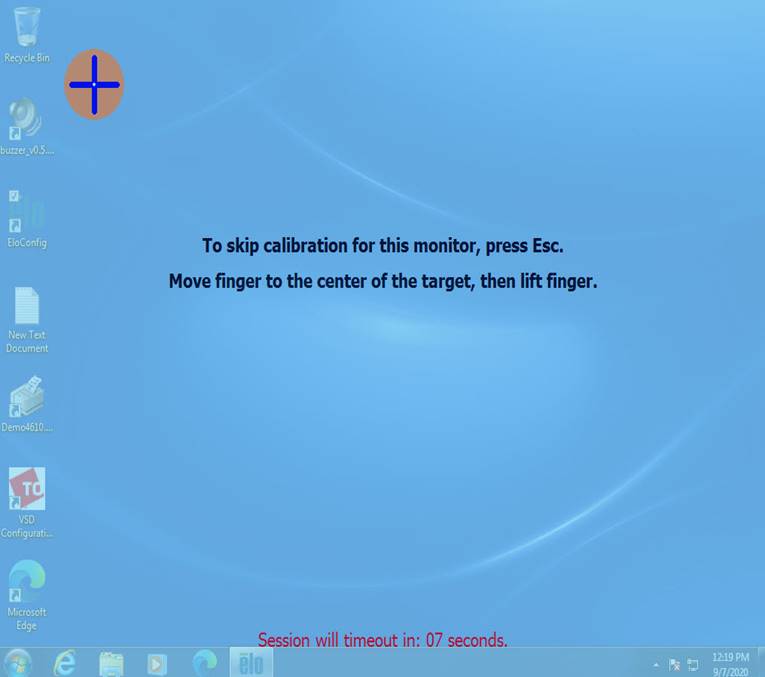
Calibre la pantalla táctil según las instrucciones.
Calibrate the touch screen according to the instructions.
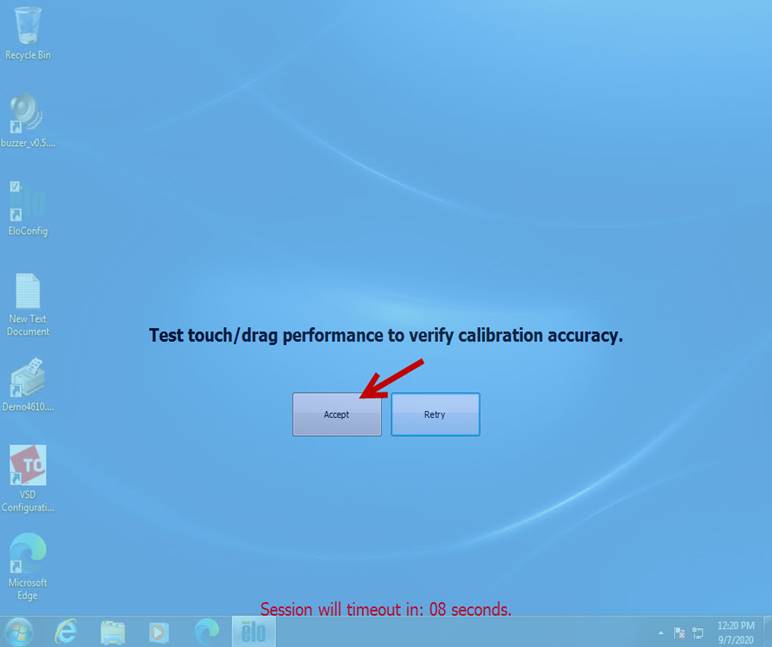
Seleccione – Select Accept
Cierre el menú de calibración.
Close the calibration menú.
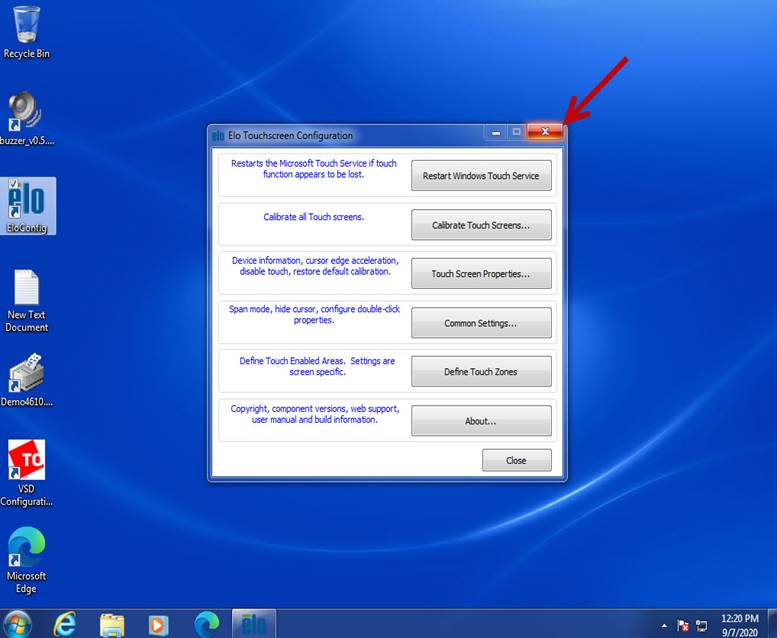
Verifique que la pantalla táctil funcione correctamente.
Check that the touch screen works properly.
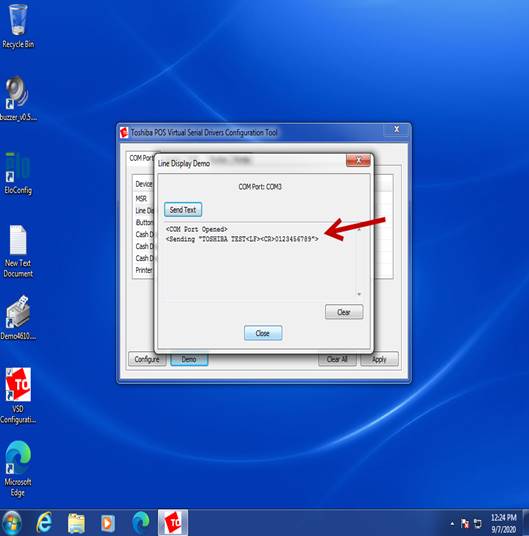
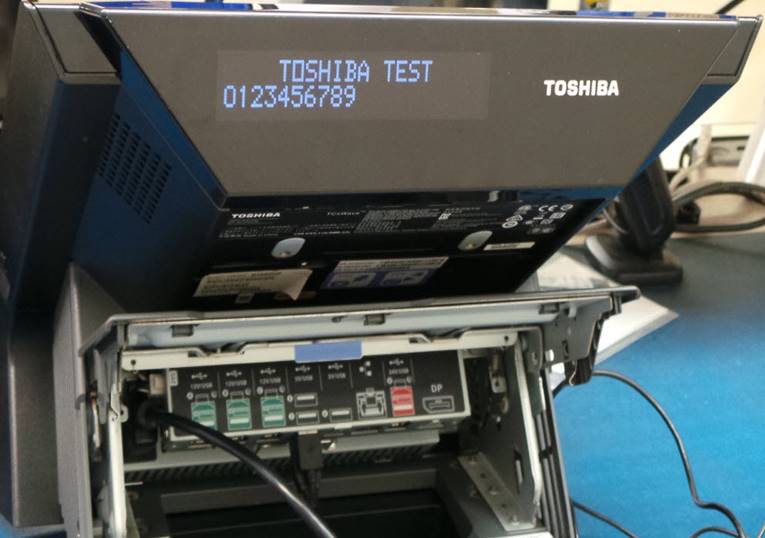
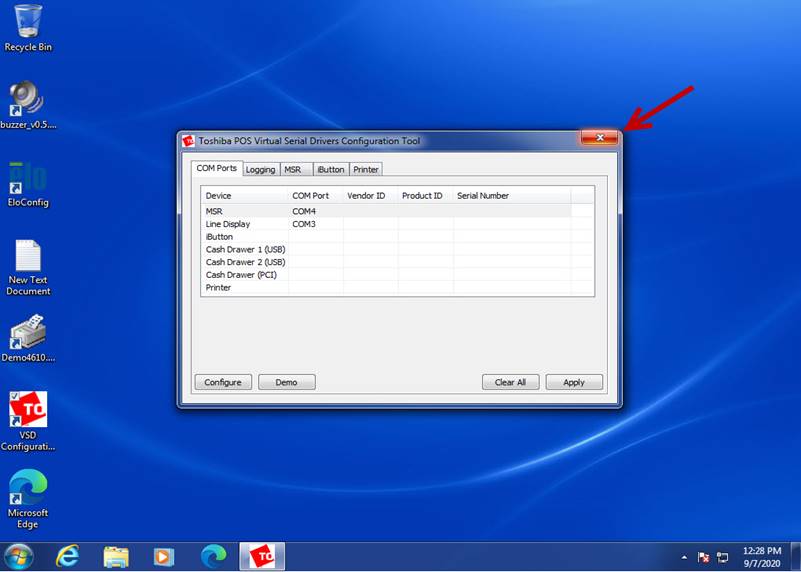
Ejecute como administrador el icono VSD Configuration Tool.
Run the VSD Configuration Tool icon as administrator.

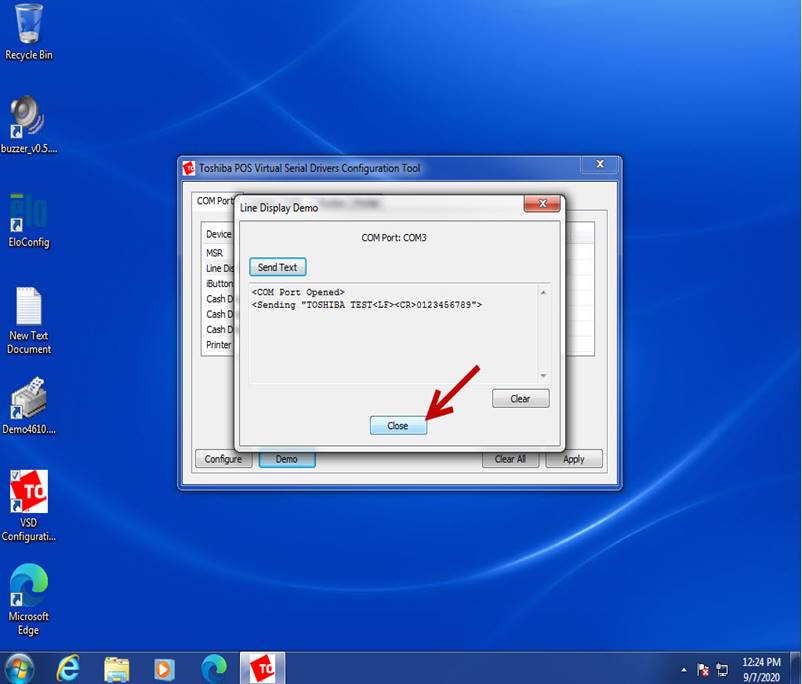
Seleccione Line Display y luego Demo.
Select Line Display and then Demo.

Seleccione – Select Send Text
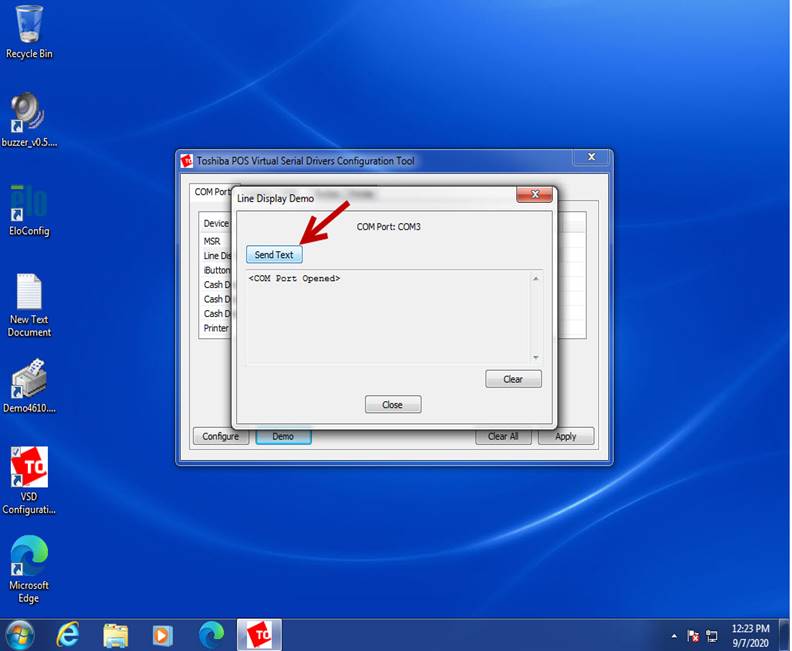
Verifique que los caracteres sean desplegados en el display.
Verify that the characters are displayed.
|
|
|
Seleccione – Select Close
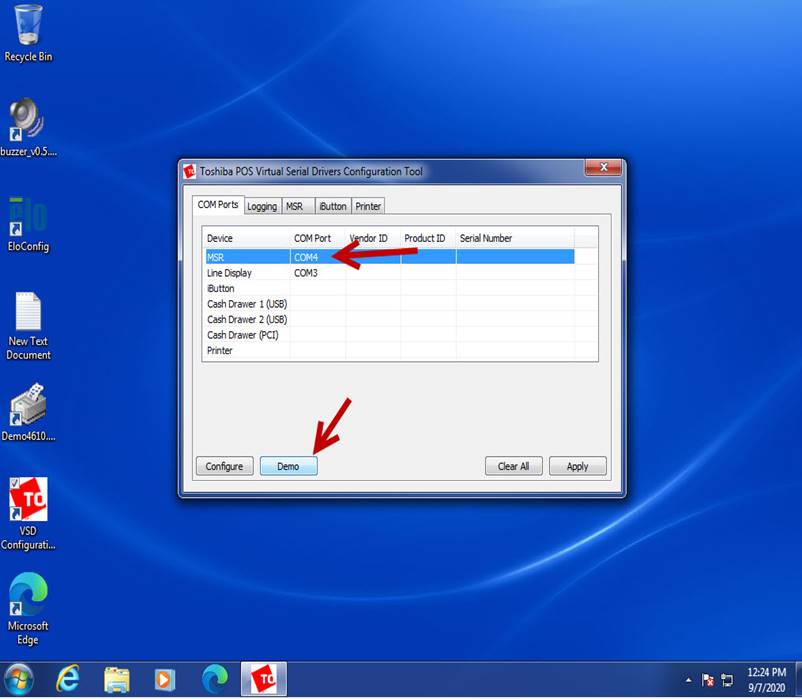
Seleccione MSR y luego Demo.
Select MSR and then Demo.
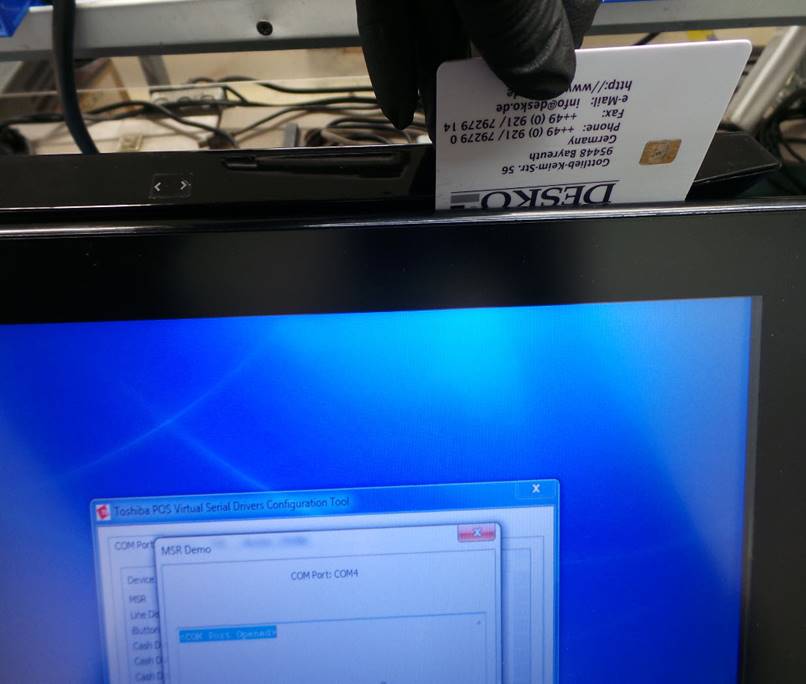
Deslice la tarjeta como se muestra en la imagen.
Slide the card as shown in the picture.
El resultado de la lectura de la tarjeta debe aparecer en la pantalla.
The result of the card reading should appear on the screen.
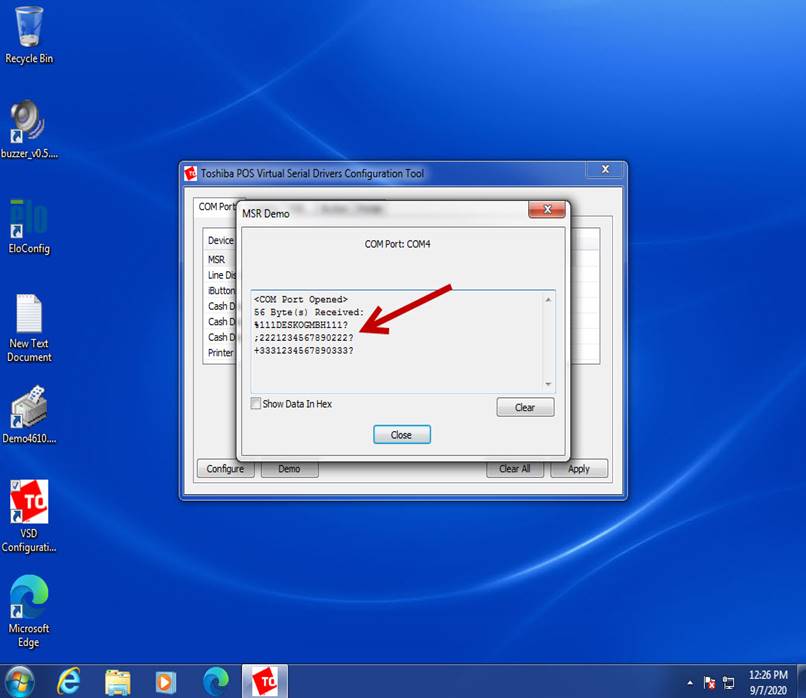
Repita la prueba varias veces.
Repeat the test several times.
Seleccione – Select Close
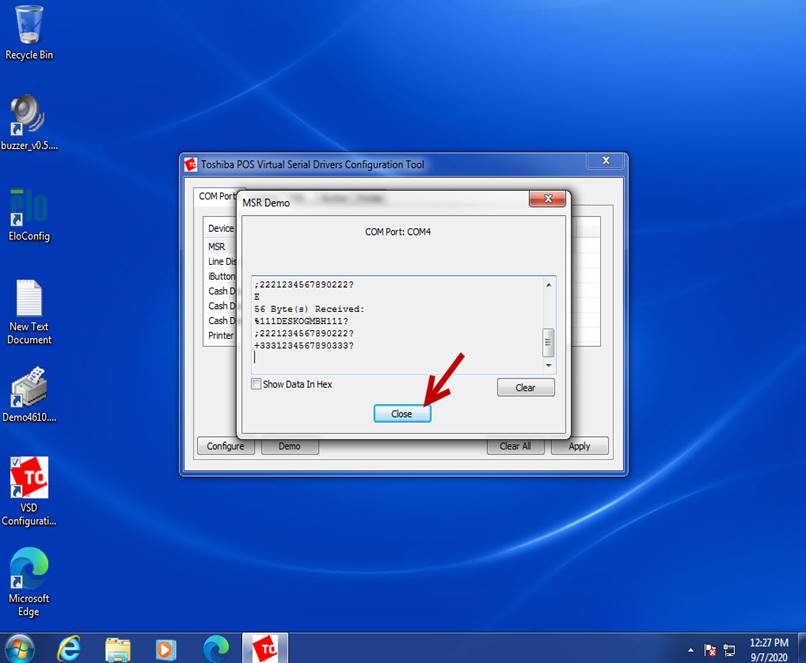
Cierre el programa.
Close the program.
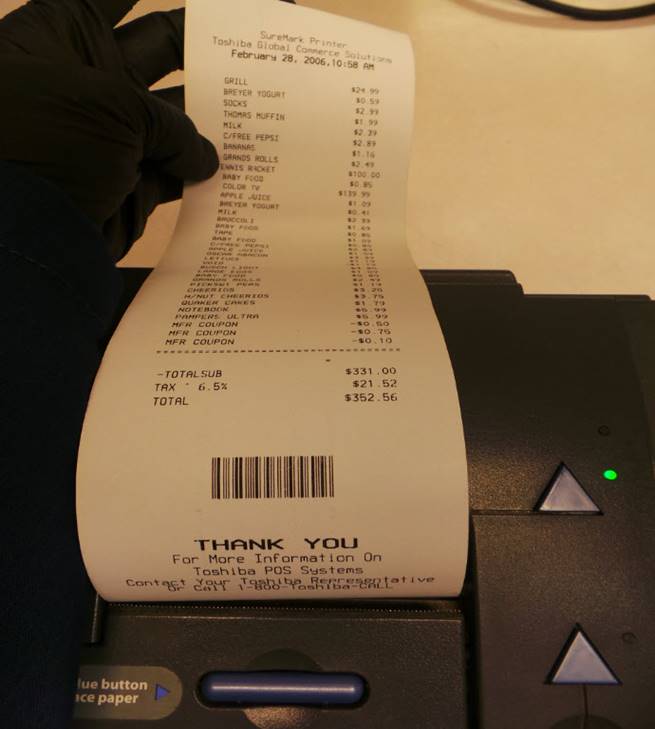
Ejecute el icono Demo4610.exe
Run the Demo4610.exe icon
Seleccione Customer receipt station demo, luego seleccione Print standard receipt y luego Run selected demos(s)
Select Customer receipt station demo, then select Print standard receipt and then Run selected demos (s)
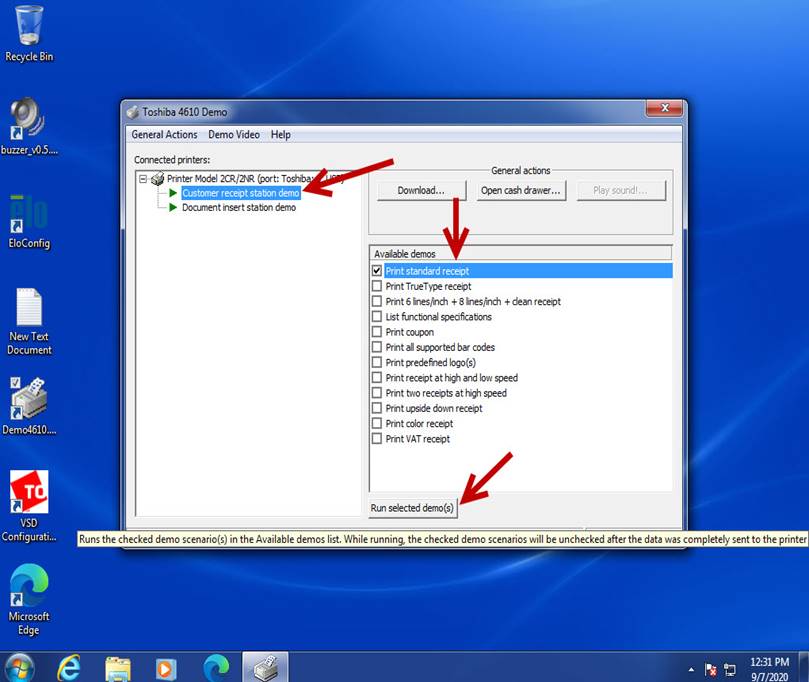
El recibo de demostración será impreso.
The demo receipt will be printed.
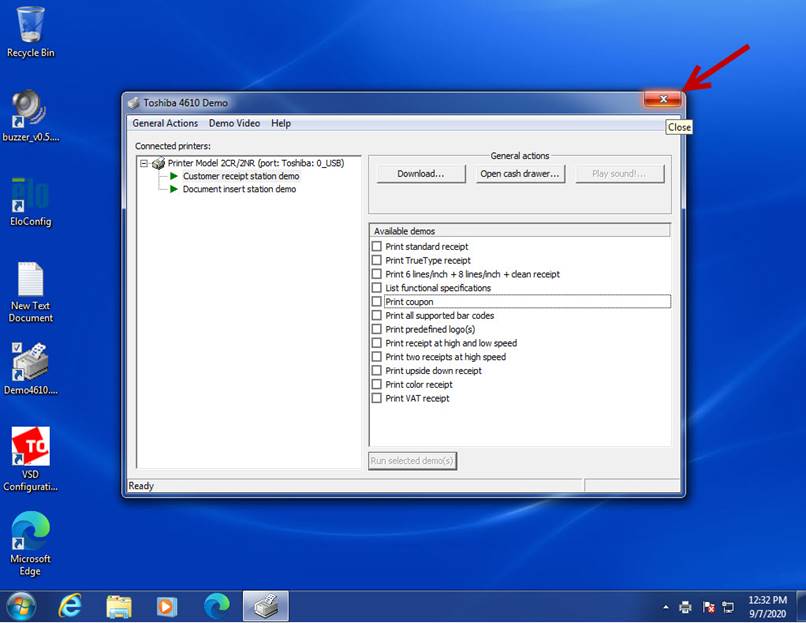
Cierre el programa.
Close the program.
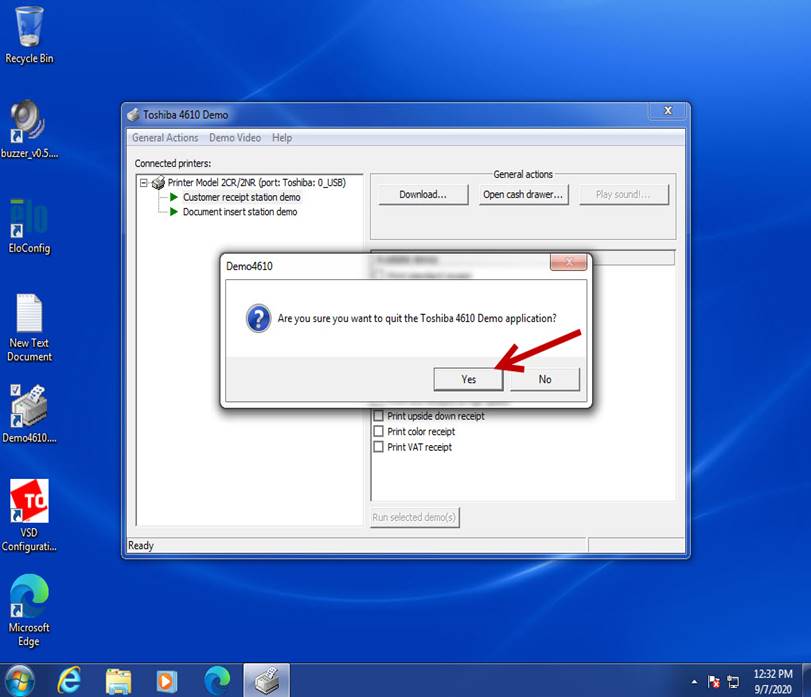
Seleccione – Select Yes
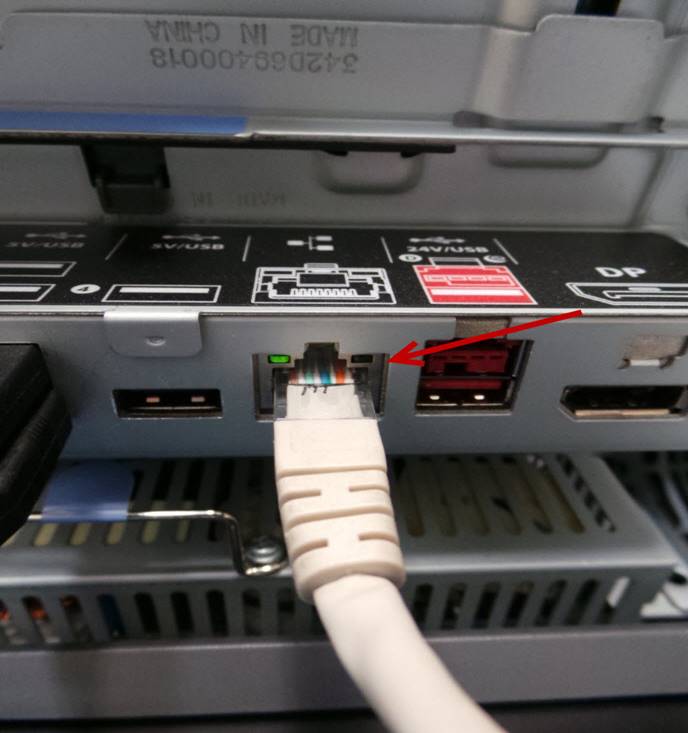
Instale el cable de Ethernet.
Install the Ethernet cable.
Ubique y ejecute el icono de Microsoft Edge.
Locate and launch the Microsoft Edge icon.
La página de inicio será desplegada.
The Internet home page will be displayed.
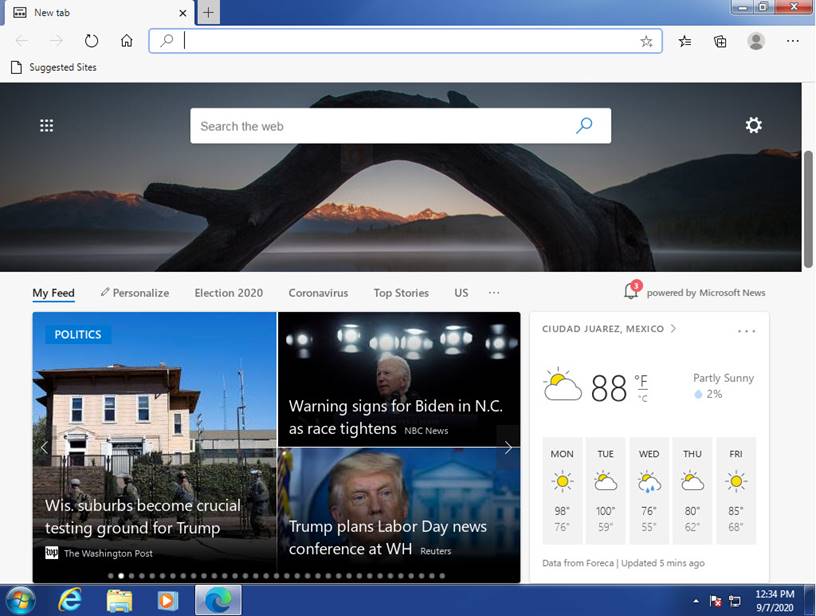
Cierre la página de internet.
Close the website.
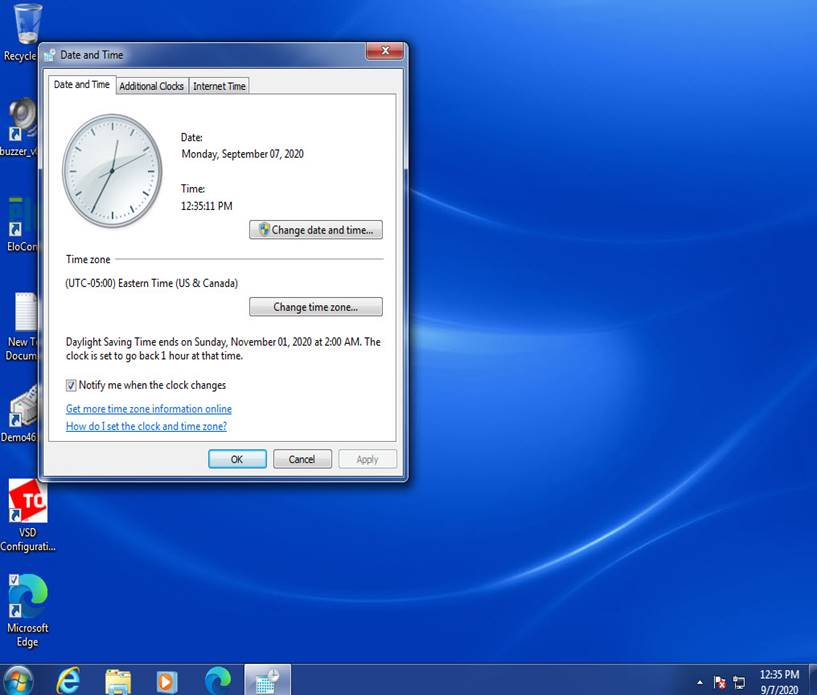
Configure la zona horaria a Eastern Time (US & Canadá)
Set the time zone to Eastern Time (US & Canada)
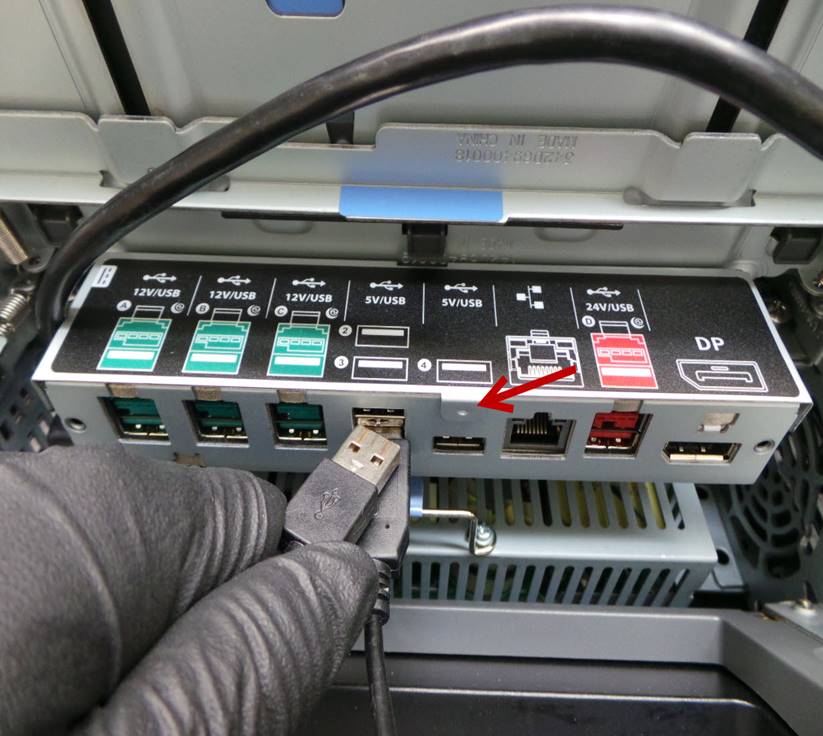
Utilizando el ratón verifique que todos los puertos USB funcionan correctamente.
Using the mouse verify that all USB ports are working properly.
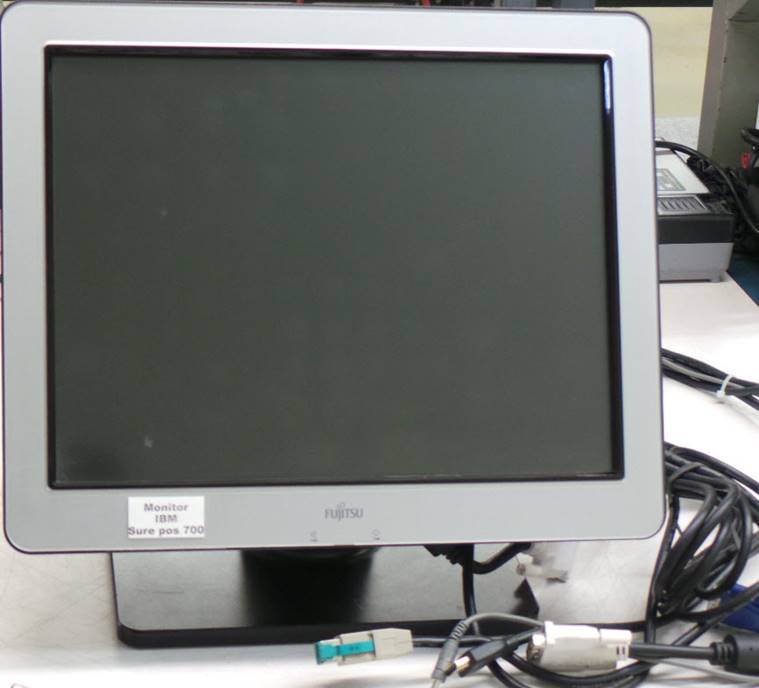
Instale el monitor IBM Sure POS 700.
Install the IBM Sure POS 700 monitor.
Conecte el cable de alimentación de corriente.
Plug in the power cord.
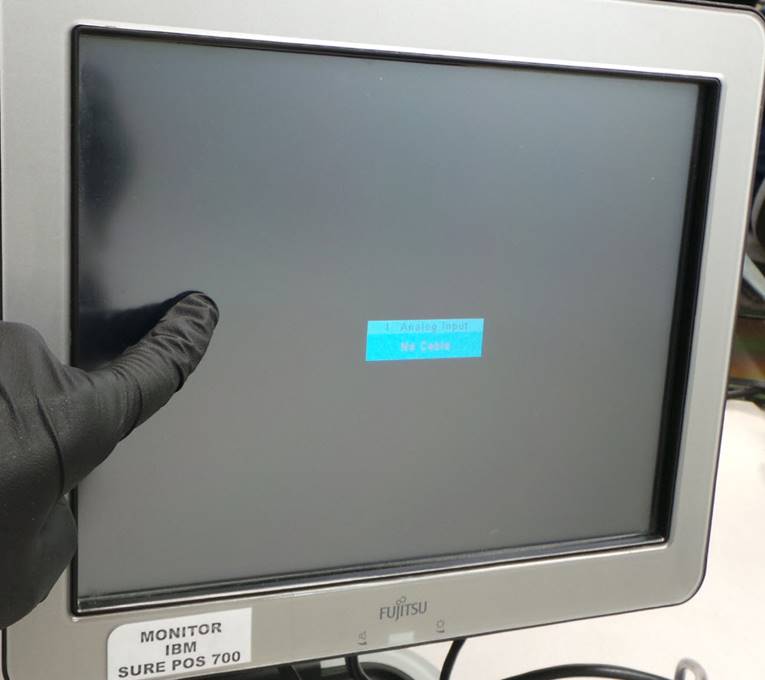
El monitor debe encender y debe dar un tono al tocar la pantalla táctil.
The monitor should turn on and it should give a tone when you touch the touch screen.
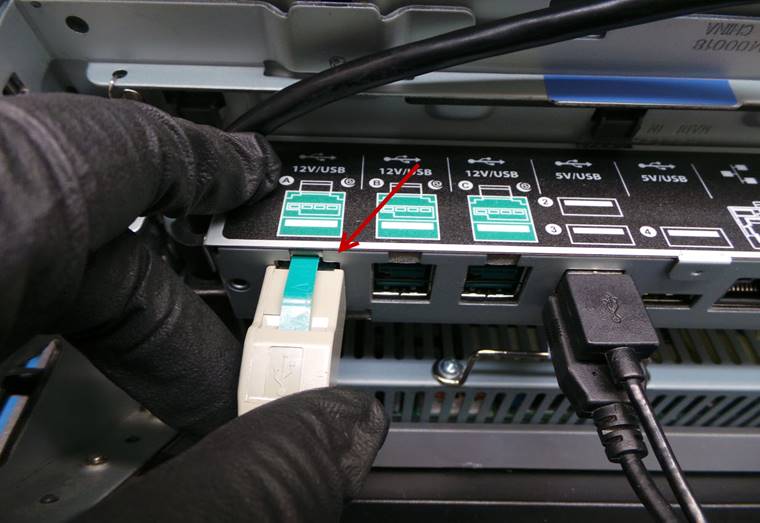
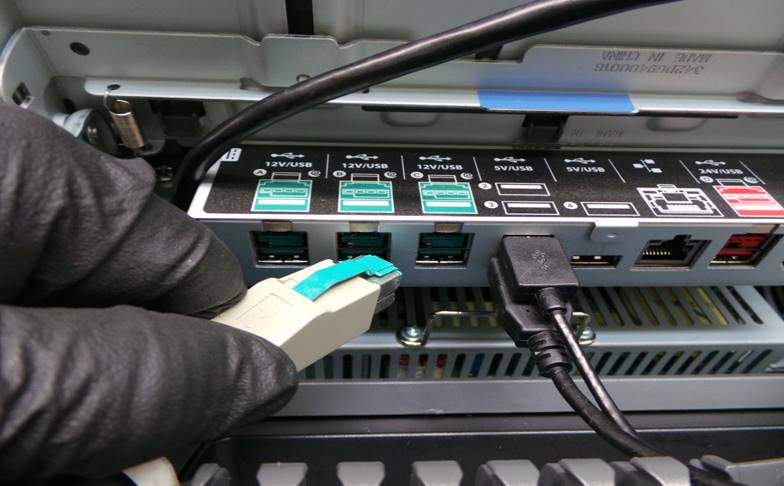
Cambie el cable de alimentación de corriente a los demás puertos de color verde y revise que el monitor secundario siga dando el tono al tocar la pantalla táctil.
Change the power cord to the other green ports and check that the secondary monitor continues to give the tone when you touch the touch screen.
Desinstale el monitor SurePOS 700.
Uninstall the SurePOS 700 monitor.
Apague la unidad.
Turn off the unit.
Desinstale el disco duro de pruebas.
Uninstall the test hard drive.
Instale el disco duro de la unidad.
Install the unit's hard drive.
LIMPIEZA O FORMATEO DE DATOS DEL DISCO DURO
CLEANING OR FORMATTING HARD DRIVE DATA
Instale el disco duro en el adaptador.
Install the hard drive in the adapter.
Instale el disco duro de la unidad en el módulo UNITEK.
Install the unit's hard drive into the UNITEK module.
Encienda el módulo UNITEK y conecte el cable de USB al puerto de la computadora.
Turn on the UNITEK module and connect the USB cable to the computer port.
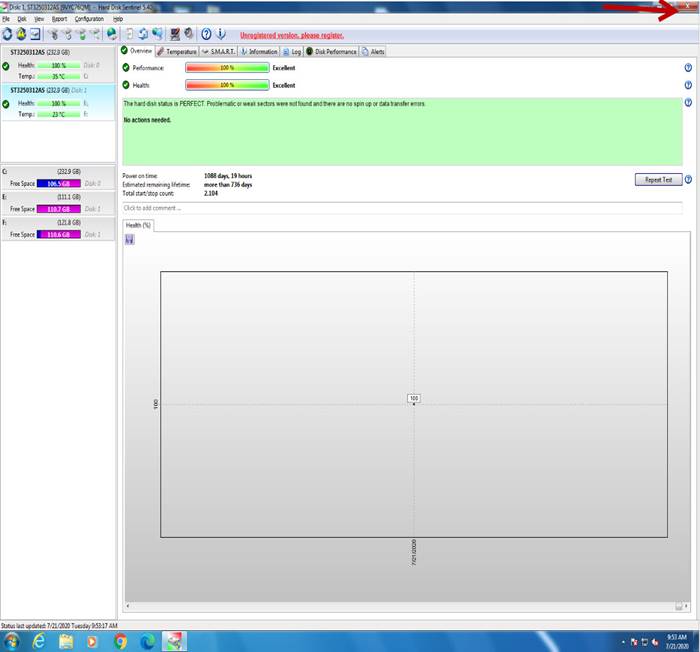
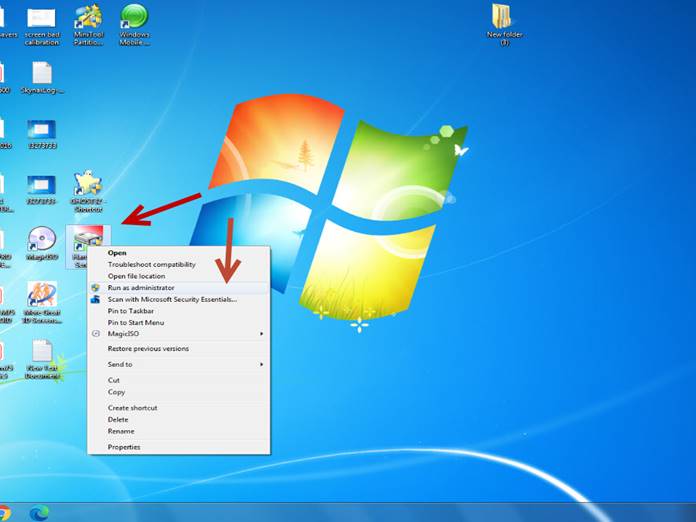
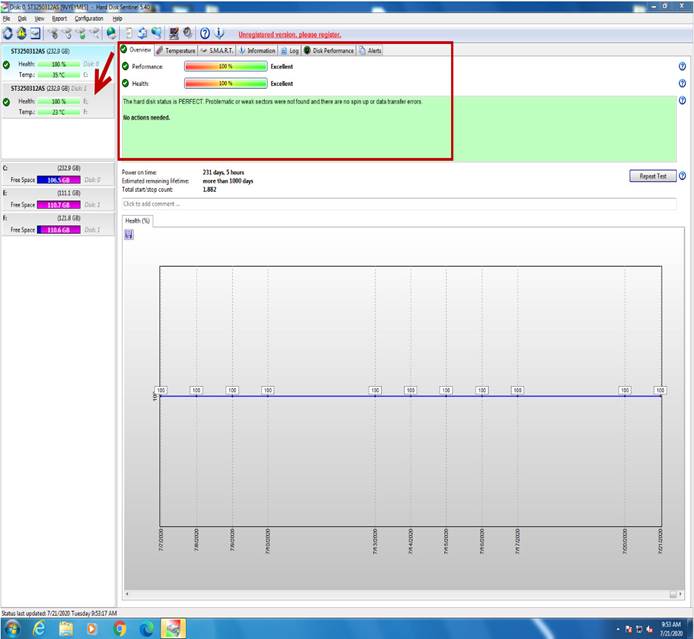
Ejecute el icono Hard Disk Sentinel como administrador.
Run the Hard Disk Sentinel icon as administrator.

Seleccione el disco para verificar los valores de Performance y Health, los cuales deben estar al 100% en caso de que alguno de los 2 este por debajo del 100%, el disco duro deberá ser reemplazado.
Select the disk to verify the Performance and Health values, which should be 100% in case any of the 2 is below 100%, the hard disk must be replaced.

Cierre el programa.
Close the program.
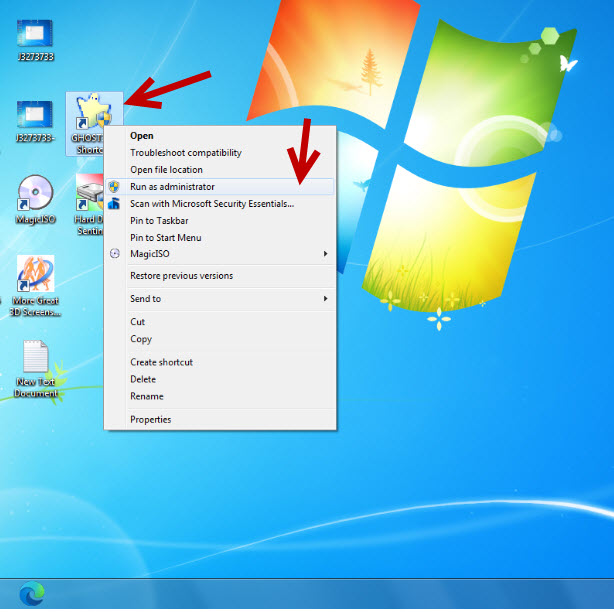
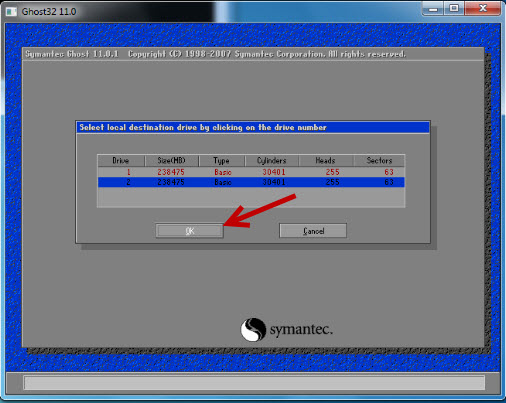
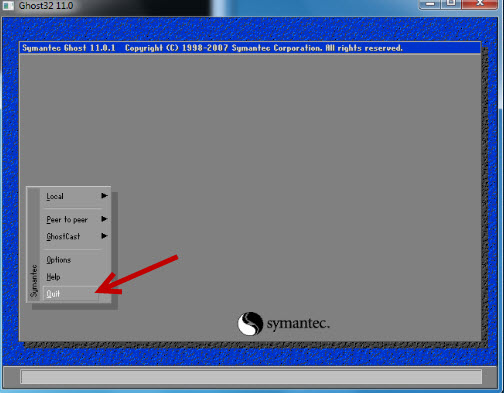
Ejecute el icono GHOST 32 Shortcut como administrador.
Run GHOST 32 Shortcut icon as administrator.
Seleccione – Select OK
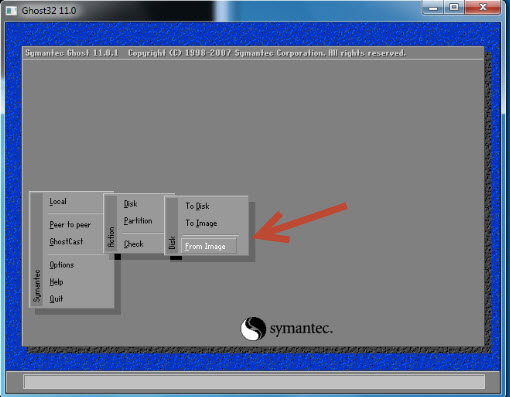
Seleccione – Select Local à Disk à From Image
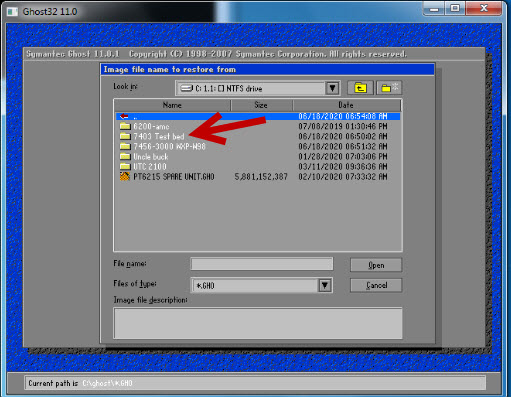
Seleccione cualquier imagen disponible, en este caso vamos a seleccionar 7403-Test bed.
Select any available image, in this case we are going to select 7403-Test bed.
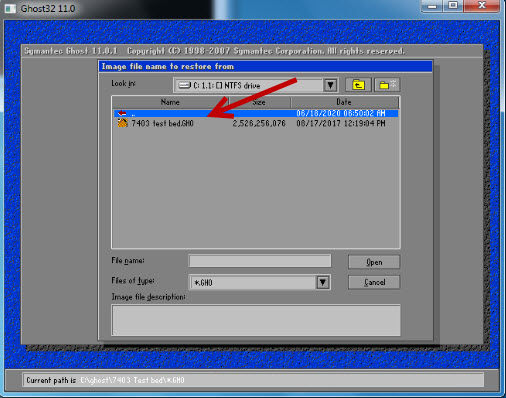
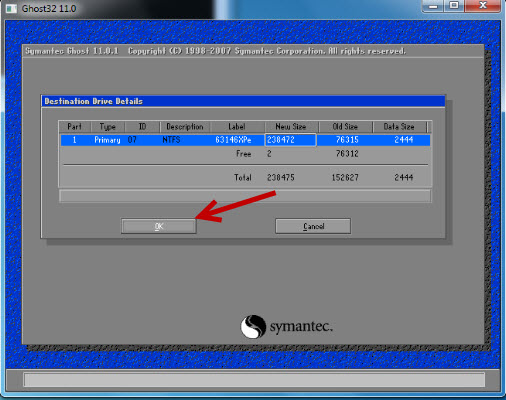
Vuelva a seleccionar la imagen.
Select the image again.
Seleccione – Select OK
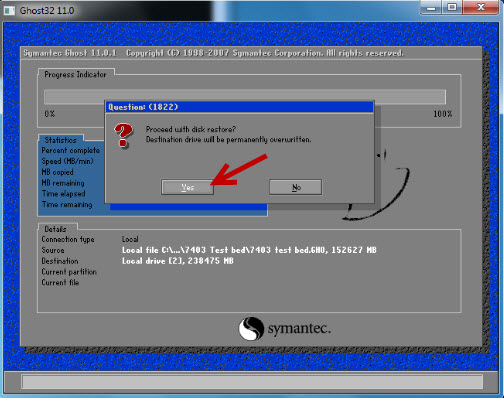
Seleccione – Select OK
Seleccione – Select Yes
Seleccione – Select Continue
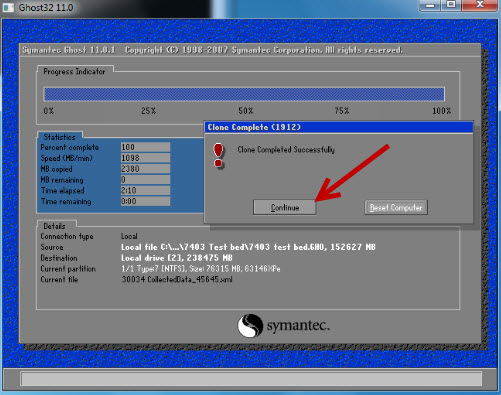
Seleccione – Select Quit
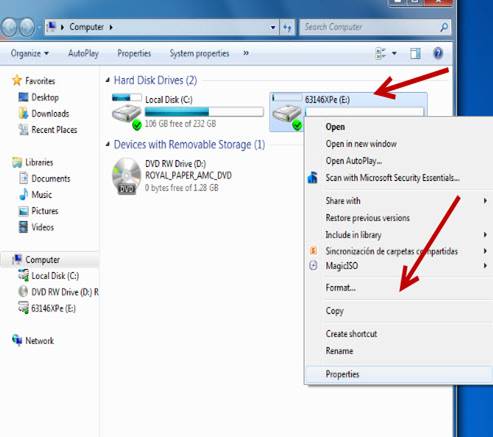
Seleccione Inicio
Select Start.
Seleccione – Select Computer
![]()
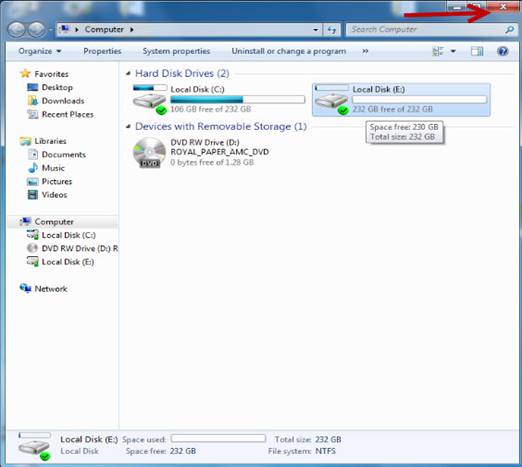
Seleccione el disco duro dando clic derecho y seleccione Format.
Select the hard drive by right-clicking and select Format.
Seleccione – Select Start
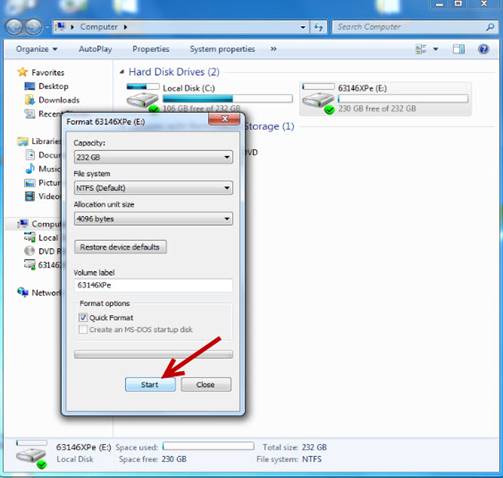
Seleccione – Select OK
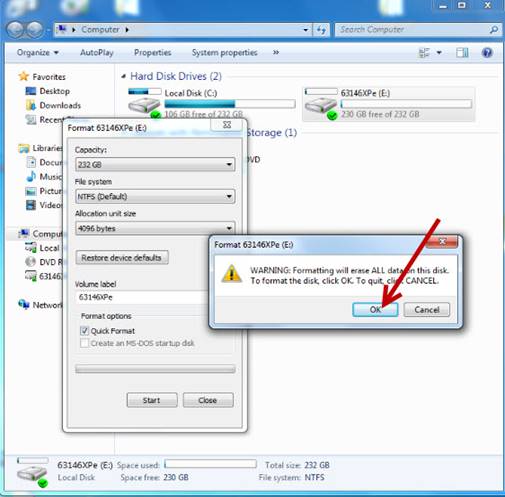
Seleccione – Select OK
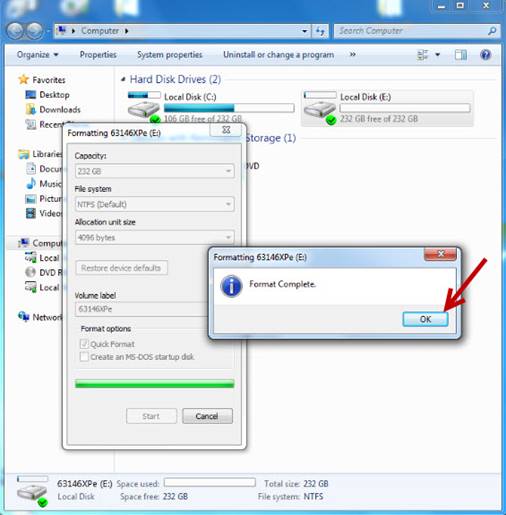
Seleccione – Select Close

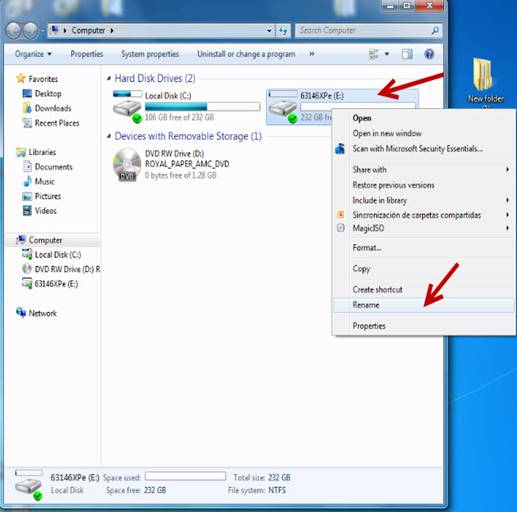
Seleccione nuevamente el disco dando clic derecho y seleccione Rename.
Select the disk again by right-clicking and select Rename.
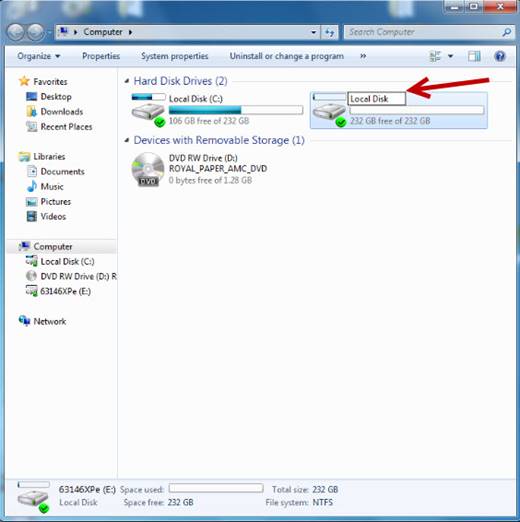
Renómbrelo como Local Disk.
Rename it as Local Disk.
Cierre la ventana de Computer.
Close the Computer window.
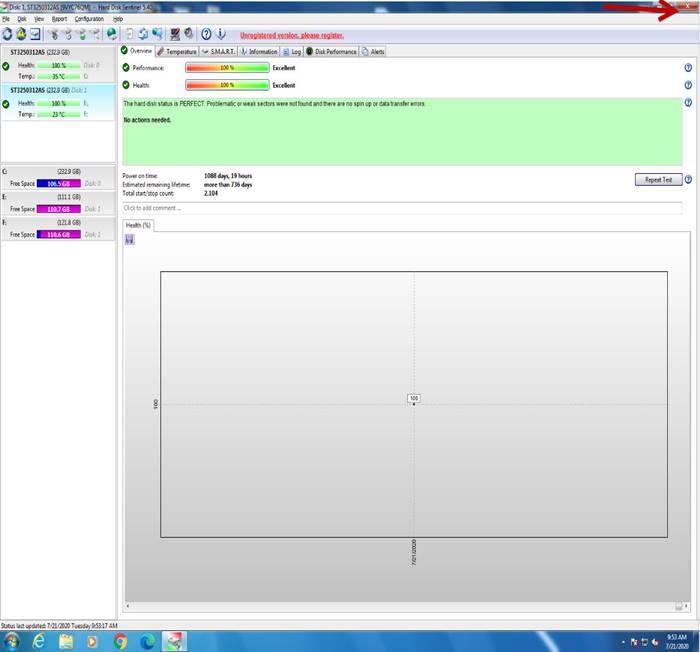
Ejecute nuevamente el icono Hard Disk Sentinel como administrador.
Run the Hard Disk Sentinel icon again as administrator.
Seleccione el disco para verificar los valores de Performance y Health, los cuales deben estar al 100% en caso de que alguno de los 2 este por debajo del 100%, el disco duro deberá ser reemplazado.
Select the disk to verify the Performance and Health values, which should be 100% in case any of the 2 is below 100%, the hard disk must be replaced.
Cierre el programa.
Close the program.
Desconecte el disco duro de forma segura.
Disconnect the hard drive safely.
Retire el disco duro del módulo UNITEK, desinstálelo del adaptador e instálelo en la unidad.
Remove the hard drive from the UNITEK module, place it back on its base and install it in the unit.
MANTENIMIENTO Y LIMPIEZA
MAINTENANCE AND CLEANING
Limpie el lector de tarjeta de crédito.
Clean the credit card reader.

Coloque la unidad con la pantalla hacia abajo.
Place the unit with the screen facing down.
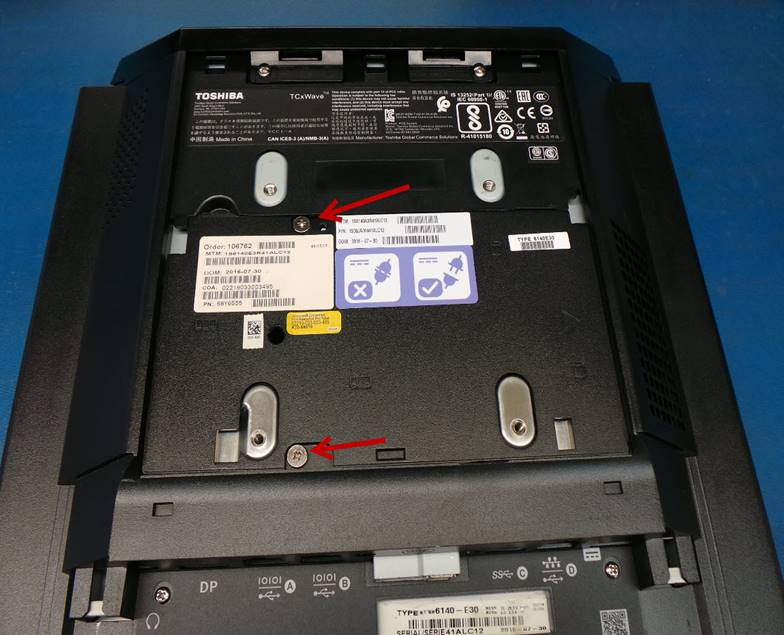
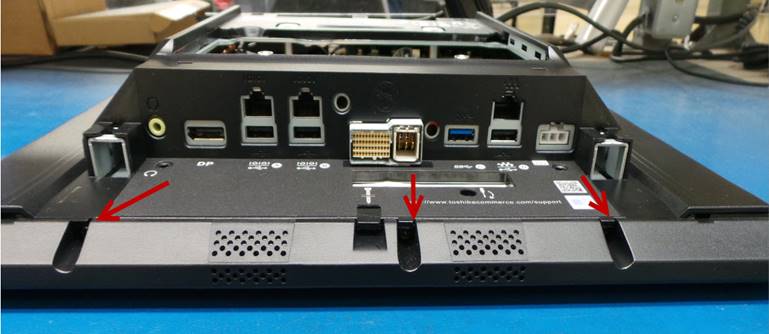
Desinstale la base de la unidad para hacerlo:
Uninstall the base of the unit by removing the 2 screws indicated in the image
Abra la cubierta de la interfaz y deslice la manivela hacia arriba hasta el tope.
Open the interface cover and slide the crank up as far as it will go.
Después de que la manivela llego al tope cierre la cubierta de la interfaz.
After the crank has reached the stop, close the interface cover.

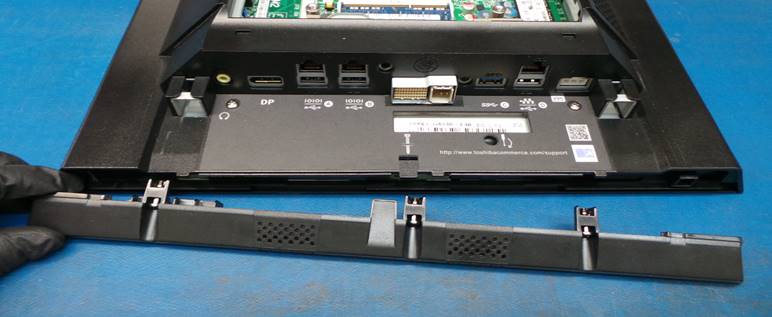
Separe la unidad de la base.
Detach the unit from the base.

Desinstale la cubierta trasera, para hacerlo deslícela en la misma dirección que la flecha.
Uninstall the back cover, to do so slide it in the same direction as the arrow.

Suelte los 2 tornillos para desinstalar la cubierta del disco duro y memoria RAM.
Loosen the 2 screws to uninstall the hard drive and RAM cover.

Levante la cubierta para tener acceso a la Tarjeta Madre.
Lift the cover to access the Motherboard.
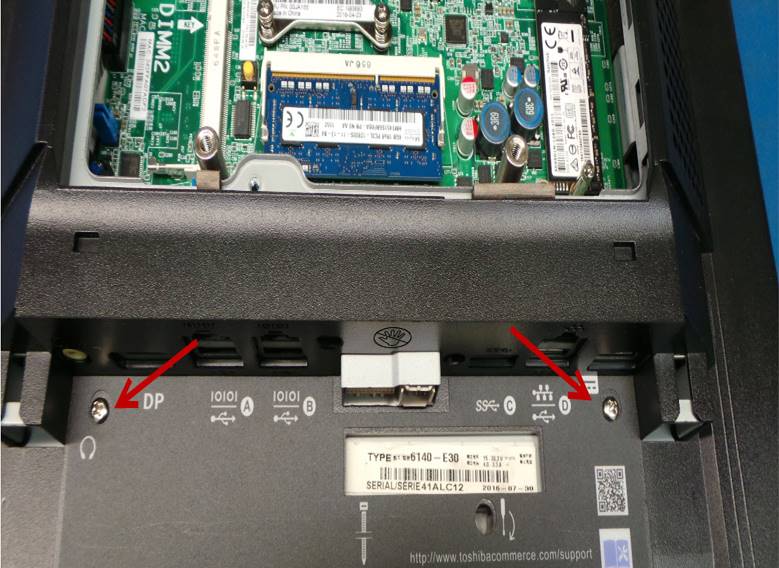
Destornille los tornillos señalados en la imagen:
Unscrew the screws indicated in the image:
Desinstale el display.
Uninstall the display.
Destornille los tornillos señalados en la imagen:
Unscrew the screws indicated in the image:
Desinstale la cubierta inferior.
Remove the bottom cover.
Destornille los tornillos señalados en la imagen
Unscrew the screws indicated in the image
Deslice la cubierta un poco hacia atrás y luego levántela para desinstalarla.
Slide the cover back a little and then lift it up to uninstall.
Realice una inspección visual en la Tarjeta Madre.
Perform a visual inspection on the Motherboard.
En caso de que encuentre capacitores reventados, reemplácelos.
In case you find busted capacitors, replace them.
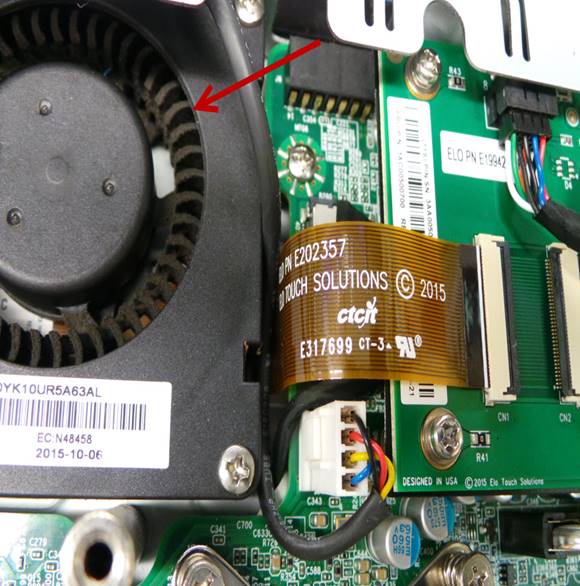
Limpie toda la suciedad y polvo del abanico.
Clean all dirt and dust from the fan.
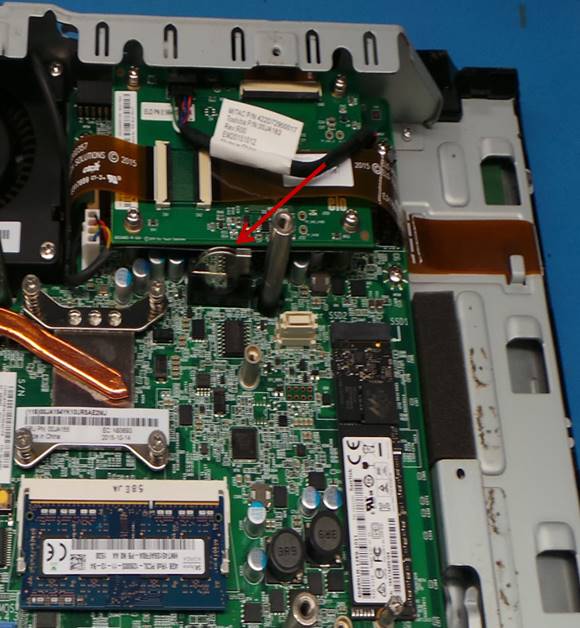
Mida el voltaje de la batería de litio, si es menor de 3.0V reemplace la batería.
Measure the voltage of the lithium battery, if it is less than 3.0V replace the battery.
Instale todas las cubiertas.
Install the cover and tighten the screws.
Desinstale la fuente de poder para limpiarla y realice una inspección visual, en caso de que encuentre capacitores reventados reemplácelos.
Uninstall the power supply to clean it and perform a visual inspection, in case you find burst capacitors replace them.
PRUEBA FINAL
FINAL TEST
Encienda la unidad.
Turn on the unit.
Apague la unidad.
Turn off the unit.
ASEGURAMIENTO DE CALIDAD
QUALITY ASSURANCE
Pida a una inspectora de Calidad que realice las pruebas a la unidad.
Ask a Quality Inspector to test the unit.
Todas las pruebas deben realizarse con el disco duro de prueba.
All tests must be done with the test hard drive.
Si la unidad pasa todas las pruebas, desinstale el disco duro de pruebas e instale el disco duro con el que será enviada la unidad. Envíe al área de empaque.
If the unit passes all tests, uninstall the testing hard drive and install the hard drive that the unit will be shipped with. Send to the packing area.
FALLAS COMUNES
COMMON FAILURES
|
FALLA |
POSIBLES CAUSAS |
SOLUCION |
|
No funciona pantalla táctil |
Pantalla táctil defectuosa |
Reemplace la pantalla táctil |
|
|
|
|
|
FAULT |
POSSIBLE CAUSES |
SOLUTION |
|
Touch screen does not work |
Defective touch screen |
Replace touch screen |
|
|
||||||
|
Revision / Revisión: 00 |
Revision Date / Fecha de revisión: 9/7/20 |
Name / Nombre: S Anaya |
Update / Actualización: New document Nuevo documeno |
Approval / Aprobado por: Tom St John |
||
|
01 |
9/20/20 |
K Tovar |
Translation Traducción |
Tom St John |
||