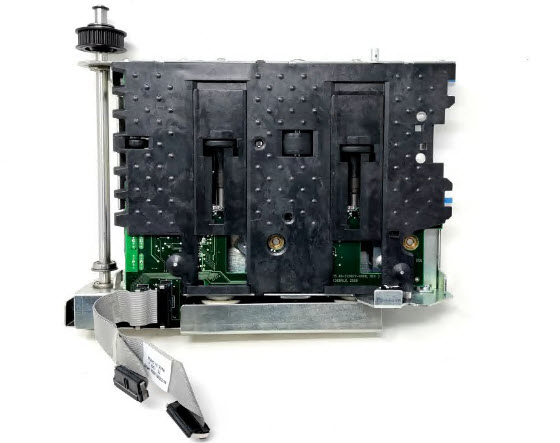
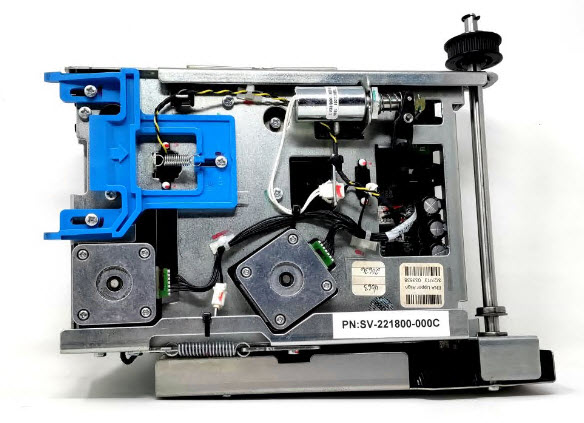
WI# 1335 ALIGN UPPER
SV221800000C
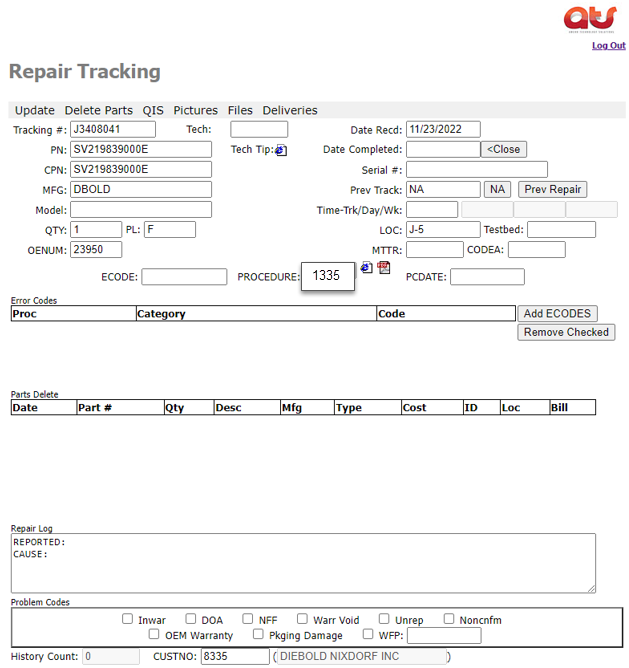
Introduzca la información del Tracking # en la página de reparación
Enter the Tracking # information on the repair page
|
|
Requerirá los siguientes elementos:
The following items are required:
§ Cama de prueba y sus accesorios
Test bed and its accessories
|
|
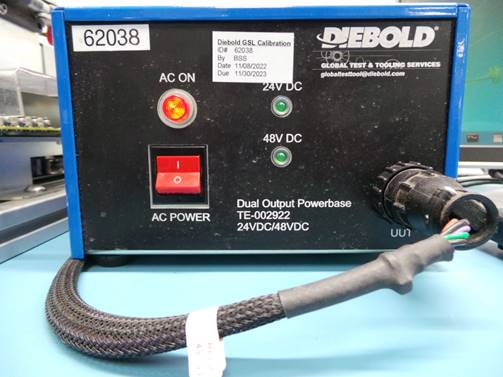
§ Fuente de 24V – 48V
24V – 48V power supply
|
|
PROCEDIMIENTO DE MANTENIMIENTO Y REPARACION
Maintenance and Repair Procedure
Paso 1
Step 1
|
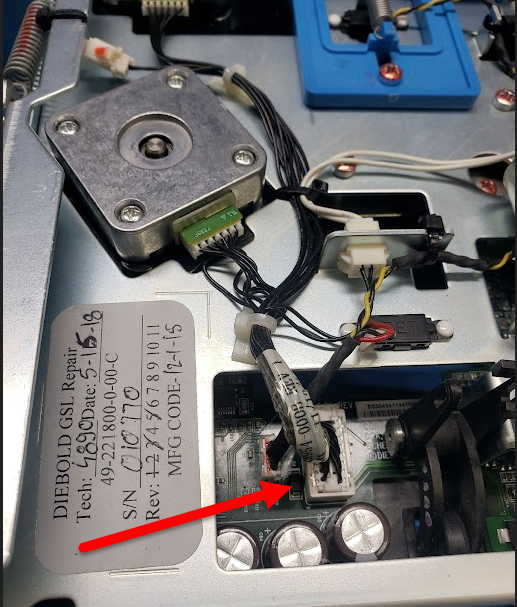
Retirar 3 trornillos para quitar el cover de la banda. |
|
Remove 3 screws to remove the belt cover. |
|
|

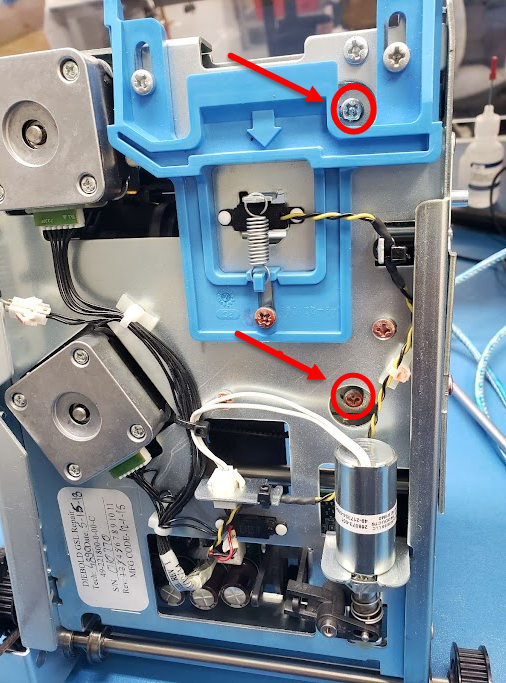
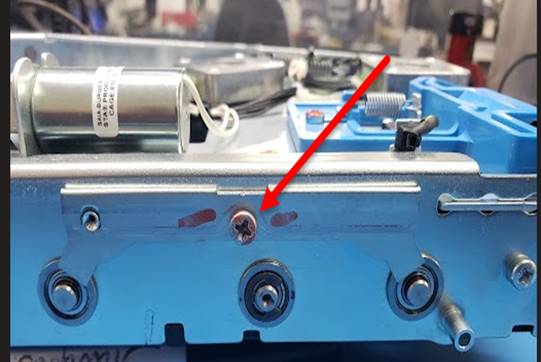
Paso 2
Step 2
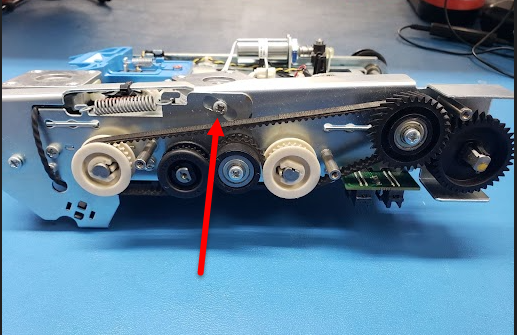
Afloje el tornillo para poder quitar la banda. Cuando ponga tensión al aflojar la banda atornille bien para que la banda quede floja.
loosen the screw to can remove the belt. When putting tension when loosening the belt, screw well so that the belt is loose.
|

Paso 3
Step 3
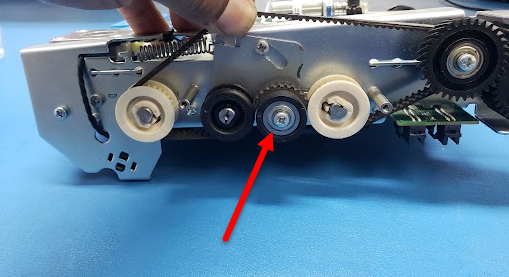
Remover tornillo para quitar la banda y quitar el rodillo.
Remove screw to remove belt and remove roller.
|
|
|
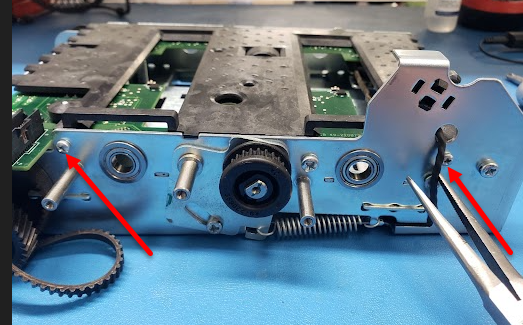
Paso 4
Step 4
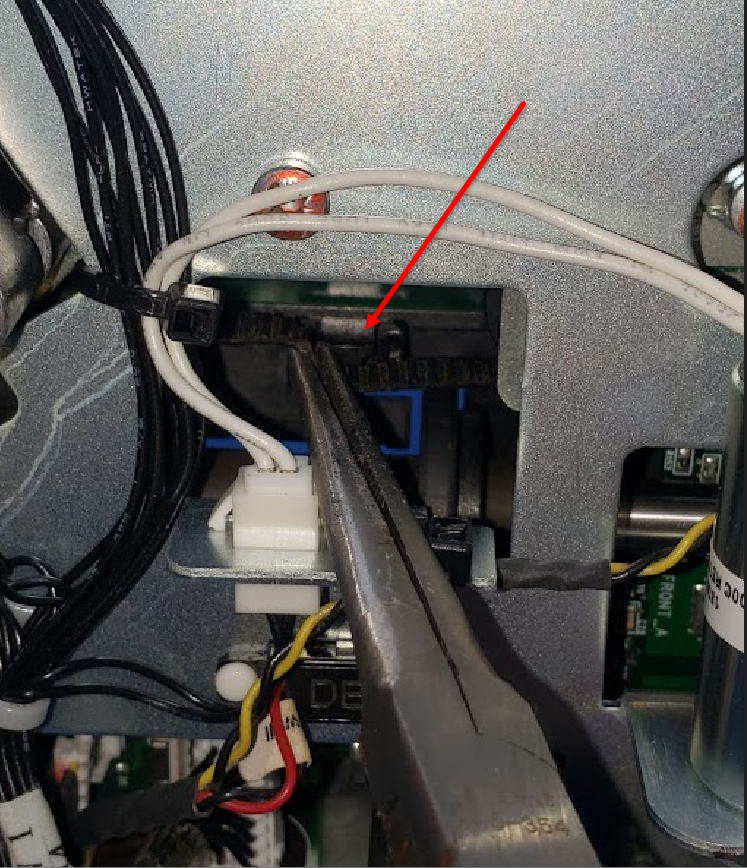
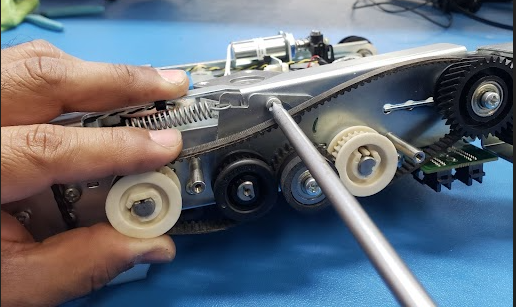
Aflojar los 2 tornillos para poder quitar la banda de su guía utilizando unas pinzas de punta. Sujetas la banda y jalar hacia arriba.
Loosen the 2 screws to be able to remove the band from its guide using nose pliers, Grab the band and pull up.
|
|
|
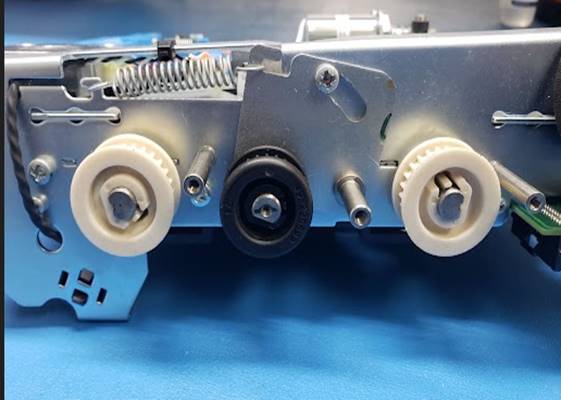
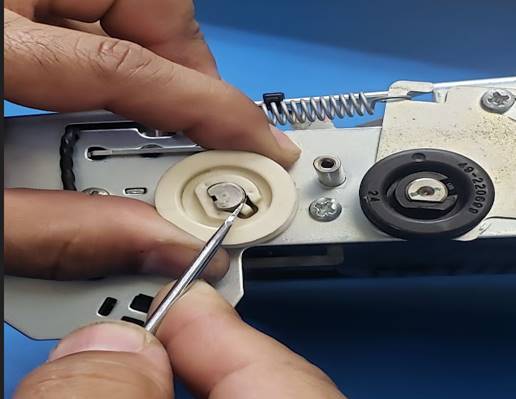
Paso 5
Step 5
|
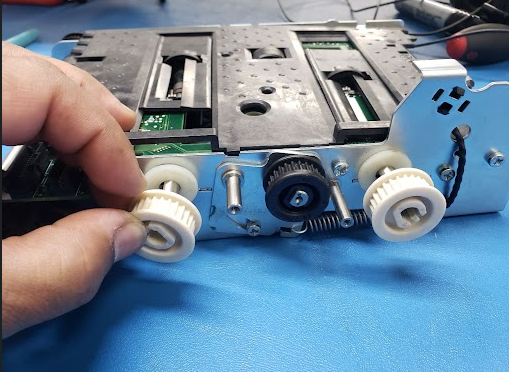
Remover los engranes blancos y las arandelas blancas. Remove the white gears and the white washers. |
|
|
|
|
.
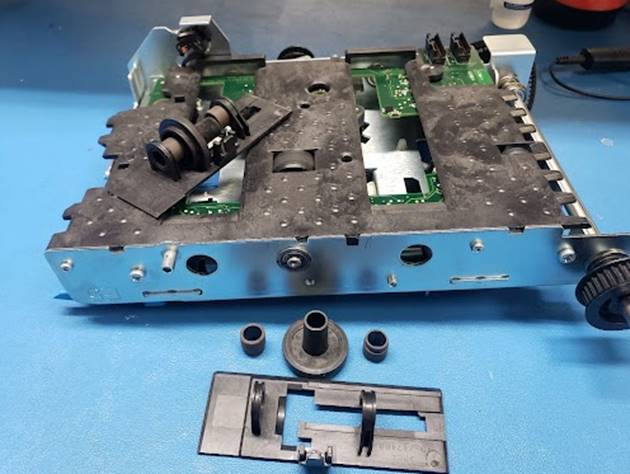
Paso 6
Step 6
|
Remover el tornillo para quitar el sujetador de balero, retirar los pernos. Remove the screw to remove the bearing holder, remove the shaft.
|
||
|
||
|
|

.
Paso 7
Step 7
Remover las 2 guías con precaución porque estas constan de 3 piezas.
Remove the 2 guides with caution because they consist of 3 pieces.
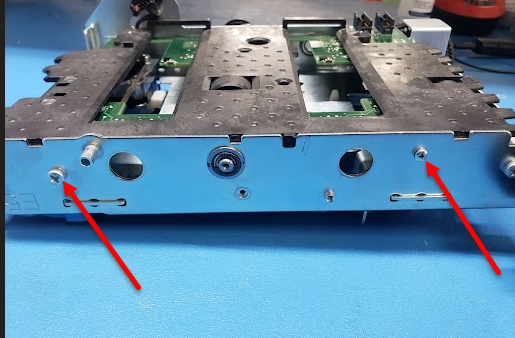
Paso 8
Step 8
Remover 4 tornillos que sujetan el platen de plástico, 2 tornillos de cada lado.
Remove 4 screws that hold the plastic platen, 2 screws on each side.
|
|
|
Paso 9
Step 9
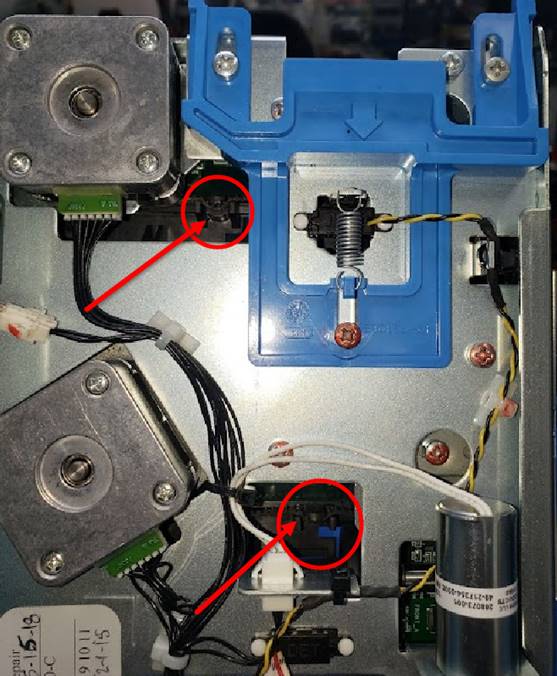
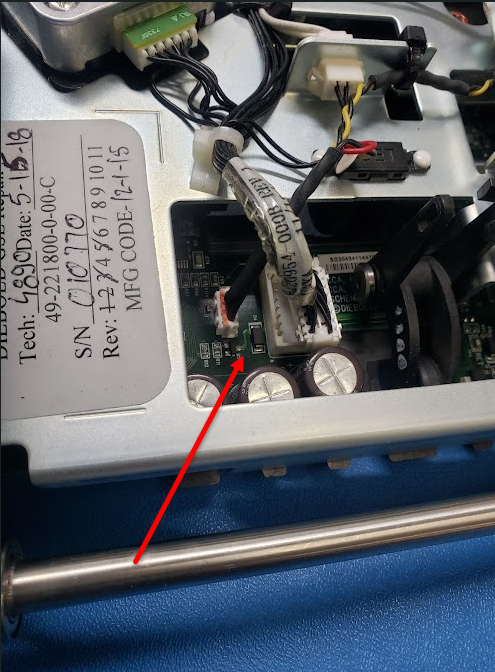
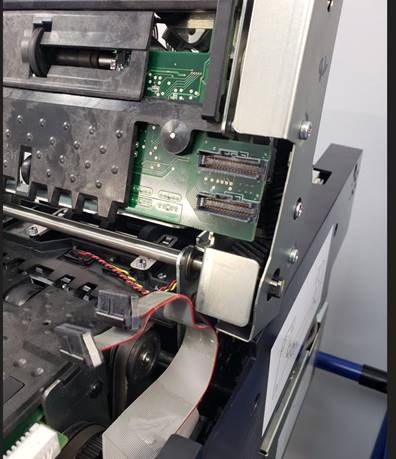
Desconectar los arneses que van a la tablilla.
Disconnect the harnesses that go to the board.
Paso 10
Step 10
Ejercer presión hacia arriba para liberar el platen de plástico del chasis.
Push up to release the plastic platen from the chassis.

Paso 11
Step 11
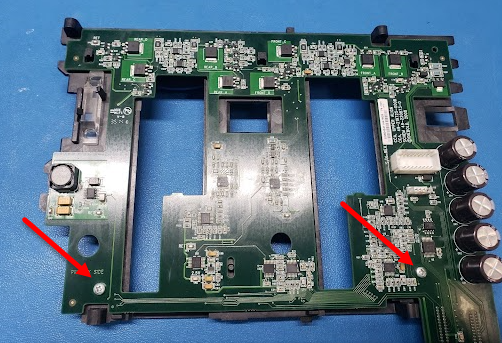
Remover 2 tornillos para separar la tablilla del platen de plástico, asegurarse que los sensores y el cristal estén limpios y libres de polvo.
Remove 2 screws to separate the plate from the plastic plate, make sure that the sensors and the light pipe are clean and free of dust.
|
|
|
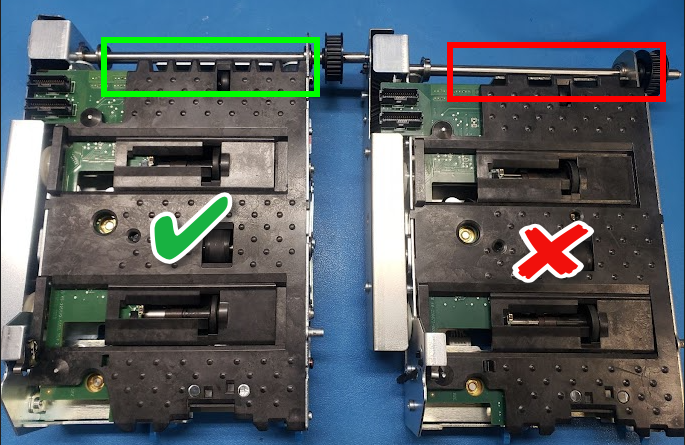
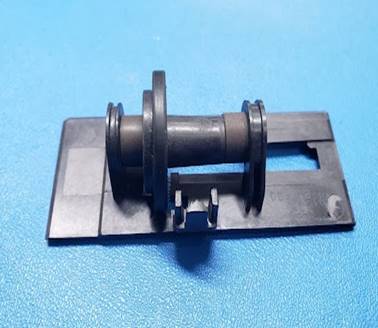
Nota: para el platen de plastico hay 2 versiones la nueva tiene 7 dientes y la vieja 3 dientes, es necesario siempre enviar los Align Upper con la version nueva.
Note: for the plastic plate there are 2 versions, the new style has 7 teeth and the old style has 3 teeth, it is always necessary to send the Align Upper with the new version.
Paso 12
Step 12
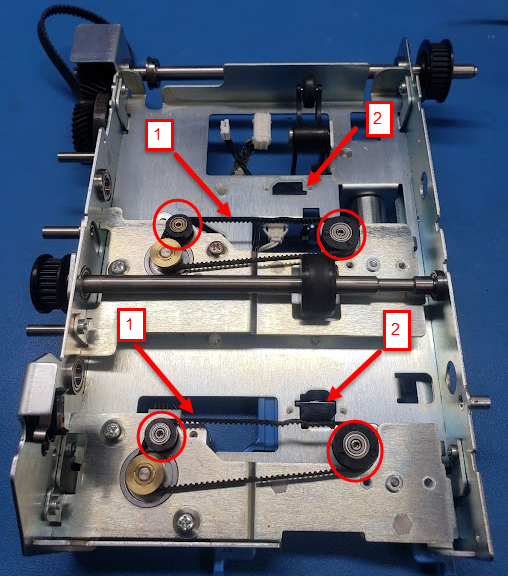
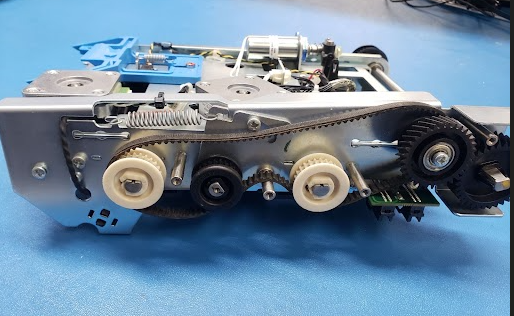
Revisar que los Rodillos giren libremente, 1 quitar la banda, 2 limpiar los cristales de los sensores, cerciorarse que todo el chasis esta limpio.
Check that the Rollers rotate freely, 1 remove the band, 2 clean the crystals of the sensors, make sure that the entire chassis is clean.
|
|
|
|
Paso 13
Step 13
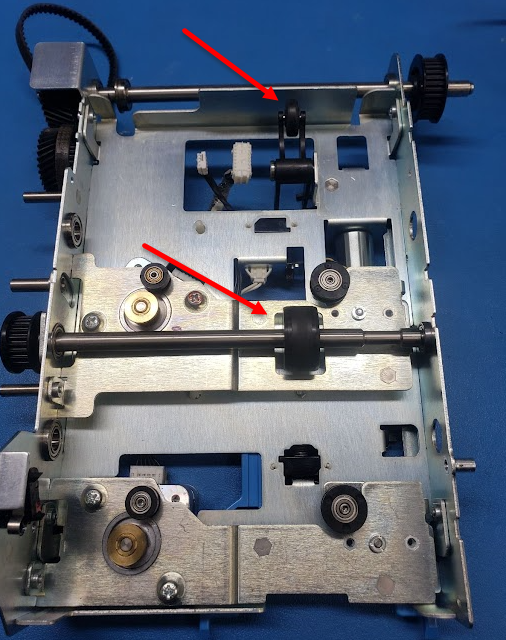
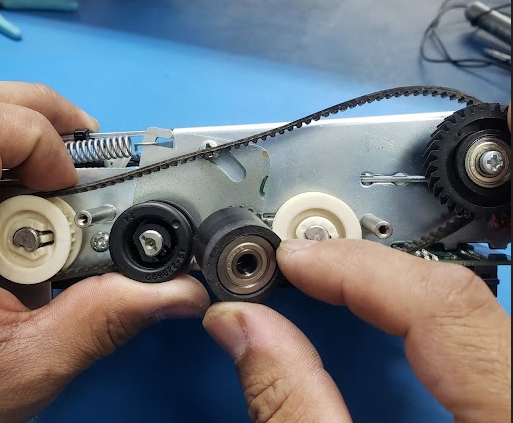
Revisar que los rodillos estén en buenas condiciones, limpios y que giren libremente.
Check that the rollers are in good condition, clean and that they rotate freely.
Nota: Revisar que todas las partes esten limpias y que no tengan daños fisicos antes de reensamblar el align upper.
Note: Check that all parts are clean and free of physical damage before reassembling the align upper.
Ensamble
Assembly
Paso 1
Step 1
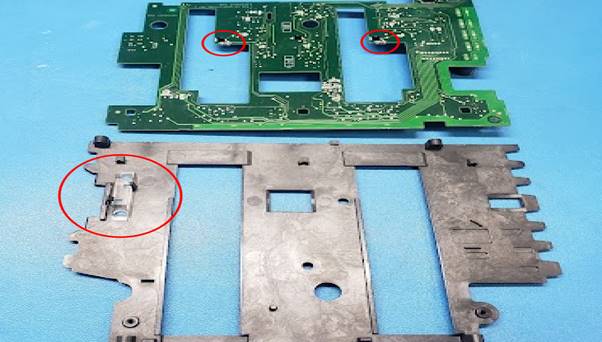
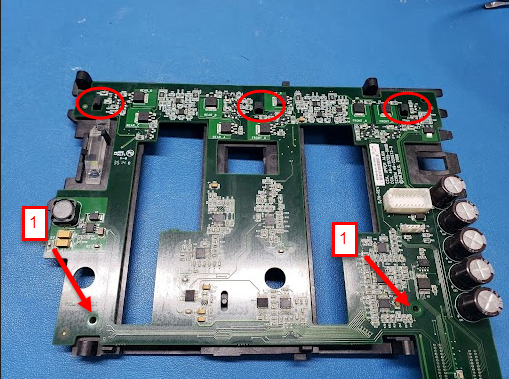
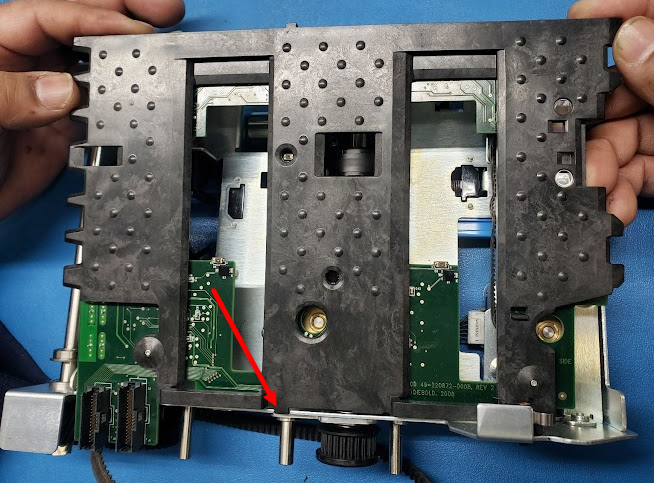
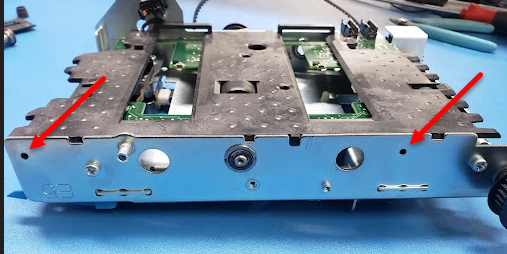
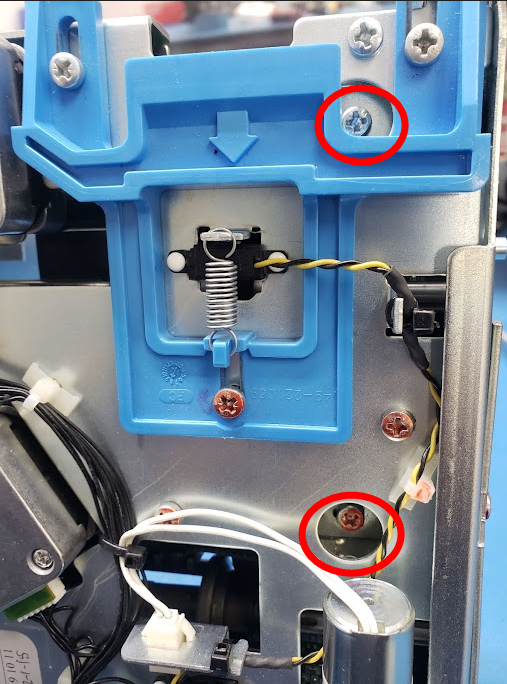
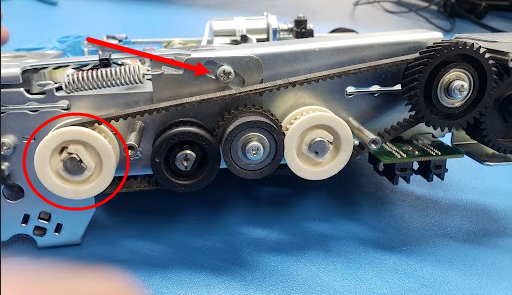
Colocar la tablilla en el platen de plástico asegurándose que este bien pocisionada, tiene 3 guias en el plástico maracadas con un círculo rojo.
1 colocar los tornillos de la tablilla.
Place the board on the plastic plate making sure it is well positioned, it has 3 guides on the plastic marked with a red circle.
1 place the screws of the board.
Paso 2
Step 2
|
Colocar las bandas en los engranes
|
Paso 3
Step 3
Colocar el platen sobre el chasis, asegurándose que la guía del platen este en el lugar indicado sobre el chasis.
Place the platen on the frame, making sure that the platen guide is in the indicated place on the chassis.
Paso 4
Step 4
Colocar los tornillos que sujetan al platen en el chasis, 2 tornillos de cada lado.
Place the screws that hold the plate to the chassis. 2 screws on each side.
Paso 5
Step 5
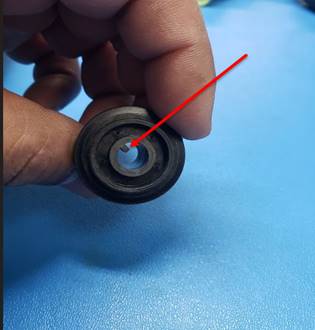
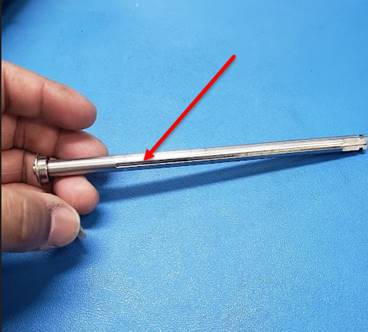
El rodillo y el perno tienen unas guías que deben de quedar ensambladas correctamente, colocar las partes de esa manera para hacer el ensamblado.
The roller and the shaft have some guides that must be assembled correctly, place the parts in that way to assemble.
|
|
|
|
Paso 6
Step 6
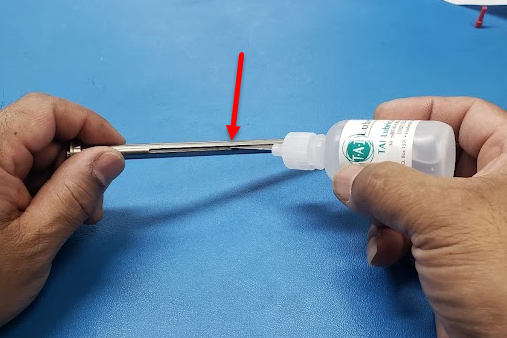
El perno debe ser lubricado con una pequeña cantidad de aceite sintético 179.
The shaft should be lubricated with a small amount of synthetic oil 179.
Paso 7
Step 7
Colocar la guia el el platen al mismo tiempo introducer el perno, recordadno que las guias del rodillo y el perno debeb de ensamblar correctamente.
Place the guide on the plate at the same time insert the pin, remember that the roller guides and the pin must be assembled correctly.

Paso 8
Step 8
Colocar el sujetador del balero.
Install the bearing holder.

Paso 9
Step 9
Colocar las arandelas y los engranes blancos.
Install the washers and the white gears.
Paso 10
Step 10
Colocar las bandas en su guía utilizando unas pinzas de punta.
Place the bands in their guide using nose pliers.
Paso 11
Step 11
Apretar los tornillos de ajuste de las bandas.
Tighten the belt adjustment screws.
Paso 12
Step 12
Conectar los cables a la tablilla.
Connect the wires to the board.
Paso 13
Step 13
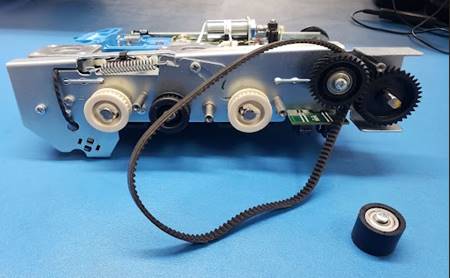
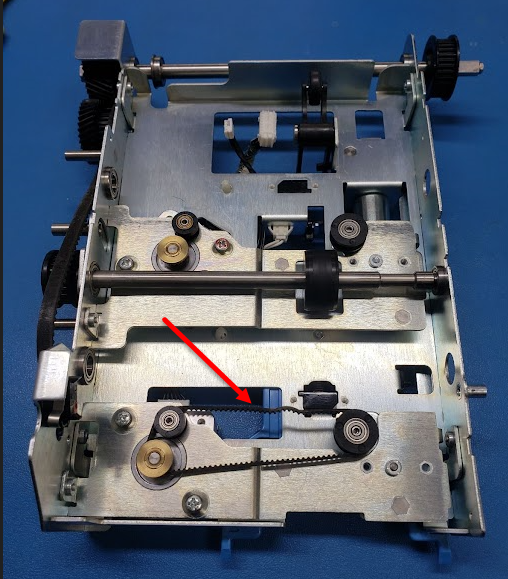
Colocar la banda de esta forma.
install the band like this.
Paso 14
Step 14
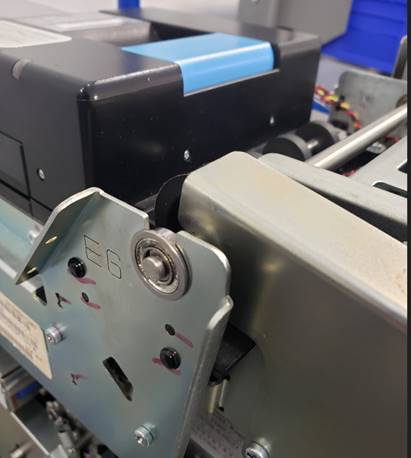
Colocar el rodillo de ajuste.
Install the adjustment roller.
Paso 15
Step 15
Aflojar el tornillo de ajuste.
Loosen the adjustment screw.
Paso 16
Step 16
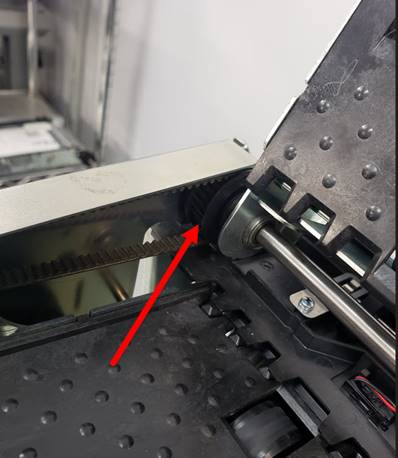
Dar 3 vueltas al engrane blanco para que la banda se acomode y apretar el tornillo de ajuste.
Turn the white gear 3 turns to adjust the belt and tighten the adjustment screw.
Paso 17
Step 17
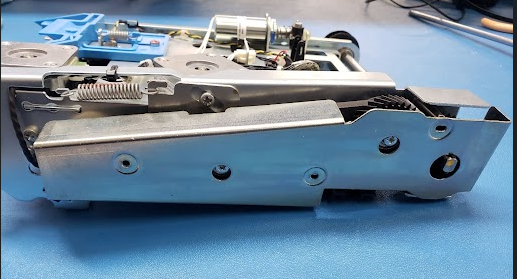
Colocar el cover de la banda.
Install the cover of the band.
|
|
|

Paso 19
Step 19
La unidad se envía a el área de calidad.
Unit is send to the quality area.
Prueba de Calidad
Quality Test
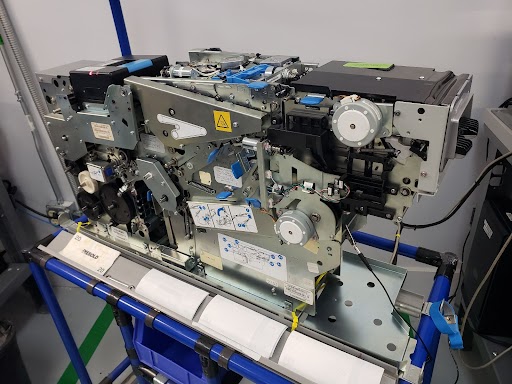
El Aling upper se instala en su estación de prueba.
Aling upper settles into the test station.
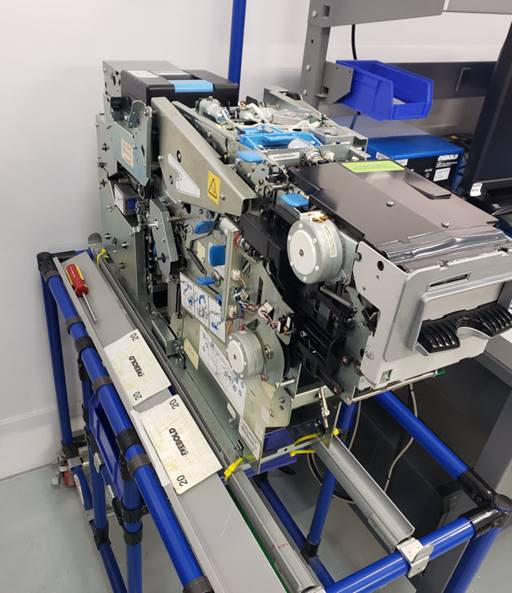
Se hacen las siguientes conexiones e instalación de bandas.
Do the following connections and installation.
|
|
|
|
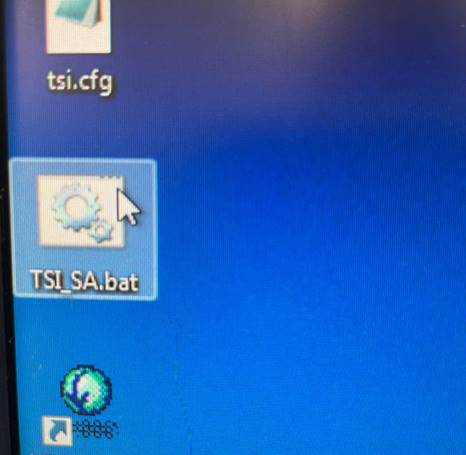
Seleccionamos TSI_SA.bat en la computadora de prueba.
Select TSI_SA.bat in the test station.
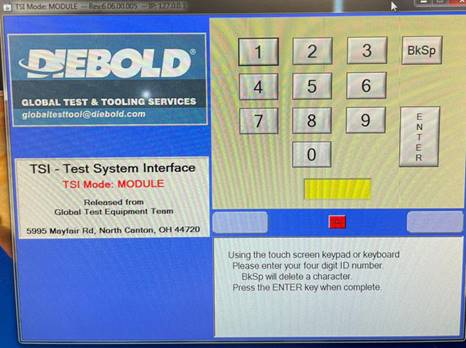
Ingresa en el siguiente recuadro el código de acceso: 9999 y
presiona Enter.
Enter the access code: 9999 and press Enter.
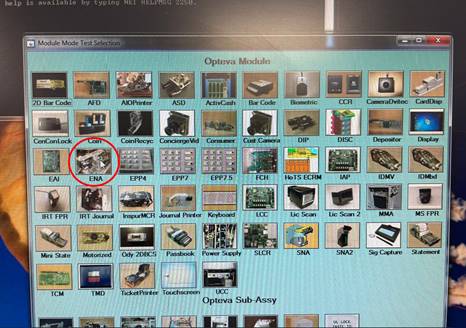
Seleccionar el programa: ENA.
Select the program: ENA.
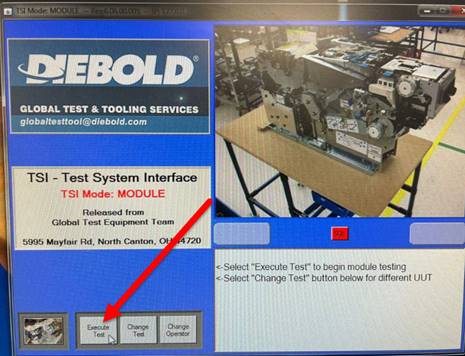
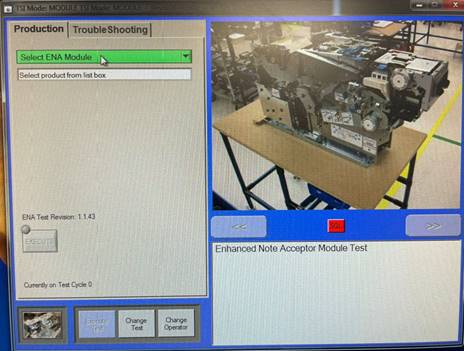
Selecciona: Execute Test.
Select: Execute Test.
A continuación, presiona Select product from list.
Click on: Select product from the list.
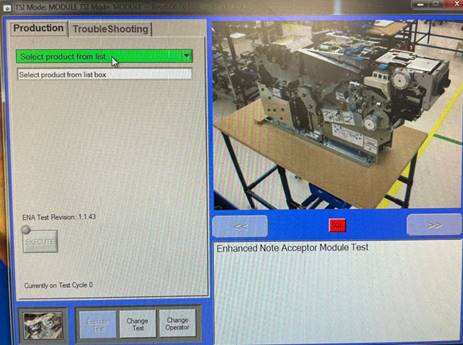
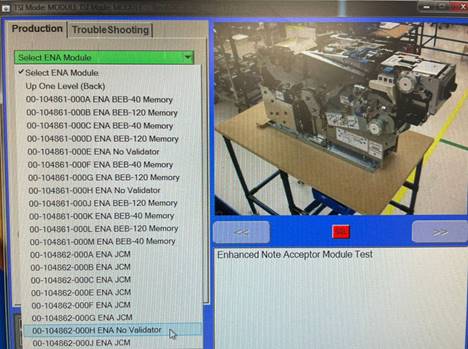
Se abrirá un listado, selecciona: ENA MODULE.
A list will appear, select: ENA MODULE.

Seleccionar: ENA MODULE.
Select: ENA MODULE.
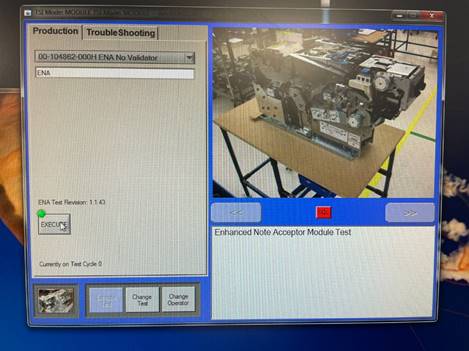
Elegir: 00- 104862-000H ENA No Validator.
Choose: 00- 104862-000H No Validator.
Presionar recuadro EXECUTE.
Press: EXECUTE.
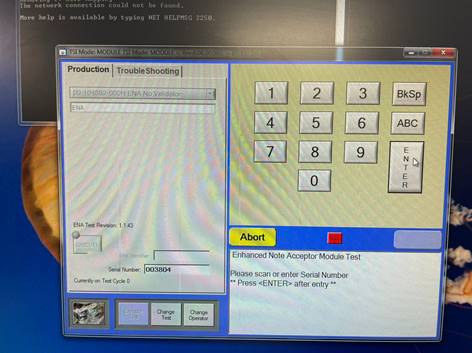
Ingresa el numero de serie de la unidad y presiona Enter.
Enter the Serial number and press Enter.
A continuacion, Seguir los pasos que aparecen en la app de prueba.
Follow the steps that appear in the trial app.
Al terminar con la prueba:
When the test is finish:
1. Cerrar la App ENA.
2. Esperar a que los LEDs indicadores se apaguen.
3. Apagar la fuente 24-48 V.
4. Desconectar el Aling upper.
1. Close the App ENA.
2. Wait until the indicator LEDs shut down.
3. Turn off the 24-48 V source.
4. Disconect Aling upper.
Llenar la informacion que corresponda en la pagina de ATS y colocar el Align Upper en una bolsa antiestatica, para ser enviado a el area de empaque.
Fill out the appropriate information on ATS page and put the Align Upper in an anti-static bag, to be sent to the packing area.