WI# 1277 USHERMAN PRINTER
DPP-250
|
|
|
|
|
|

PRUEBAS / TESTS
Presione al mismo tiempo los botones  suelte
el botón
suelte
el botón  y mantenga presionado el botón
  por
1 segundo, suelte el botón
por
1 segundo, suelte el botón 
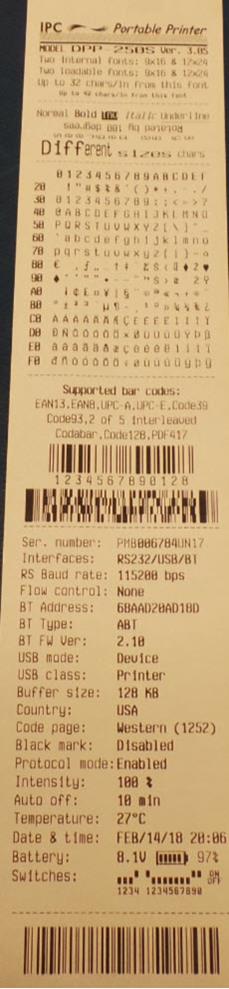
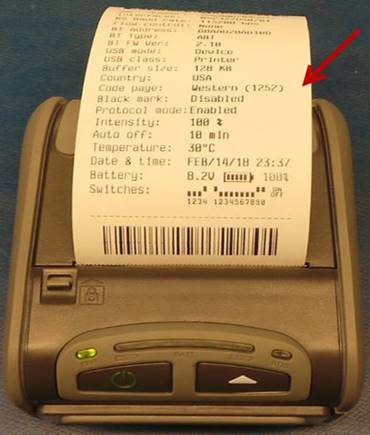
después de escuchar un beep, la impresora realizara una impresión de autodiagnóstico corta. Revise que las interfaces RS232/USB/BT estén presentes.
Press the buttons at the same time  release the button
  and hold the button
  for 1 second, release the button
  after hearing a beep, the printer will make a short
self-diagnostic print. Check that the RS232 / USB / BT interfaces are
present.
after hearing a beep, the printer will make a short
self-diagnostic print. Check that the RS232 / USB / BT interfaces are
present.
|
|
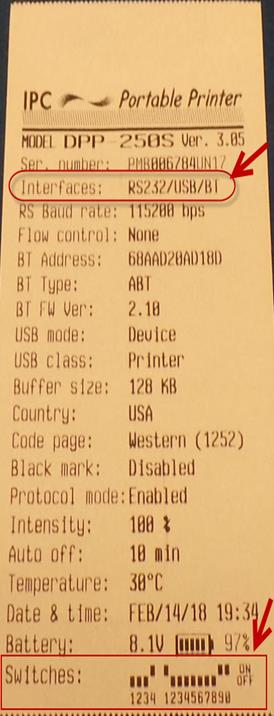
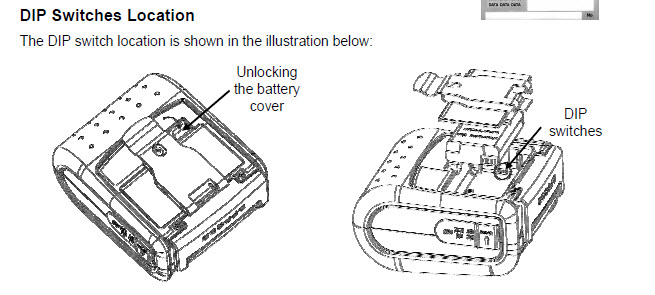
Revise que la configuración de los interruptores sea igual a como están señalados en la impresión, ya que esa es la configuración por defecto. En caso de que la configuración sea diferente cámbiela a la configuración por defecto.
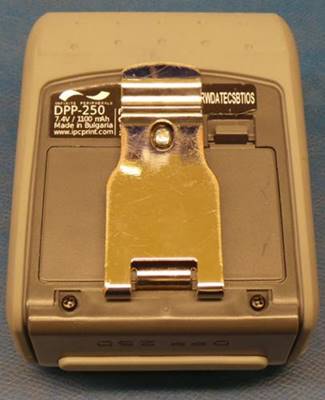
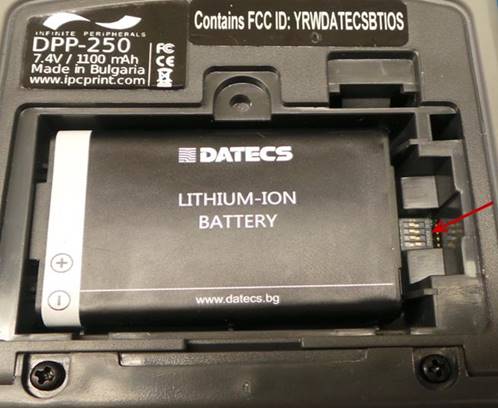
Los interruptores 1 - 4 se encuentran en la parte de abajo de la impresora, para tener acceso a ellos desinstale la cubierta de la batería.
Check that the configuration of the switches is the same as they are indicated in the printing, since that is the default configuration. In case the configuration is different, change it to the default configuration.
Switches 1-4 are located at the bottom of the printer, to access them uninstall the battery cover.
|
|
|
|
|
|
Apague la impresora.
Turn the printer off.
Presione al mismo tiempo los botones  suelte
el botón
suelte
el botón  y mantenga presionado el botón
  por
5 segundos, suelte el botón
por
5 segundos, suelte el botón
después de escuchar 3 beeps, la impresora realizara una impresión de autodiagnóstico larga. Revise la calidad de la impresión.
Press these buttons at the same timerelease the button
for 5 seconds, release the button
after hearing 3 beeps, the printer will make a long self-diagnostic print. Check the quality of the print.
|
|
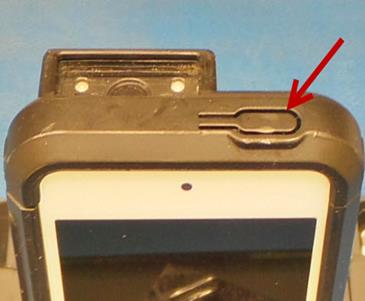
Utilice el iPod de prueba instalado en un sled LP5.
Encienda el iPod presionando el botón que se encuentra en la parte superior.
Use the test iPod installed on an LP5 sled.
Turn the iPod on by pressing the button at the top.
|
|
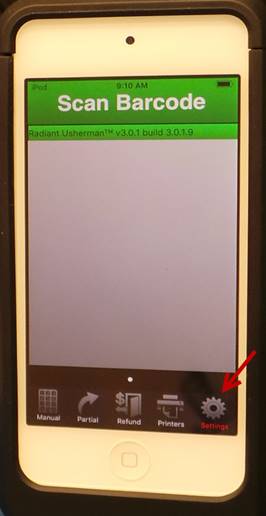
Una vez que el iPod este encendido, ejecute la aplicación de USHERMAN y seleccione configuraciones (Settings).
Once the iPod is on, run the USHERMAN application and select Settings.
|
|
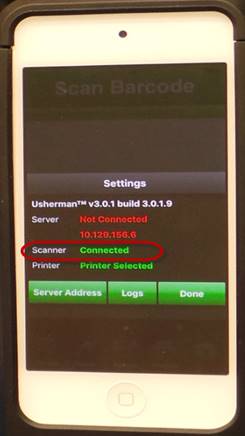
El estatus del lector de códigos debe ser ‘Connected’.
The status of the code reader must be ‘Connected’.
|
|
En la aplicación de Usherman seleccione Printers.
In the Usherman application select Printers.
|
|

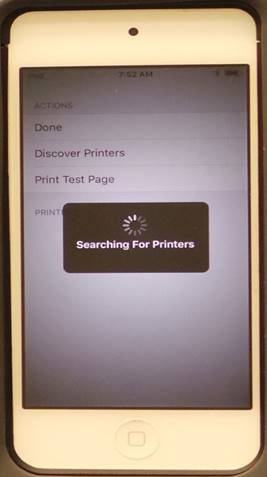
Seleccione Discover Printers.
Select Discover Printers.
|
|

Iniciara la búsqueda de la impresora.
The printer search will start.
|
|
Una vez que la impresora sea localizada, aparecerá IPC DPP-250.
Once the printer is located, IPC DPP-250 will appear.
|
|
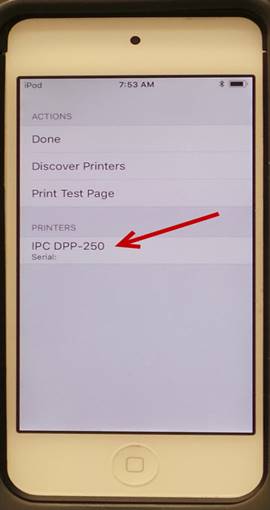
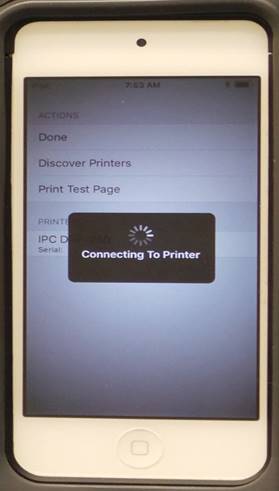
Seleccione IPC DPP-250 para vincular la impresora.
Select IPC DPP-250 to link the printer.
|
|
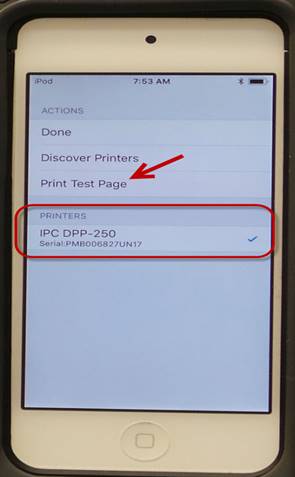
Una vez vinculada aparecerá el número de serie de la impresora; seleccione Print Test Page.
Once linked, the serial number of the printer will appear; select Print Test Page.
|
|
La impresora imprimirá la página de prueba.
The printer will print the test page.
|
|

Seleccione Done para terminar.
Select Done to finish.
|
|

Apague la impresora y el iPod.
Turn off the printer and iPod.
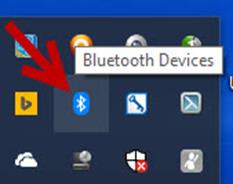
Ubique en el escritorio de la computadora el icono Bluetooth Devices y ejecútelo.
Locate the Bluetooth Devices icon on the desktop and click on it.
NOTA: Es necesario que la computadora cuente con interfaz Bluetooth para poder realizar la prueba.
NOTE: It is necessary that the computer has a Bluetooth interface to be able to perform the test.
|
|
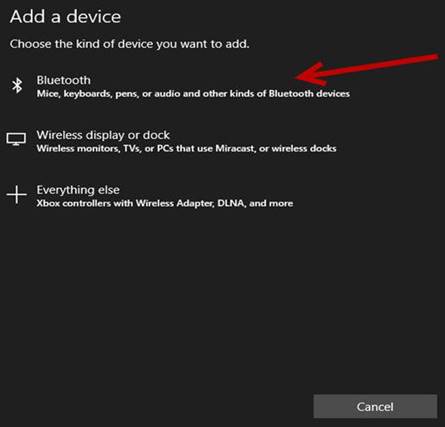
Seleccione Add Bluetooth or other device.
Select Add Bluetooth or other device.
|
|

Seleccione Bluetooth.
Select Bluetooth.
|
|
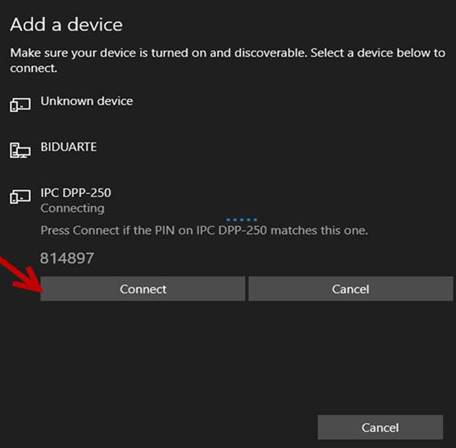
Seleccione IPC DPP-250
Select IPC DPP-250
|
|

Seleccione Connect.
Select Connect.
|
|
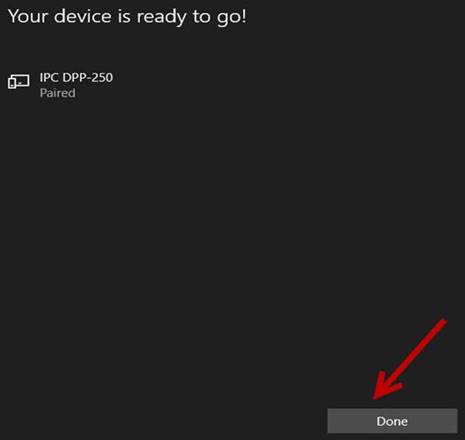
Seleccione done una vez que la impresora ya esté vinculada (Paired)
Select done once the printer is already Paired
|
|
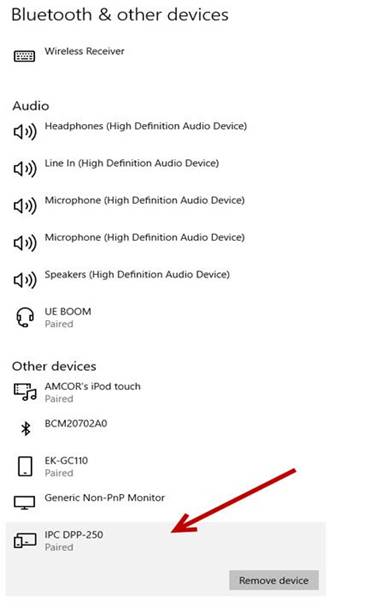
La impresora aparecerá vinculada (Paired)
The printer will appear Paired
|
|
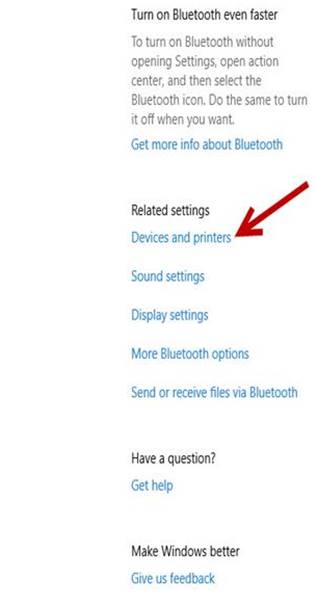
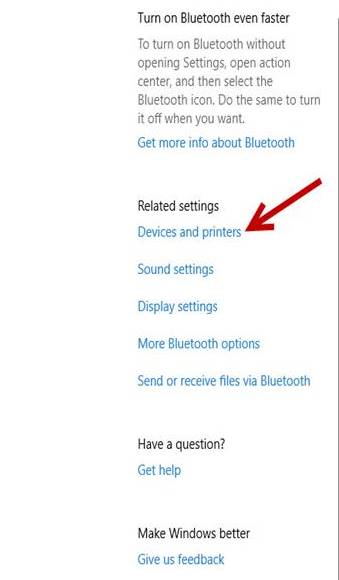
Seleccione Devices and printers.
Select Devices and printers.
|
|
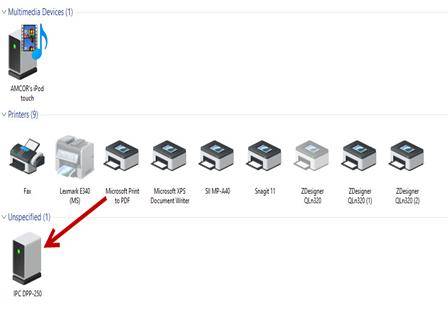
Seleccione IPC DPP-250.
Select IPC DPP-250.
|
|
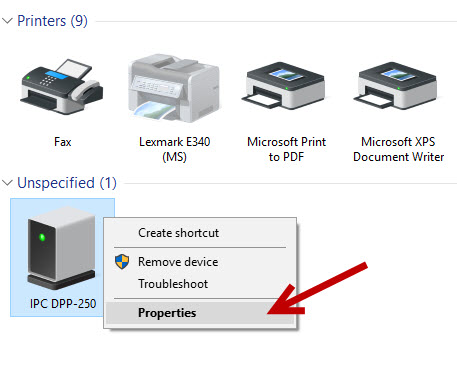
Seleccione Properties.
Select Properties.
|
|
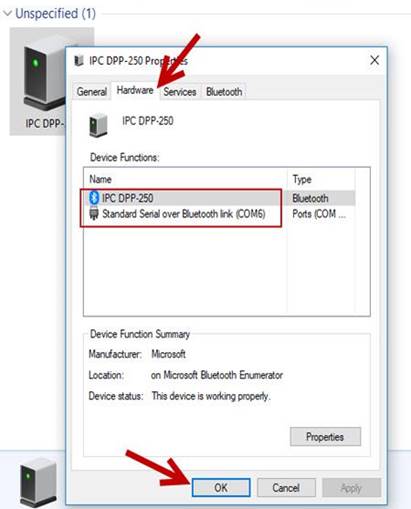
Seleccione la pestaña de Hardware y verifique en que puerto está instalada la impresora, ya que el número de puerto cambia cada vez que se instala una impresora, en este caso está instalada en el puerto COM6.
Select the Hardware tab and verify on which port the printer is installed, since the port number changes each time a printer is installed, in this case it is installed on the COM6 port.
Seleccione OK para cerrar la pestaña.
Select OK to close the tab.
|
|
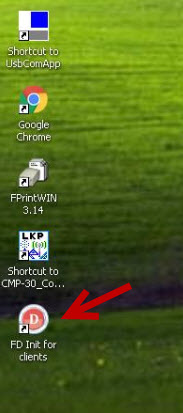
Ubique el icono FD Init for clients en el escritorio y ejecútelo.
Locate the FD Init for clients icon and run it.
|
|
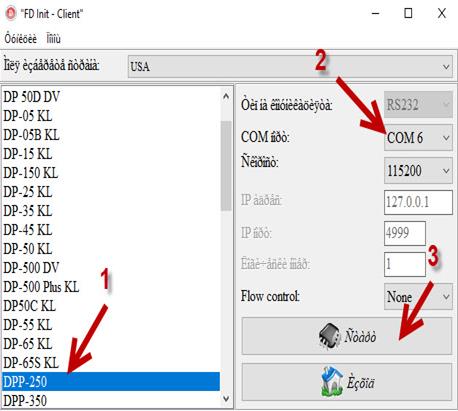
Seleccione DPP-250 (1), seleccione el número de puerto, en este caso es el COM 6 (2), seleccione la figura que está señalada con el número 3.
Select DPP-250 (1), select the port number, in this case is COM 6 (2), select the figure that is marked with the number 3.
|
|
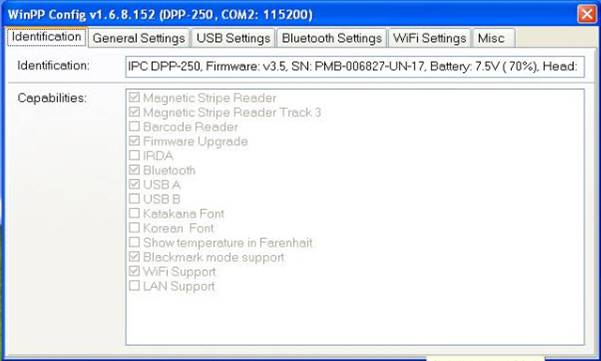
Aparecerá la siguiente pestaña indicando el modelo, puerto, número de serie, etc.
The following tab will appear indicating the model, port, serial number, etc.
|
|

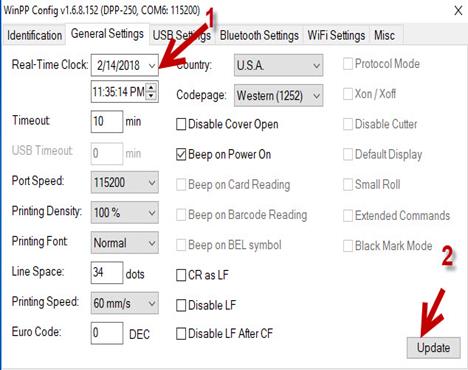
Seleccione General Settings; configure la fecha y hora correctas (1) utilizando como base el horario de Nueva York, seleccione Update (2).
Select General Settings; set the correct date and time (1) using the New York time as default, select Update (2).
|
|
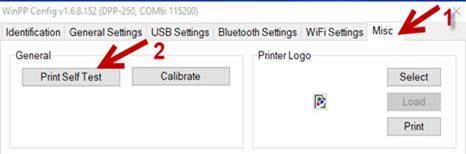
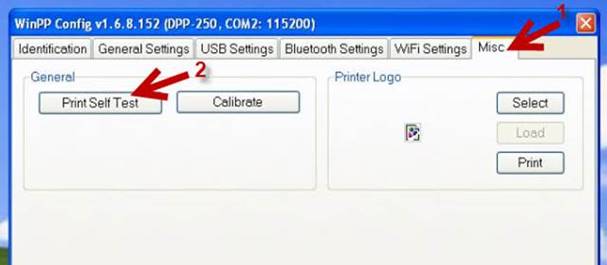
Seleccione la pestaña de Misc (1), después seleccione la opción de Print Self Test (2).
Select the Misc tab (1), then select the Print Self Test option (2).
|
|
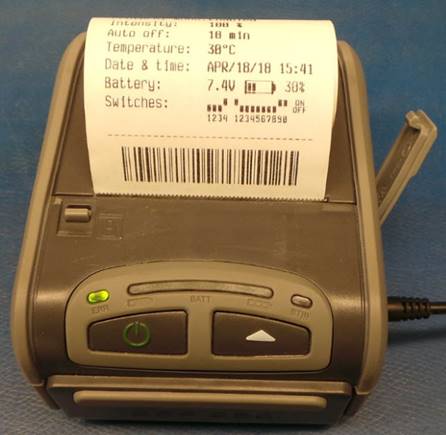
La impresora imprimirá el autodiagnóstico largo.
The printer will print the long self-test.
|
|
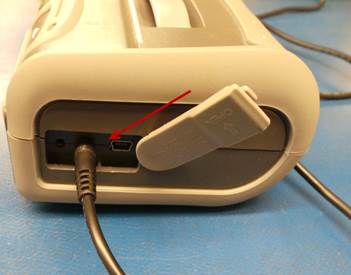
Apague la impresora.
Conecte el cable USB del puerto de la impresora a la computadora.
Turn the printer off.
Connect the USB cable from the printer port to the computer.
|
|
Encienda la impresora y busque la opción de Devices and printers en la computadora.
Turn on the printer and look for the Devices and printers option on the computer.
|
|
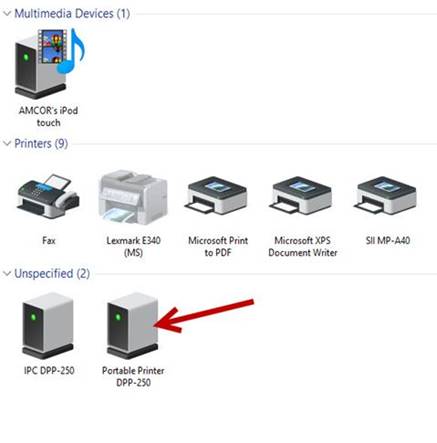
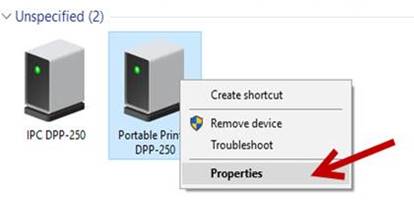
Seleccione Portable Printer DPP-250.
Select Portable Printer DPP-250.
|
|
Seleccione propiedades (Properties).
Select Properties.
|
|
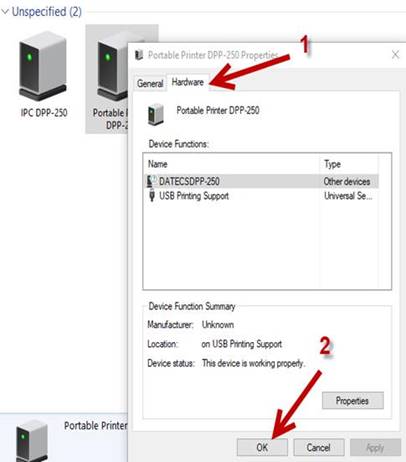
Seleccione la pestaña de Hardware (1) y verifique que la impresora este instalada vía USB Printing Support; seleccione OK (2).
Select the Hardware tab (1) and verify if the printer is installed via USB Printing Support; select OK (2).
|
|
Desconecte el cable USB de la computadora y de la impresora; Apague la impresora.
Unplug the USB cable from the computer and printer; Turn the printer off.
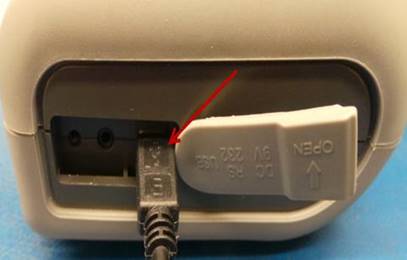
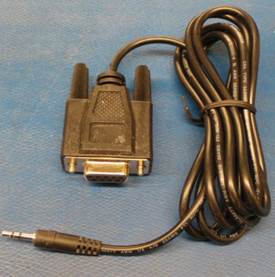
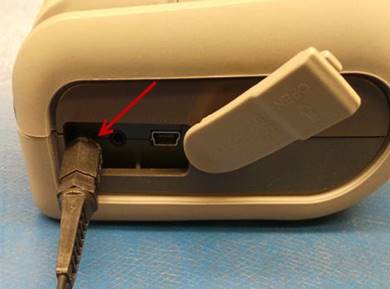
Instale el cable RS-232 al puerto RS-232 de la unidad y al puerto serial de la computadora donde realizara las pruebas.
Install the RS-232 cable to the RS-232 port of the unit and the serial port of the computer where you will perform the tests.
|
|
|
Encienda la impresora y ubique el icono FD Init for clients en el escritorio de la computadora; ejecútelo.
Turn the printer on and locate the FD Init for clients icon on the desktop; run it.
|
|
Seleccione el modelo DPP-250 (1), después seleccione el número de puerto en el cual se realizará la conexión, en este caso es el COM 2 (2) y por último seleccione Start plugin para iniciar la conexión (3).
Select model DPP-250 (1), then select the port number where the connection will be made in this case is COM 2 (2) and finally select Start plugin to start the connection (3).
|
|

Si la conexión fue exitosa, aparecerá la siguiente pantalla.
If the connection was successful, the following window will appear.
|
|
Seleccione la pestaña de Misc (1), después seleccione Print Self Test (2).
Select the Misc tab (1), then select Print Self Test (2).
|
|
La impresora realizara la impresión de autodiagnóstico; revise la calidad de impresión.
The printer will perform the self-diagnostic printing; check print quality.
|
|
Apague la impresora y desconecte el cable RS-232.
Turn the printer off and disconnect the RS-232 cable.
MANTENIMIENTO / MAINTENANCE
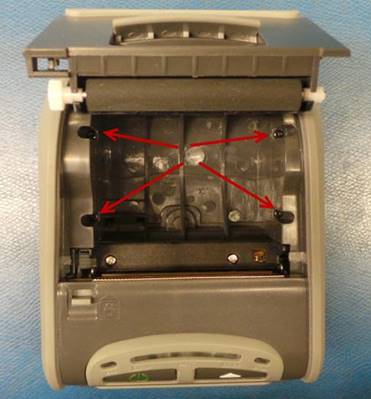
Abra la cubierta donde se instala el papel y desatornille los cuatro tornillos señalados en la imagen para retirar la cubierta superior.
Open the cover where the paper is installed and unscrew the four screws indicated in the image to remove the top cover.
|
|
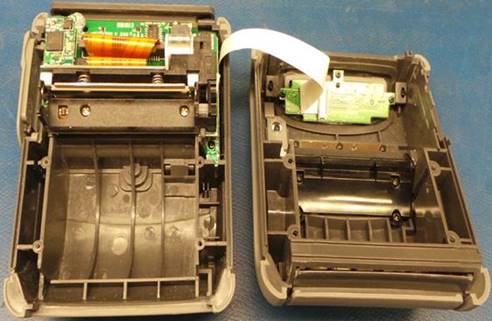
Retire todo el polvo y residuos de papel, Limpie la cabeza impresora y el rodillo.
Remove all dust and debris paper, clean the print head and roller.
|
|
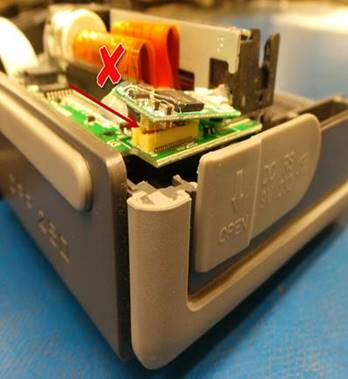
Revise la tablilla Bluetooth, en caso de que se encuentre como en la imagen número 1, retire el silicón, instale la tablilla correctamente y vuelva a colocar silicón.
Check the Bluetooth board, if it is the same than image number 1, remove the silicone, install the board correctly and replace silicone.
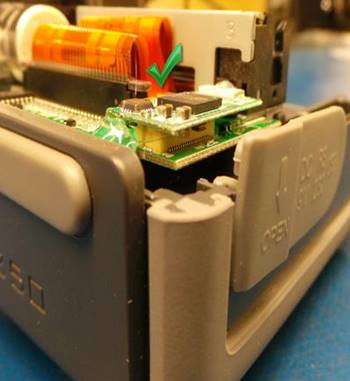
La tablilla debe quedar como en la imagen número 2.
The board should be same than image number 2.
|
1 |
2 |
|
|
|
BATERIA / BATTERY
Instale el cargador de la batería.
Install the battery charger.
|
|
Los LEDs indicadores del nivel de carga de la batería estarán prendiendo y apagando mientras se esté cargando la batería, al cargarse por completo los LEDs permanecerán encendidos.
The LEDs indicating the battery charge level will be turning on and off while the battery is charging, when fully charged the LEDs will remain on.
El tiempo de espera para cargar la batería por completo es de aproximadamente 2 horas.
The waiting time to fully charge the battery is approximately 2 hours.
|
|

Desinstale el cargador de la batería y apague la impresora.
Uninstall the battery charger and turn the printer off.
ASEGURAMIENTO DE CALIDAD / QUALITY ASSUREMENT
Pida a una inspectora de calidad que realice las pruebas a la impresora.
Ask a quality inspector to perform the tests on the printer.
Si la impresora pasa todas las pruebas será enviada al área de empaque.
If the printer passes all the tests it will be sent to the packing area.
SOLUCIÓN DE PROBLEMAS
|
DEFECTO |
CAUSA |
SOLUCIÓN |
|
No funciona Bluetooth |
Conector de la tablilla Bluetooth suelto |
Reinstale la tablilla Bluetooth Reemplace el silicón que tiene la tablilla asegurándose que el conector quede bien instalado |
|
No enciende |
Batería defectuosa o falta batería |
Reemplace la batería |
|
Pobre calidad de impresión |
Cabeza impresora defectuosa |
Reemplace la cabeza impresora |
TROUBLESHOOTING
|
DEFECT |
CAUSE |
SOLUTION |
|
Bluetooth does not work |
Loose Bluetooth board connector |
Reinstall the Bluetooth board Replace the silicone that has the board making sure that the connector is properly installed |
|
Does not turn on |
Defective battery or missing battery |
Replace the battery |
|
Poor print quality |
Defective print head |
Replace the print head |
|
|
||||||