WI# 1014 RECEIPT PRINTER
4610-2CR
IMPRESORA – PRINTER IBM
PN: 4610 2CR
PARTES DE PRUEBA / TEST PARTS
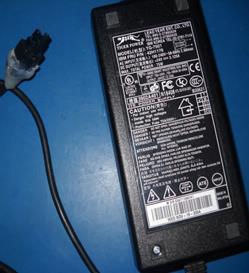
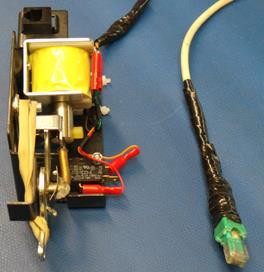
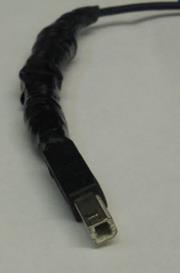
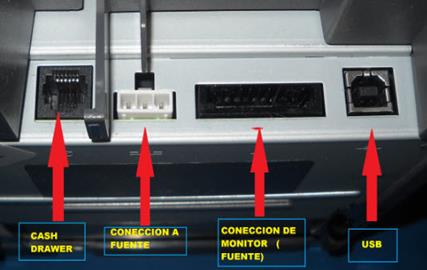
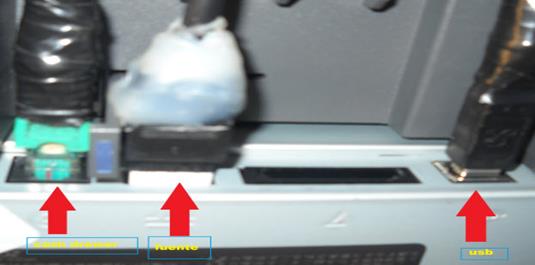
FUENTE – POWER SOURCE CASH DRAWER CABLE USB
CONEXIONES / CONNECTIONS
PRUEBAS DE IMPRESIÓN / PRINTING TESTS
Conecte cable de fuente, USB y cash drawer.
Connect source cable, USB and cash drawer.
|
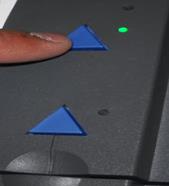
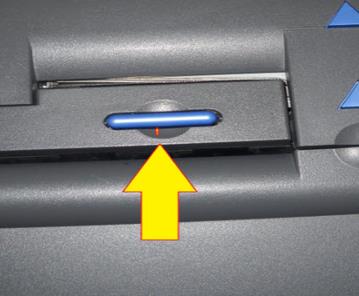
Presione el botón azul; se abrirá la tapa. Press the blue button; the cover will open.
|
Coloque el rollo de papel térmico. Load the roll of thermal paper.
|
|
Levante la tapa. Lift the cover.
|
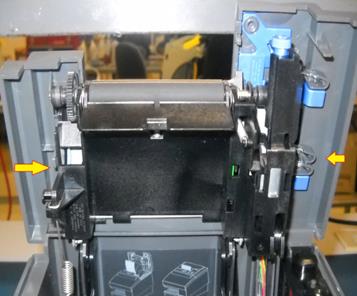
Coloque la cinta de impresión. Load the print ribbon.
|
PRUEBA DE ESTADÍSTICAS DE USO EN TICKET / TEST OF TICKET USE STATISTICS
Conecte la fuente a la toma eléctrica para preparar la unidad. Cuando los leds de la impresora cambien de color ámbar a verde estará lista para comenzar las pruebas.
Connect the source to the electrical outlet to prepare the unit. When the printer's LEDs change from amber to green it will be ready to start testing.
1.  2.
2.
|
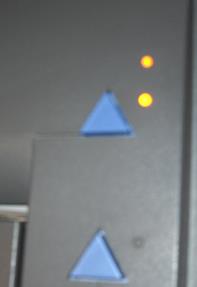
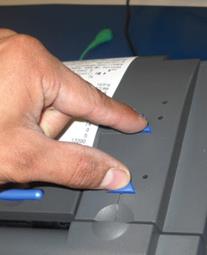
Presione los dos botones al mismo tiempo. Press both buttons at the same time. |
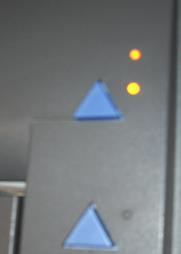
Cambiará el led de color verde a color ámbar. The led will change from green to amber.
|
|
|
|

|
1. Presione el botón de alimentación de papel. 1. Press the paper feed button.
|
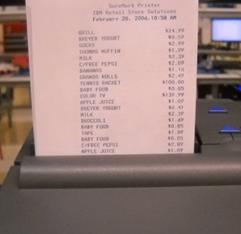
2. Se imprimirá un ticket, revise la calidad de la impresión. 2. A ticket will be printed, check the print quality. |
|
|
|
|
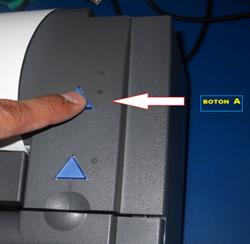
3. Ahora presione los dos botones al mismo tiempo, cambiara el led de color verde a color ámbar. 3. Now press both buttons at the same time, the led will change from green to amber.
|
4. Inserte la hoja de prueba orientada al lado derecho de la impresora, presione el botón B; comenzará a imprimir. 4. Insert the test sheet oriented to the right side of the printer, press the B button; will start printing. |
|
|
|
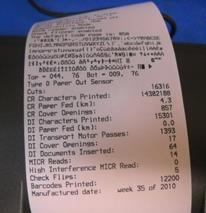

Revisar la calidad de impresión.
Check the print quality.

PRUEBA LECTURA DE CHEQUE (LECTURAS DE MICR) / CHECK READING TEST (MICR READINGS)
Coloque el cheque con la cara hacia abajo y los números hacia el lado derecho de la impresora.
Place the check face down and the numbers facing the right side of the printer.
Se encenderán los leds de color verde, esto indica que la unidad detecto el cheque.
The green LEDs will light up, this indicates that the unit detected the check.
Presione los botones de alimentación de papel y alimentación de documentos al mismo tiempo por aproximadamente dos segundos, deje de presionar y vuelva a presionarlos los dos botones.
Press the paper feed and document feed buttons at the same time for about two seconds, release and then press the two buttons again.
Enseguida comenzara a realizar la función de lectura de cheque (lecturas de micr) y volteo de cheque, se imprime el siguiente tiquete.
Immediately it will begin to perform the function of reading the check (micr readings) and flip of the check, the following ticket is printed.
1  2
2
 3
3 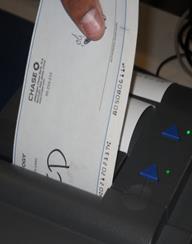 4
4 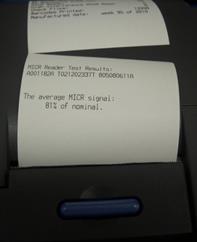
REVISION DE COMUNICACIÓN DEL USB (IMPRESION) / USB COMMUNICATION CHECK (PRINTING)
Revisar que estén bien conectados los cables de fuente de poder, cash drawer y USB.
Check that the power supply, cash drawer and USB cables are properly connected.
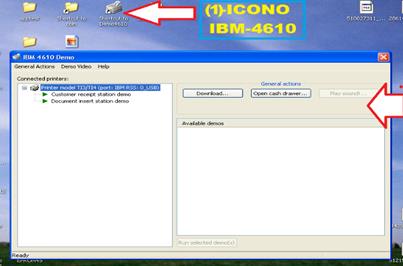
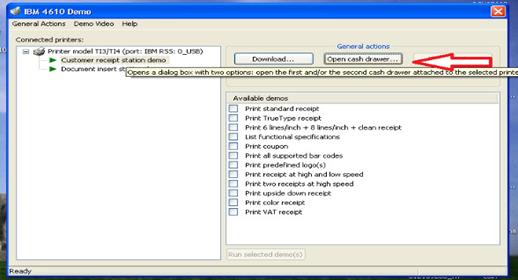
Cuando la impresora esté preparada para iniciar la prueba, seleccione el icono demo4610 y aparecerá la siguiente página:
When the printer is ready to start the test, select the demo4610 icon and the following page will appear:
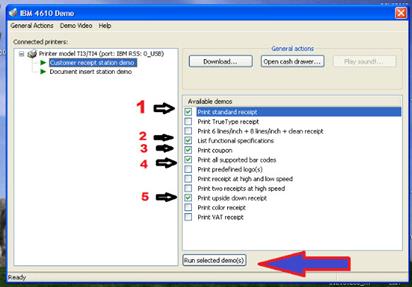
Seleccione (customer receipt station demo) aparece una ventana donde debe seleccionar de una en una las pruebas.
Select (customer receipt station demo) a window appears where you must select the tests one by one.
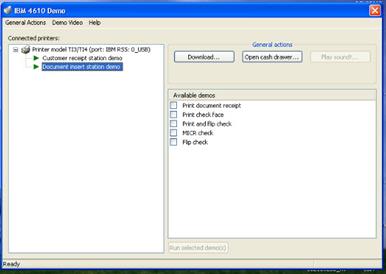
Prueba hoja de abajo: seleccione (document insert station demo) cambiaran las pruebas.
Test sheet below: select (Document insert station demo) tests will change.
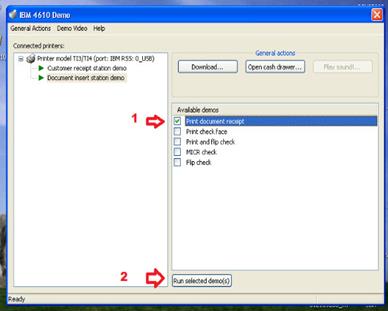
Seleccione la prueba que sigue (1) después (2) poniendo la hoja de prueba en la parte de abajo.
Select the test that follows (1) then (2) by putting the test sheet at the bottom.
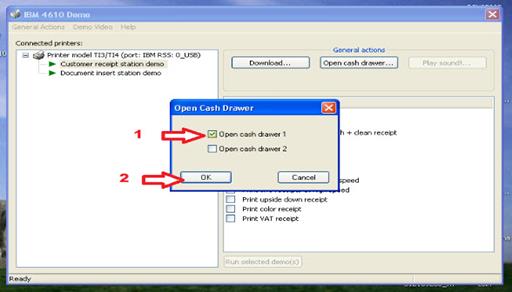
Prueba de cash drawer: seleccione (Open cash drawer)
Cash drawer test: select (Open cash drawer)
Seleccione (open cash drawer) y después (ok).
Select (open cash drawer) and then (ok).
MANTENIMIENTO / MAINTENANCE
La impresora debe limpiarse tanto interna como exteriormente.
The printer must be cleaned both internally and externally.
COMO RETIRAR LAS CUBIERTAS / HOW TO REMOVE THE COVERS
v Cubierta Frontal – Front Cover
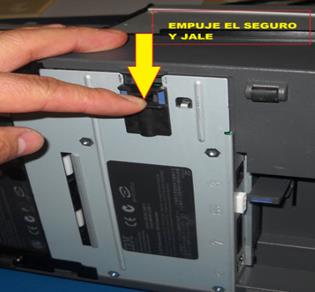
Para retirar la cubierta, empuje el seguro y jale al mismo tiempo hacia el lado izquierdo, como lo muestra la imagen.
To remove the cover, push the latch and at the same time pull to the left side, as shown in the image.
v Cubierta Superior (rollo) – Top Cover
|
1. Presione el botón de liberación de papel. 1. Press the paper release button.
|
2. Abra la cubierta del rollo, jale ambos clips y retire la cubierta. 2. Open the roll cover, pull on both clips and remove the cover.
|
|
|
|
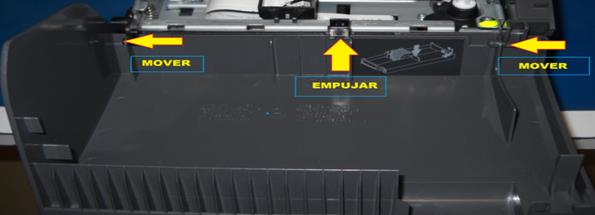
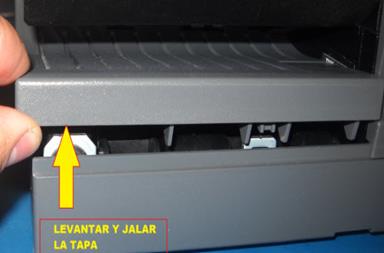
v Cubierta Inferior (inserción de documentos) – Bottom Cover
|
Levante la esquina frontal izquierda de la puerta del volteador y jale. Lift the left front corner of the flipper door and pull.
|
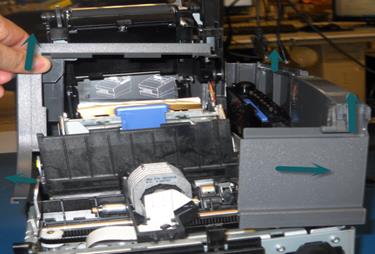
Levante el gabinete. Lift up the cabinet.
|
|
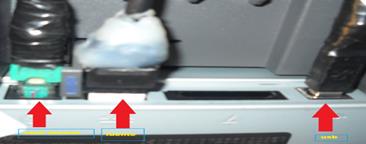
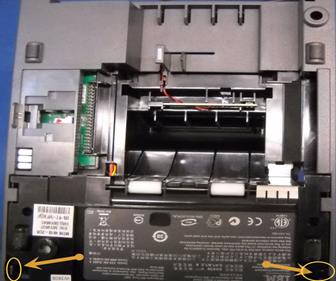
Retire las fuentes. Remove sources.
|
|
|
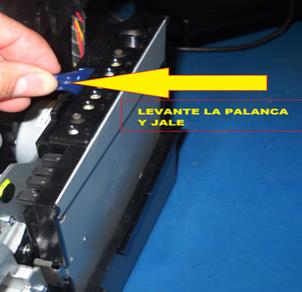
Retire la cubierta pulsando los seguros y jalando. Remove the cover by pressing the latches and pulling.
|
|
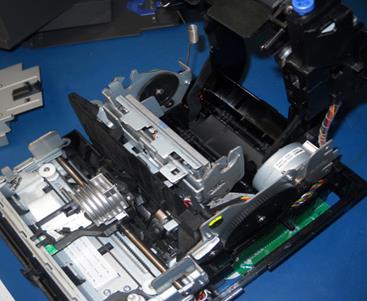
Una vez retiradas todas las cubiertas, limpie la unidad utilizando aire comprimido. Las cubiertas también deben ser limpiadas con un paño y jabón.
After removing all covers, clean the unit using compressed air. The covers should also be cleaned with a cloth and soap.
FALLAS COMUNES / COMMON FAILURES
v MALA IMPRESIÓN – BAD PRINTING
Esta falla se puede presentar por el mal ajuste del eje de transporte.
This failure can occur due to poor adjustment of the transport shaft.
- Afloje el tornillo lateral derecho.
- Loosen the right-side screw.
- Ajustar según lo requiera el eje de transporte ya que puede estar un poco movido y esto hará que la impresión este desajustada.
- Adjust the transport shaft as required, as it may be a little shaky and this will cause the impression to be out of adjustment.
v LOS FOCOS SE QUEDAN PRENDIDOS EN COLOR ÁMBAR – THE LIGHTS STAY ON IN AMBER
-Revisar la cabeza, que este en buen estado.
-Check the head, that it is in good condition.
-Se encienden cuando falta papel.
-They light up when paper is missing.
v ERROR EN LECTURA DE CHEQUE – CHECK READING ERROR
-Limpiar pastilla o lector de cheque usando cotonete con alcohol.
-Clean the pad or check reader using cotton swab.
v NO CORTA – DOES NOT CUT
-Revisar que el resorte que sostiene la cortadora no este flojo o dañado.
-Check that the spring that supports the cutter is not loose or damaged.
-Revisar que la cortadora este bien ensamblada.
-Check that the cutter is well assembled.
v PAPEL ATORADO – PAPER JAMMED
-Revisar que no tenga papel atorado o grapas que obstaculicen el paso del papel.
-Check that there are no jammed paper or staples that obstruct the passage of the paper.
-Que las guías del papel no estén quebradas.
-That the paper guides are not broken.
|
|
||||||